Reality 3D Printer: Setup, Calibration, and Troubleshooting
Learn a practical, step-by-step approach to setting up a reality 3d printer, calibrating for reliable prints, choosing materials, and tackling common issues with confidence.

Goal: Set up, calibrate, and troubleshoot a reality 3d printer to produce reliable parts and prototypes. You’ll learn assembly checks, safe operation, slicer profiles, material choices, and post-processing basics. This guide uses clear, step-by-step instructions, with practical tips for home offices, makers, and students. According to Print Setup Pro, starting with proper setup reduces waste and failures, saving time and money.
What is a reality 3d printer and why it matters
According to Print Setup Pro, a reality 3d printer refers to a consumer or prosumer machine capable of turning digital models into tangible objects. These devices typically use fused deposition modeling (FDM) or stereolithography (SLA) processes, each with distinct strengths for prototypes, functional parts, or decorative pieces. The term 'reality' signals a shift from digital design to real-world output, making reliable setup essential for consistent results. In home offices, classrooms, or small workshops, a well-chosen reality 3d printer becomes a versatile tool for rapid iteration, hobby projects, and educational demonstrations. Understanding the categories, common components, and expected print behaviors helps you decide between budget options and higher-end machines, set realistic goals, and avoid frustration when first attempting complex geometries.
Core components and how they influence print quality
A reality 3d printer’s performance hinges on several key parts working in harmony. The frame or gantry provides rigidity to prevent wobbles that blur detail. The hotend or laser unit (depending on process) converts material into a solid object; its temperature stability and nozzle condition directly affect extrusion quality or resin cure. The print bed, whether heated or light-sensitive, is critical for adhesion and warp resistance. Drive belts and steppers control motion, so precise tension and alignment reduce ghosting and layer misregistration. The controller board coordinates all signals, and the power supply must be adequate to handle peak current. Finally, cooling fans, fans ducts, and print surface influence overhangs and surface finish. Understanding these parts helps you diagnose issues by removing a variable rather than guessing.
Safety first: handling, power, and ventilation
Safety starts with basic electrical precautions and a clean workspace. Always power down before swapping nozzles or touching moving parts to avoid pinch injuries. Keep liquids away from electronics and store flammable materials away from the machine. Ensure your workspace has adequate ventilation, especially when printing materials that release fumes during extrusion or curing. Use gloves when handling hot components and avoid touching the nozzle or heated bed during operation. Regular firmware updates can improve safety features or error handling. Following these practices protects you, your family, and your equipment while you work on projects with the reality 3d printer.
Getting started: unpacking, assembly, and basic checks
Before powering up, inspect the box contents against the manual. Verify all fasteners are present and snug, belts are tensioned, and the bed surface is clean. When assembling the frame, keep alignment guides tight but not over-torqued. Once assembled, perform a cold-start test with no filament to observe smooth motor movements and listen for grinding or skipped steps. Calibrate the home position and confirm the printer can move along X, Y, and Z axes without obstruction. Finally, install the included slicer software and confirm you can import a simple test model.
Calibrations that matter: bed leveling, extrusion, and flow
Calibration is the backbone of repeatable results. Start with bed leveling to ensure the first layer adheres evenly across the build plate. Then check Z-offset to avoid squashed or too-loose starts. Calibrate extrusion by printing a short test line and measuring the actual length to adjust extrusion multiplier. Flow rate consistency is important for uniform layer height; if prints look too dense or too sparse, revisit extrusion settings. Regular calibration reduces failed prints and gives you a reliable baseline for more complex parts.
Slicer settings that map to print goals
Slicer profiles transform your digital model into machine instructions. Begin with a conservative layer height and wall thickness that match your printer’s capabilities and the material you’ve chosen. Enable supports only when necessary, and adjust infill density to balance strength and print time. Slice orientation matters for surface finish and support removal, so experiment with part orientation and raft options to optimize first-layer adhesion. Finally, enable cooling and retraction thoughtfully to minimize stringing and improve detail in corners. A well-tuned slicer opens the door to consistent, high-quality prints.
Materials and compatibility: choosing the right filament or resin
Materials vary widely, so compatibility with your reality 3d printer matters. For FDM printers, start with user-friendly filaments like PLA for beginners and PETG for tougher parts. For higher heat resistance or chemical exposure, ABS or nylon may be appropriate, though they require more controlled environments. SLA printers use resin types with different cure times and color properties. Always consult material datasheets for recommended nozzle temperature, bed temperature, and wash/ post-processing requirements. Handling post-processing solvents and waste responsibility is essential for safe, sustainable printing.
Print quality improvement: supports, cooling, and tension
Achieving clean surfaces often comes from optimizing layer transitions. Use appropriate support structures for overhangs and bridge where necessary. Ensure the part cooling fan is balanced to prevent warping on tall prints. Check belt tension and pulley routing to reduce wobble and ghosting. Consider a heated bed, a stable build surface, and proper nozzle clearance to reduce adhesion issues. Small tweaks—like adjusting start points or retraction distance—can yield noticeable improvements in surface quality and dimensional accuracy.
Post-processing and finishing: from part to product
Post-processing transforms prints into usable parts. Methods include carefully removing supports, sanding, priming, and painting to achieve desired aesthetics and tolerances. For resin prints, post-cake washing, post-curing, and safety immersion are essential steps. When assembling multi-part projects, ensure tolerances are accounted for in the design. Document your post-processing workflow to streamline repeatability for future prints. A consistent finishing routine elevates your outcomes from prototype to presentable product.
Troubleshooting common failures and quick fixes
Common issues include poor adhesion, warping, under- or over-extrusion, and stringing. Start with verifying bed level and cleanliness, then check filament quality and nozzle condition. Run a calibration cube to isolate extrusion problems or retraction settings. If the first layer is missing sections, adjust Z-offset and nozzle height. For warped corners, increase bed temperature or adjust enclosure temperature, if available. Document each fix and test with a new model to confirm stability.
Maintenance and part replacement schedule
Preventive maintenance makes a big difference in longevity and consistency. Regularly inspect belts, bearings, and the print surface for wear. Replace nozzles or resin tanks as needed and keep firmware current. Clean the build plate and enclosure to reduce dust and debris that can affect print quality. A simple routine—clean, inspect, replace when necessary—keeps your reality 3d printer ready for ongoing projects and reduces downtime.
Productivity and safety best practices for long-term use
Establish a routine that includes pre-print checks, end-of-day cleanup, and an easy way to log calibration results. Maintain an organized workspace with clear cable management and a dedicated storage area for tools and spare parts. Invest in quality safety equipment and ventilation for long print runs. Finally, schedule periodic reviews of your workflow to incorporate new materials, slicer features, or firmware updates that improve reliability and efficiency.
Authority sources
To reinforce best practices, consult these authoritative sources and standards:
- https://www.nist.gov/
- https://www.osha.gov/
- https://mit.edu/
Tools & Materials
- Allen wrenches / hex key set(Common sizes for frame and linear rail screws)
- Calipers(For precise measurements and extrusion checks)
- Filament spools (PLA and PETG recommended)(At least two spools with different colors or properties)
- Digital thermometer/IR thermometer(Useful to gauge nozzle and bed temperature ranges)
- Isopropyl alcohol (70% or higher)(Bed cleaning and surface prep)
- Safety gloves and safety glasses(Personal protection during maintenance and post-processing)
- Blue painter’s tape or build surface(Improves first-layer adhesion on some beds)
- Spare nozzles and nozzle wrench(For occasional clogs or wear)
- Spatula / scraper(Bed removal and part release)
- Clean cloths / microfiber towels(Dust-free workspace and surface cleaning)
Steps
Estimated time: 2-6 hours
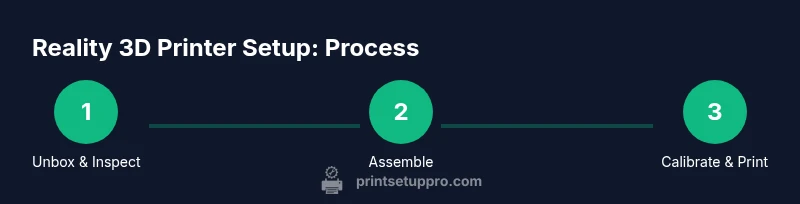
- 1
Unbox and inspect components
Open the package, verify all parts against the packing list, and clean the work area. Note any missing items and contact support if needed. Check for shipping damage before assembly.
Tip: Take photos of the box and components for future reference. - 2
Assemble the frame and rails
Follow the manual to attach the frame, align rails, and ensure smooth movement on all axes. Do not force any screws; misalignment will affect accuracy.
Tip: Tighten gradually in a crisscross pattern to avoid skew. - 3
Mount the bed and Z-axis
Install the build plate or bed surface and attach the Z-axis mechanism. Verify verticality with a square and ensure the bed moves without binding.
Tip: Apply light lubrication to guide rods if recommended by the manufacturer. - 4
Install motors and belts
Mount stepper motors and route belts with proper tension. Avoid overtightening; loose belts reduce accuracy while overly tight belts wear faster.
Tip: Use a belt tension gauge if available. - 5
Level the bed and establish a home offset
Power on and jog the head to home position. Perform initial bed leveling at several points; set an appropriate Z-offset to achieve a clean first layer.
Tip: Record your bed height settings for future reference. - 6
Load filament and set extrusion basics
Feed filament through the extruder, purge the nozzle, and verify smooth extrusion. Check that the filament path is clean and free of dust.
Tip: Mark a filament length to measure extrusion during testing. - 7
Connect to computer and install drivers
Install the printer driver package and the slicer software. Confirm the printer is detected and communicates correctly with the host computer.
Tip: Disable conflicting background software that could interfere with USB/serial communication. - 8
Calibrate extrusion and run a first-layer test
Print a calibration cube or first-layer test. Measure actual dimensions to adjust extrusion multiplier and flow. Reprint until dimensions match.
Tip: Use a calibration model with clear measurement targets. - 9
Create a slicer profile and import your model
Choose a basic profile for your material, set initial layer height, and enable essential supports. Import your model into the slicer and preview the toolpath.
Tip: Save a baseline profile for future prints and adjust per material. - 10
Slice and start your first print
Generate the G-code and start the first print. Monitor the first few layers to confirm adhesion and avoid warping.
Tip: Be ready to pause or stop if the first layer fails to lay down uniformly. - 11
Monitor and adjust during printing
Observe temperature stability, stepper behavior, and layer alignment. Pause if you notice layer separation, stringing, or curling.
Tip: Keep a log of adjustments and outcomes for future reference. - 12
Post-process and evaluate the result
Remove supports, trim excess material, and perform light finishing as needed. Compare against your design goals and iterate for improvement.
Tip: Document any changes to improve repeatability on next parts.
People Also Ask
What is a reality 3d printer and what can it do for me?
A reality 3d printer is a consumer or prosumer device that turns digital designs into physical objects using FDM or SLA processes. It’s capable of rapid prototyping, functional parts, and educational demonstrations, depending on materials and build quality.
A reality 3d printer is a home or classroom device that makes physical models from digital designs using filament or resin. It’s great for prototyping and learning by doing.
How do I know which material to start with?
Begin with beginner-friendly materials like PLA for FDM printers. Move to PETG for stronger parts, and consider ABS or nylon only if your workspace supports the required temperatures and enclosure. Always consult the material data sheet.
Start with PLA, then try PETG for strength. Only move to tougher materials if you’re set up for higher temperatures and enclosure needs.
Why is my first layer not sticking to the bed?
Common causes are an unlevel bed, dirty or damaged build surface, incorrect nozzle height, or excessive retraction. Re-level and clean the bed, adjust Z-offset, and retry with a simple print to confirm adhesion.
If the first layer won’t stick, relevel the bed, clean the surface, and adjust the nozzle height before trying again.
What should I do if prints show warping or curling?
Warping often results from insufficient bed adhesion or temperature control. Improve bed leveling, use a heated bed if needed, and adjust enclosure temperature or print orientation to minimize surface stress.
Warping usually means adhesion or heat control needs adjustment; check bed leveling and consider enclosure warmth.
How often should I perform routine maintenance?
Perform basic maintenance monthly: check belts, nozzles, and bed surface; clean fans and electronics area; and update firmware when available. Schedule deeper checks every 3-6 months depending on print volume.
Do a quick monthly check and a deeper 3-6 month review based on how much you print.
Can I print safely in a small home office?
Yes, with proper ventilation and safety practices. Use a clean, uncluttered space, avoid placing the printer near flammable materials, and follow general fume management guidelines for materials that release vapors.
You can print safely at home if you ventilate the space and keep the area tidy and away from hazards.
What common issues signal a need for calibration?
If prints are inconsistent, layer shifts occur, or dimensions drift, re-check bed level, Z-offset, and extrusion calibration. Re-run a simple cube test to confirm stability.
Inconsistent results or shifted layers usually mean you should re-check bed level and extrusion calibration.
Watch Video
Quick Summary
- Start with a solid setup to reduce waste and failures.
- Calibrate bed level, Z-offset, and extrusion for reliable first layers.
- Choose materials that match your printer’s capabilities and safety constraints.
- Tune slicer profiles and monitor prints for best results.
- Establish a maintenance routine to sustain long-term performance.