Printing Labels: A Step-by-Step Guide for Home Offices
Learn how to print labels at home or in a small office with step-by-step guidance on stock selection, printer setup, design, printing, and troubleshooting.

You will learn how to print labels with the right label stock, printer, and software. This guide covers stock selection, design considerations, printer setup, and step-by-step printing workflows for home offices and small shops. According to Print Setup Pro, choosing the correct label stock and alignment is the biggest determinant of clean, durable results.
What printing labels involves
Printing labels is a practical blend of stock choice, design, printer setup, and finishing touches. For home offices and small businesses, the goal is repeatable, reliable results rather than one-off experiments. A well-planned workflow minimizes misfeeds, miscuts, and wasted materials, while delivering labels that look professional and survive normal handling. The Print Setup Pro team emphasizes that preparation matters more than fancy gear: confirm label dimensions, ensure printer compatibility, and pick a design approach that matches your products. When you standardize these choices, you reduce errors and save time across every batch. In this guide you’ll learn to control typography, margins, and alignment so your printing labels project stays consistent across sheets, days, and different label types. The outcome should be legible text, clean edges, and adhesives that stay put during storage and use.
What to expect from label printing in modern workflows
Label printing today ranges from simple address labels to full product labels with branding, barcodes, and QR codes. You’ll find options for sheet labels, roll labels, and direct thermal varieties depending on your printer and environment. The core skills are understanding stock compatibility, mastering design templates, and validating output with test runs. As you gain experience, you’ll be able to automate parts of the process—like importing product data or printing on demand—while maintaining consistent quality. Print Setup Pro’s approach centers on building a repeatable setup that minimizes surprises, keeps costs predictable, and supports scalable labeling tasks.
The role of readability and brand consistency in labeling
Readable labels convey professionalism and help customers identify items quickly. Clear typography, high contrast, and sufficient label margins are essential for legibility from typical viewing distances. Branding elements should be consistent with your packaging: logo placement, color choices, and typography should mirror your other materials. When you align your label design with your brand guidelines, you not only improve recognition but also reduce misreads by scanners and label readers. Print Setup Pro highlights that consistency across labels reduces confusion in inventory and shipping, especially when labeling multiple SKUs or product lines.
Tools & Materials
- Printer capable of label media (inkjet, laser, or dedicated label printer)(Ensure it supports label stock thickness and width you plan to use)
- Label stock sheets or rolls(Choose a stock type and finish appropriate for your project (paper, polyester, or polypropylene))
- Design software or templates (e.g., word processor, Canva, or label-specific tools)(Use templates sized to your label sheets to avoid misalignment)
- Cutting tool (scissors or a paper trimmer)(Optional for trimming non-full-bleed labels)
- Ruler or alignment aids(Helpful for precise margins and multi-row layouts)
- Printer cleaning supplies(Keep rollers clean to prevent jams or smudges)
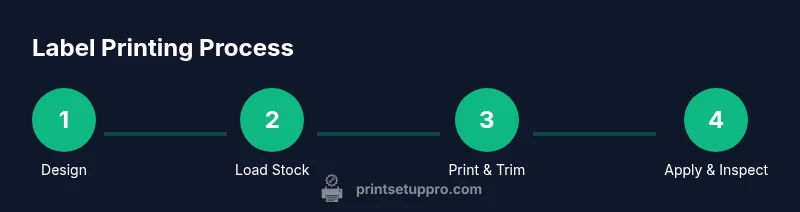
Steps
Estimated time: 60-90 minutes
- 1
Prepare stock and design
Gather the chosen label stock and set up your design file with correct dimensions. Confirm the sheet size, label count per sheet, and margins to avoid content being cut off. Design elements should align with the label grid to ensure consistent placement across all labels.
Tip: Always print a test page on plain paper before using the label stock to verify alignment. - 2
Set page size to match your labels
In your software, set the page or document size to the exact label sheet dimensions. If using a template, enable the grid guides and ensure margins reflect the safe print area.
Tip: Enable a visible bleed area or margins to prevent important content from trimming at edges. - 3
Import or create label content
Add brand elements, text, and any barcodes or QR codes. Use high-contrast fonts and a legible font size. Keep critical information within the safe zone of each label.
Tip: Test different font sizes on plain paper to find the balance between readability and space efficiency. - 4
Load label stock correctly
Place the stock into the printer with the correct face up or face down orientation per your printer model. Align the stack to avoid skewing and ensure the leading edge sits flat.
Tip: Use the feed tray guides to prevent skew during printing. - 5
Run a print preview and test print
Preview the job to check margins, alignment, and any overflows. Print a single sheet on plain paper to confirm that content lines up with labels.
Tip: If content shifts, adjust margins and re-validate before continuing. - 6
Print the full batch
Print the full batch using the same settings and stock. Allow the printer to run smoothly without pausing mid-job to prevent misfeeds.
Tip: Handle printed sheets by the edges to avoid smudges while they dry. - 7
Trim or separate labels as needed
If your labels require trimming, cut precisely along the edges to keep a clean look. For machine-ready formats, ensure perforations or borders are intact.
Tip: Use a sharp blade for clean edges and avoid scoring failures. - 8
Apply labels and verify durability
Adhere labels to the intended surface and check adhesion. For moisture-prone environments, test adhesion after a short exposure to humidity.
Tip: Let adhesive set for a few minutes before handling items to prevent curling. - 9
Store unused stock properly
Keep unused stock flat in a cool, dry place away from direct sunlight. Label stock can warp or curl if stored improperly, impacting future prints.
Tip: Rotate stock to use older sheets first and avoid moisture exposure.
People Also Ask
What is the difference between sheet labels and label rolls, and when should I use each?
Sheet labels are versatile and work well for small batches or mixed designs, while label rolls are ideal for higher-volume or continuous packaging workflows. Choose based on print frequency, available hardware, and how often you need to change layouts.
Sheet labels are great for small jobs or mixed designs, while rolls are better for higher-volume labeling. Choose based on your print frequency and hardware.
Can I print labels with a standard home printer?
Yes, many home printers can print standard sheet labels with the right stock and templates. Ensure the printer supports label thickness and aligns with the label grid to avoid jams and misprints.
Yes, you can, as long as your printer supports label stock and you use the correct templates.
What should I do if labels jam or peel after printing?
Check stock compatibility, reinsert the stock correctly, and run a test page. Clean the rollers if necessary and verify you’re using the correct adhesive and surface for the label. If issues persist, try a different stock or printer setting.
If labels jam or peel, recheck stock compatibility, test with plain paper, and clean the rollers.
Which software is best for label design?
Choose software that supports precise layout templates and can import data if needed. Options include word processors with templates, Canva for visuals, and dedicated label design tools with grid-based layouts.
Use software that supports precise layouts and templates, like Canva or a word processor with label templates.
Can I print labels from Canva or other online tools?
Yes. Create a design in Canva, export to a high-resolution image or PDF, and import into your label template. Make sure the exported file matches your label dimensions to prevent misalignment.
Canva works well when you export in the right size and import into a template that matches your label dimensions.
How should I store blank and printed labels?
Keep stock flat in a cool, dry place away from direct sunlight. Printouts should be kept in a clean, dry area to prevent smudging and moisture damage.
Store both stock and prints in a cool, dry place away from sunlight to preserve quality.
Watch Video
Quick Summary
- Choose the right label stock for durability and print quality.
- Design with readability and brand consistency in mind.
- Test prints prevent waste and misalignment.
- Maintain a clean printer and organized stock to scale labeling tasks.