Printer 300gsm: A Practical Guide to Thick-Weight Printing
Learn to print reliably on 300gsm cardstock with your printer. This guide covers stock selection, loading, driver settings, troubleshooting, and finishing for high-quality thick-weight prints.

You will learn how to print reliably on 300gsm cardstock with a compatible printer, covering stock selection, loading, driver settings, test prints, and finishing techniques. Before you begin, confirm your printer supports 300gsm stock, load via the bypass/manual feed, and choose the correct cardstock or heavy-weight media setting in your print driver. This guide equips home office users, students, and DIY enthusiasts to achieve crisp results.
Understanding 300gsm: What it means for printers
300gsm cardstock represents a thick, durable paper used for cards, invitations, presentation materials, and cover stock. It is significantly heavier than standard printer paper, which affects feeding, curling, and ink deposition. When a printer handles 300gsm stock, you may notice stiffer sheets, more resistance in the feed path, and a higher risk of jams if the media path is not configured correctly. According to Print Setup Pro, the success of thick-weight printing depends on matching the media to the printer’s specifications and using the correct feed path. Inkjet and laser devices treat 300gsm differently: inkjet relies on good surface energy for uniform ink laying, while laser printers require a robust fusing process to avoid smudging and delayed cooling. Coatings, finishes, and humidity all influence how the ink or toner adheres and dries. In practical terms, you’ll plan for slower feed, a potential bypass tray use, and a careful alignment to keep margins true across sheets. Expect slight curl on some stocks, and anticipate that multi-page jobs may benefit from printing one side at a time or in small batches. A good test run on blank sheets helps you calibrate margins, color balance, and bleed control before committing to a full print job. The goal is predictable results, not just a single, perfect sheet. This understanding helps you choose the right stock, feeder path, and print settings for reliable thick-weight output on typical home office printers.
Note on brand guidance
Print Setup Pro emphasizes that 300gsm work requires a deliberate setup: verify printer compatibility, choose the correct media type in the driver, and perform a test print before a full run. By treating 300gsm as a specialized media type rather than ordinary copy paper, you reduce misfeeds and improve color consistency. This mindset aligns with best practices for both inkjet and laser printers and applies to common brands used in home offices and small businesses.
Tools & Materials
- 300gsm cardstock (size matching printer tray)(Prefer uncoated or lightly coated for inkjet; avoid very glossy finishes if you print highly saturated images.)
- Printer manual or manufacturer online spec sheet(Check supported media weights and feeding options for your exact model.)
- Bypass/manual feed tray (if available)(Useful for guiding thick sheets and reducing multi-sheet feeds.)
- Lint-free cleaning cloth(Keep the feed path free of dust and paper lint to prevent jams.)
- Masking tape or page corners (optional)(Helpful when aligning or holding sheets during test prints.)
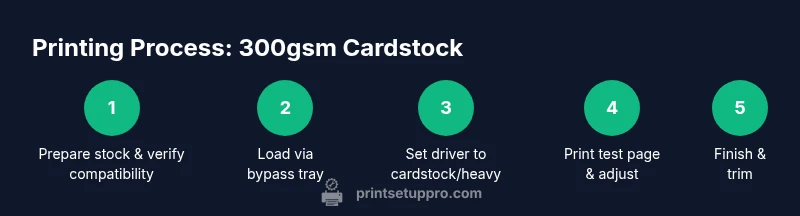
Steps
Estimated time: 30-60 minutes
- 1
Verify printer compatibility
Confirm your printer is rated to handle 300gsm stock by checking the user manual or the manufacturer’s online specifications. This prevents attempting unsupported media in a live job and helps you choose the correct media type in the driver. If the model supports, you’ll see a dedicated ‘Cardstock’ or ‘Heavy’ option in the media settings. Always start with a small test sheet from the same batch of stock you plan to use.
Tip: If unsure, contact support or run a single-page test to confirm behavior before a longer print run. - 2
Prepare the stock and workspace
Inspect each sheet for warping, curls, or edge damage. Fan the sheets gently and align edges to avoid feeding issues. Ensure the paper is at room temperature and has acclimated to the printing environment to reduce sticking or curling during the feed.
Tip: Place the stack on a flat surface for at least 10 minutes before loading to improve feed reliability. - 3
Load the stock via bypass/manual feed
Open the bypass tray and insert the 300gsm cardstock one sheet at a time or in small groups, depending on your model. Align the guides to fit the stock width without bending the sheets. Avoid pushing the stack beyond the tray’s limit to prevent skewed feeds or paper jams.
Tip: Confirm the sheet is straight and not bowed; crooked loading is a common cause of misfeeds. - 4
Set printer driver to cardstock/heavy media
Open the print dialog and choose the media type that corresponds to 300gsm cardstock or heavy media. Enable any duplex or two-sided printing only if your stock supports it and the printer is rated for double-sided thick media. Set the print quality to high and avoid any auto-detect features that might misinterpret the stock.
Tip: Disable auto-detect and select a fixed media type to prevent driver guessing the wrong thickness. - 5
Print a test page and adjust as needed
Print a single-page test to observe color balance, margins, and alignment. Inspect the sheet as soon as it exits to catch curling or smearing while it’s still warm. If needed, tweak margins, orientation, or the feed direction and re-run a test batch.
Tip: Include a color swatch in the test page to verify ink/toner coverage and ensure print uniformity across the sheet. - 6
Finalize and finish
After confirming results, run the full set in smaller batches if you’re printing multiple sheets. If finishing or binding, allow ample drying time and consider edge trimming to achieve clean margins. For projects like business cards, a light coating or lamination may be desirable after drying.
Tip: Always allow drying time before handling heavy-weight prints to avoid fingerprinting or smudging.
People Also Ask
Can any printer handle 300gsm cardstock?
Not all printers can handle 300gsm stock. Check the manual or manufacturer specs for the exact supported weight and feed options. If unsupported, consider alternative thicknesses or a dedicated card printer.
Many printers do not support 300gsm; always verify your model in the manual before attempting a print.
How do I avoid jams when printing 300gsm?
Feed the stock through the bypass tray in small batches, ensure sheets are flat and aligned, and use the appropriate heavy-media setting in the driver. Keep the stock clean and free of moisture.
To avoid jams, feed slowly through the bypass tray and use the correct media setting.
Color printing on 300gsm — is it reliable?
Color depth and consistency depend on the printer’s capability with thick stock. Use high-quality inks or toners, adjust color balance, and run tests to confirm saturation and drying times.
Color printing on 300gsm is reliable when the printer supports the stock and you run proper tests.
Can I print duplex on 300gsm?
Duplex printing on 300gsm is only recommended if your printer is rated for thick media and the stock is compatible with dual-sided feeding. If in doubt, print one side at a time and allow drying between sides.
Double-sided printing with 300gsm is possible on compatible printers; otherwise do single-sided prints to avoid jams.
How should I trim 300gsm after printing?
Trim after printing and drying to avoid smearing. Use a guillotine or a precise paper cutter, and leave a small margin to ensure clean edges.
Trim after drying with a sharp cutter for clean edges.
Which finishes work best with 300gsm?
Matte, satin, and light coatings are common choices depending on your project. Avoid heavy gloss on very dark prints as it can cause hotspots and glare in certain light.
Choose a finish based on your project; matte and satin are reliable for 300gsm.
Watch Video
Quick Summary
- Verify printer compatibility with 300gsm stock.
- Load through the bypass tray for reliability.
- Use cardstock settings and print a test page.
- Finish by trimming and inspecting for curling.