3D Printer Nozzle Cleaning: A Step-by-Step Guide
Learn how to clean a 3d printer nozzle to prevent clogs, improve extrusion consistency, and extend nozzle life. Follow safe methods, essential tools, and a clear workflow designed for home offices and DIY setups.

Learn how to safely perform 3d printer nozzle cleaning to prevent clogs and improve print quality. This quick guide covers when you should clean, the essential tools, and a safe, step-by-step method you can perform at home. You’ll learn heat management, residue handling, and which solvents or tools to avoid, plus how to verify a clear nozzle before resuming prints. No specialized gear required—just careful, methodical steps.
What nozzle clogs look like and why cleaning matters
Nozzle clogs are a common bottleneck in 3D printing. You may notice under-extrusion, blobbing, or stringing as prints progress. Regular nozzle cleaning helps maintain consistent extrusion and surface quality. According to Print Setup Pro, regular nozzle maintenance reduces jams and improves print reliability, especially when switching between different filaments. Clogs can form from burnt plastic, dust, and moisture that get baked into the nozzle. Understanding the signs helps you act before problems escalate. In this section, we’ll identify typical symptoms and explain how a clean nozzle translates into smoother layer deposition. Having a clean nozzle means fewer missed layers, better adhesion, and more predictable results. The nozzle is the last gate before filament becomes a thread on the print bed, so attention here pays off in every project.
Cleaning approaches: heat-based cleaning, cold pulls, and manual cleaning
There isn’t a single universal method for nozzle cleaning; most technicians use a combination of approaches. Heat-based cleaning uses the printer’s own temperature to soften residues so they can be pushed out or extruded through, while cold pulls capture stubborn bits by pulling filament when it’s semi-soft. Manual cleaning with a fine needle or brass brush helps dislodge crusty deposits around the nozzle opening and threads. For most homes and small shops, starting with a heat-based pass, then performing a cold pull, and finishing with careful exterior cleaning yields reliable results. If you see persistent clogs after several attempts, it may be time to inspect the heater block for buildup or consider replacing the nozzle. In all cases, avoid forcing material or using aggressive solvents that can damage the nozzle or the heater components. Print Setup Pro notes that combining methods reduces risk and improves outcomes over using a single technique alone.
Safety and setup: workspace, PPE, and safe solvents
Prepare your workspace and PPE before touching a hot printer. Power down the machine, unplug the power, and allow the nozzle to cool only until you can touch it safely. Wear heat-resistant gloves and eye protection when handling hot components. Use isopropyl alcohol (70%–90%) for residue cleanup, and avoid acetone on brass or certain nozzle materials, as it can degrade the nozzle over time. Keep a clean, uncluttered area with a tray to catch small parts. If you must remove the nozzle from the heater block, do so only after the unit is cool and you have the right tools. Never operate the printer with exposed wiring or a damaged heater; consult your manual for the exact disassembly steps. Safety first protects both you and the printer.
How often you should clean and what to monitor between cleanings
The frequency of nozzle cleaning depends on filament type, usage, and the environment. Start with a routine check after a handful of prints, especially when changing between filaments with different additives. If you notice reduced extrusion, inconsistent layer lines, or rough starts, schedule a cleaning session. Between sessions, keep filament dry and clean, store tools in a designated tray, and regularly inspect the nozzle for stray plastic or corrosion on metal surfaces. Establish a simple maintenance cadence that fits your workflow; document issues and improvements to track progress over time. Regular light cleanings prevent major clogs and keep prints predictable, saving time and material in the long run.
Tools & Materials
- Heat-resistant gloves(Rating suitable for hot components; check for a heat tolerance of at least 250°C.)
- Nozzle cleaning needle or thin wire(Fine-gauge tool for clearing the nozzle bore without damaging it.)
- Needle-nose pliers(For loosening or gripping nozzle parts when removed.)
- Isopropyl alcohol (70–90%)(Cleans residues without harsh effects on most nozzle materials.)
- Soft brush or pipe-cleaner(Gently removes crusty deposits around the opening.)
- Lint-free cloth or microfiber(Wipes surfaces without leaving fibers behind.)
- Replacement nozzle (optional)(Keep a spare in case of wear or damage.)
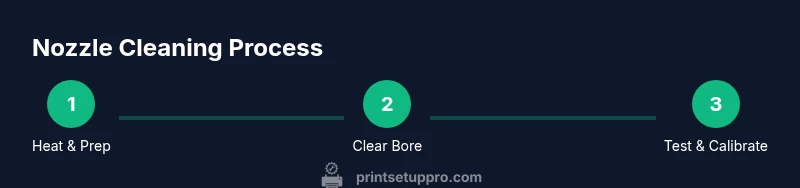
Steps
Estimated time: 40-60 minutes
- 1
Power down and heat the nozzle to printing temperature
Turn off the printer and unplug the power. If you can, re-power and preheat to the last-used filament temperature so residues soften and can be pushed out. The goal is to bring the nozzle to a safe working temperature to facilitate residue removal without forcing material. Avoid touching the nozzle while it’s hot to prevent burns.
Tip: Use heat-resistant gloves and keep a clear area so molten plastic can be guided away safely. - 2
Remove filament and prepare the work area
Manually retract or cut away the filament to prevent it from entering the nozzle during cleaning. Move the extruder aside so you have unobstructed access to the nozzle. Place your tray or mat underneath to catch debris and avoid contaminating surrounding parts.
Tip: Have spare filament nearby for a quick test after cleaning. - 3
Clean the bore with a cleaning needle
Gently insert the cleaning needle or a fine wire into the nozzle opening to dislodge the buildup. Do not force or bend the needle; a careful, straight push works best. Repeat in small increments if needed, pausing to wipe away loosened material.
Tip: Keep the needle aligned to avoid damaging the nozzle threads. - 4
Perform a cold pull for deep residues
Unload the filament, let the nozzle cool a bit, insert clean filament and then gently pull it out as the filament cools and solidifies. This method captures stubborn particulates that hot extrusion misses. Inspect the filament for embedded debris before reloading.
Tip: Do not yank; a slow, steady pull yields better debris removal. - 5
Clean exterior surfaces and threads
Wipe the exterior with alcohol and a lint-free cloth. Inspect the threads and remove any buildup that could hamper reassembly or heat transfer. Brush away any remaining residue from the heater block area to prevent recontamination.
Tip: Be mindful of components near the heater block to avoid accidental damage. - 6
Reinstall, calibrate, and run a test print
Reattach the nozzle if removed, recalibrate to your printer’s usual settings, and perform a small test print. Observe extrusion, layer consistency, and first-layer adhesion to confirm the cleaning was effective. If issues persist, consider repeating the process or inspecting for worn nozzles.
Tip: Document any changes in settings for future cleanings.
People Also Ask
What are the common signs of a nozzle clog?
Common signs include under-extrusion, inconsistent extrusion, blobs on the print, and sudden changes in layer height. These indicate residue or blockage in the nozzle bore that requires cleaning.
Common signs include under-extrusion and blobs; this means residue is blocking the nozzle and needs cleaning.
Can I use acetone or other strong solvents to clean the nozzle?
Avoid acetone on brass nozzles and most 3D printer nozzles unless the manufacturer approves it. Use isopropyl alcohol for residue and follow the maker’s guidelines for any solvent.
Avoid acetone on most nozzles; use isopropyl alcohol as a safer cleaning option.
Is it safe to remove the nozzle for cleaning?
Nozzle removal is safe when the printer is cool, you have the correct tools, and you follow the manufacturer’s disassembly steps. If unsure, consult the manual to prevent damage.
Yes, but only when the printer is cool and you’re following the manufacturer’s steps.
How often should I clean between filament changes?
Clean as needed when filament changes show signs of buildup or reduced print quality. Establish a routine cadence based on filament type and how often you print.
Clean when you notice signs of buildup or poor quality, and keep a regular maintenance cadence.
What should I do if clogs persist after cleaning?
If clogs persist after cleaning, inspect nozzle wear, heater block buildup, or consider replacing the nozzle. Persistent issues may require professional support or manufacturer guidance.
If it still clogs, check for nozzle wear or heater block buildup, and consider replacement or support.
Watch Video
Quick Summary
- Inspect nozzle regularly to prevent prints from failing
- Use a layered cleaning approach for best results
- Prioritize safety with PPE and careful handling
- Run a test print to confirm extrusion quality