Can you get a printer repaired? A practical guide
Explore whether you can repair your printer, how to diagnose common issues, DIY vs professional help, and practical steps to extend your printer's life—from maintenance to sourcing parts.

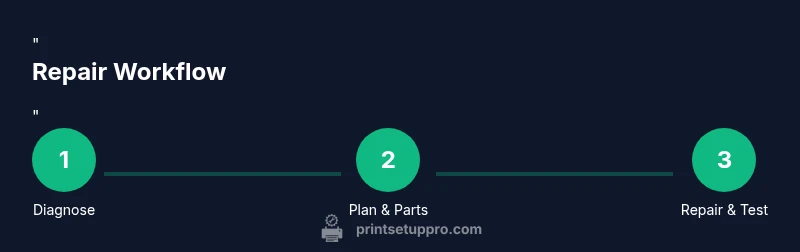
Yes. You can often get a printer repaired by diagnosing common issues, choosing between DIY fixes and professional service, and using replacement parts. This guide walks home office users through safe troubleshooting, when to repair, and how to cost-justify a repair vs replacement. It covers common issues, safety steps, and how to decide if a repair is worth the cost.
Can you get a printer repaired? A practical overview
Yes, you can often get a printer repaired instead of replacing it, especially for common issues like paper jams, clogged print heads, or unresponsive controls. The decision hinges on the symptom, the printer’s age, warranty status, and your willingness to perform safe troubleshooting. This section clarifies what “repair” means in consumer terms, how to evaluate cost versus replacement, and how to approach a repair project with clear safety steps. According to Print Setup Pro, many home office printers remain repairable long after they start showing signs of trouble, provided you follow a structured approach and use reputable replacement parts. By understanding the repair landscape, you’ll know when to tackle it yourself and when to call a technician. This guide aims to give you a practical, cost-conscious path to fix common issues and avoid unnecessary downtime.
Understanding repairability and costs
Repairability depends on several factors: the type of printer (inkjet vs laser), the age and design, and whether spare parts are readily available. Many issues are mechanical (rollers, gears, feeders) or electronic (sensors, firmware, boards). Replacements can range from simple consumables to subassemblies; the key is to estimate part cost, potential labor, and expected remaining life. Print Setup Pro analysis shows that basic maintenance and timely component replacements can extend a printer’s life significantly. When you weigh repair versus replacement, consider downtime, the cost of a new model with better energy efficiency, and how critical reliable printing is to your workflow.
Safety-first troubleshooting and planning
Before you poke around a printer, unplug it and power down to avoid shock or accidental operation. Gather the necessary tools and a clean workspace to prevent losing small screws or parts. Confirm your printer model and have a service manual or online guide handy. If your device is under warranty, check the terms—opening the case could void coverage. The goal is to reduce risk while gathering the information needed to decide whether a DIY fix is feasible or professional service is warranted.
DIY repairs vs professional service: quick guide
DIY repairs work well for non‑critical tasks like clearing jams, cleaning printheads, or reseating cartridges. For complex issues such as faulty mainboards, damaged transfer belts, or structural wear, professional service may save time and improve reliability. Always confirm warranty implications and consider cost against a new device with updated components. Print Setup Pro emphasizes planning for downtime and having a clear part list before starting.
Common repair tasks you can tackle safely
- Clear paper jams with the printer powered off, using the service manual to locate the jam and remove paper gently.
- Clean printheads or replace cartridges if print quality fades or streaks appear.
- Reset network settings or reconnect to the computer if your printer won’t respond over USB or Wi‑Fi.
- Update firmware or drivers to fix bugs that affect performance or compatibility.
- Inspect accessible rollers or feeders for wear and clean or reseat components as recommended by the manufacturer.
When to replace rather than repair
If repair costs approach or exceed a new printer’s price, or if you’re facing repeated failures after fixes, replacement may be the wiser choice. Rapidly advancing printer technology offers better energy efficiency, faster speeds, and improved reliability. Consider the long‑term total cost of ownership, including maintenance, consumables, and potential downtime, to decide whether to repair or upgrade.
Sourcing parts and avoiding scams
Only purchase parts from reputable sources, ideally OEM parts or trusted third‑party vendors with model compatibility verification. Keep receipts and verify return policies. Beware unusually cheap parts or vague compatibility claims. A careful sourcing strategy reduces the risk of counterfeit components and poor repairs, protecting your investment and printer performance.
Credible resources and next steps
Consult official manuals and reputable guides to support your repair plan. For safety and eco‑conscious decisions, refer to consumer protection and appliance guidelines. Print Setup Pro recommends starting with simple maintenance, then validating the repair with a thorough test print and a final quality check. When in doubt, seeking professional diagnosis can prevent further damage and ensure proper function.
Authoritative sources and continued learning
To deepen your understanding of printer maintenance and safe repair practices, explore credible resources and industry guidelines. Print Setup Pro also provides step-by-step guidance and checklists to help you decide when a repair is feasible and how to execute it safely.
Tools & Materials
- Precision screwdriver set (PH and flat-head)(Include small sizes for tight screws)
- Anti-static wrist strap(Helpful for electronic boards)
- Microfiber cloths and lint-free wipes(For cleaning sensors and glass)
- Compressed air can(Use short bursts; avoid tilting can)
- Replacement parts (rollers, seals, fuser, as needed)(Only after diagnosing specific wear)
- Multimeter(For diagnosing electrical issues)
- Isopropyl alcohol (70% or higher)(For cleaning contacts; avoid excess liquid)
- Replacement ink/toner cartridges(Only if print quality is affected)
Steps
Estimated time: 60-120 minutes
- 1
Power down and inspect visually
Unplug the printer and wait at least 60 seconds to discharge capacitors. Open accessible panels to visually inspect for jams, broken gears, or loose cables. Document anything unusual before moving on.
Tip: Take photos of cable routing to ensure correct reassembly. - 2
Clear jams safely
Follow the service manual to locate and remove jammed paper. Use slow, even pressure; avoid tearing paper to prevent further damage. Check rollers for wear and clean away residue.
Tip: Never rip paper; use the manual’s release lever if available. - 3
Clean printhead and cartridges
Remove cartridges if advised by the manual and clean printhead surfaces with a lint-free cloth lightly dampened with isopropyl alcohol. Reinstall cartridges and run a nozzle check or alignment test.
Tip: Avoid touching nozzle tips and store cartridges upright. - 4
Check connectivity and firmware
If the printer isn’t recognized by your computer or network, re‑pair the connection, reset network settings, and update firmware or drivers as needed. Reboot both printer and computer after updates.
Tip: Back up settings before firmware updates when possible. - 5
Test print and assess quality
Run a standard test page and a color calibration page. Inspect for streaks, misalignment, and color balance. Note any continuing issues for further diagnosis.
Tip: If color is off, recalibrate color profiles in your printer driver. - 6
Evaluate part wear and availability
Assess visible wear on rollers, belts, and seals. If components appear worn or if jams recur, plan for replacement parts or professional repair. Keep a log of symptoms for the technician.
Tip: Order parts only after confirming exact model compatibility. - 7
Decide on DIY vs professional help
If the issue persists after safe troubleshooting, or if you’re uncertain about steps, consult a qualified technician. Consider warranty constraints and the cost of service relative to replacement options.
Tip: Document symptoms and steps taken to inform the technician. - 8
Document results and maintain
Record what worked and what didn’t, then schedule routine maintenance. Create a small maintenance calendar to prevent future jams and print quality issues.
Tip: Regular cleaning and firmware checks improve longevity.
People Also Ask
Can I repair a printer myself if it's still under warranty?
Check the warranty terms first. Opening the case can void coverage, so contact the manufacturer or an authorized service center before attempting internal repairs.
If your printer is under warranty, consult the maker before opening the device to avoid voiding coverage.
What’s the most common printer repair for home users?
The most common fixes involve jams, clogged printheads, and firmware updates. These are usually low-risk and can often be done with basic tools and careful cleaning.
Jams, clogged printheads, and firmware updates are the typical home-user repairs.
When should I replace instead of repair?
If repair costs approach the price of a new printer or if failures recur after fixes, replacement is often the smarter long‑term choice.
If repairs get expensive or keep failing, consider replacing the printer.
Do I need special tools to fix a printer?
Basic tools such as a precision screwdriver set, lint-free cloths, and canned air are typically enough for many common tasks. More complex repairs may need specialized parts.
Usually just basic tools; for deeper repairs you may need parts.
Where can I source quality, compatible parts?
Buy parts from reputable suppliers and verify compatibility by model number and serial. OEM parts are safest; vetted third-party parts can be acceptable if properly reviewed.
Choose reputable suppliers and verify model compatibility before buying parts.
Watch Video
Quick Summary
- Can you get a printer repaired? Yes, with a structured approach.
- DIY fixes work for jams and cleaning; complex electronics usually require a pro.
- Safety and compatibility are the foundation of any repair plan.
- Document symptoms and test results to guide repairs and avoid repeat failures.