How a Printer Cleans Itself: A Practical Guide
Learn how printers clean themselves, the mechanisms at work, and step-by-step routines to keep print quality high. Includes practical tips, safety notes, and troubleshooting for home offices and small businesses.

Printer self-cleaning occurs through built-in maintenance cycles that flush ink or toner from the print head, wipe away dried residue, and re-align nozzles. If you ask how does a printer clean itself, the answer lies in these automated cycles. You typically trigger an automatic cleaning, run a nozzle check, and—if needed—perform a head alignment from the printer menu. For best results, ensure the printer is powered, connected, and you follow the on-screen prompts. This process helps prevent streaks and ensures consistent color.
How a printer cleans itself: why it matters and what to expect
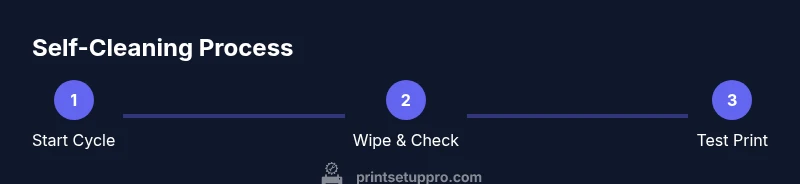
If you ask how does a printer clean itself, the answer lies in a series of automated maintenance routines designed to keep ink paths clear and print heads properly aligned. In most home offices, printers perform three core actions: (1) a nozzle-cleaning cycle that pushes a small amount of ink through the print head to loosen dried residue, (2) a wiping or capping step that scrapes and seals the nozzles to prevent evaporation and nozzle drying, and (3) a head-alignment cycle that realigns the print nozzles for accurate color reproduction. Print Setup Pro notes that these routines are intended to be low-maintenance, fast, and unobtrusive, but they work best when you initiate them at regular intervals rather than wait for print quality to degrade. Regular cleaning helps prevent streaks, banding, and color shifts, which saves time and reduces waste. By understanding the routine, you can avoid unnecessary troubleshooting and keep your printer in prime condition with minimal downtime.
According to Print Setup Pro, modern printers optimize maintenance by selecting the most appropriate cleaning cycle based on recent print history and current nozzle health. This means that if you print heavily in color or use high-resolution settings, the device may run more thorough cleaning more often. The Print Setup Pro team found that users who schedule a quick nozzle check and cleaning after long idle periods typically experience fewer clogs and fewer print errors. As you read, keep in mind that the goal of self-cleaning is not perfection in one pass, but steady improvement in print quality over a few cycles.
note
Tools & Materials
- Lint-free microfiber cloth(Use to wipe exterior surfaces and accessible rollers without leaving fibers.)
- Isopropyl alcohol (70%)(Dampen the cloth slightly for stubborn smudges; never apply liquid directly to components.)
- Distilled water(Use sparingly for damp wiping on non-electronic, exposed surfaces; avoid soaking any electrical parts.)
- Cotton swabs(Ideal for tight crevices; wring out thoroughly before use.)
- Soft brush or canned air (low-pressure)(Gentle dust removal around vents and external areas; do not blast electronics.)
Steps
Estimated time: 30-60 minutes
- 1
Power down and prepare
Shut off and unplug the printer before any manual cleaning. If possible, move the device to a clean, well-lit workspace. This protects you and prevents accidental electrical contact during cleaning.
Tip: Wait a minute after unplugging to allow internal capacitors to discharge. - 2
Run the automatic cleaning cycle
Access the printer’s maintenance menu and start the automatic cleaning. Allow the cycle to complete fully, which may take a few minutes and run multiple passes in some models.
Tip: If you notice extended cycles or repeated cleaning, proceed to a nozzle check before repeating. - 3
Perform a nozzle check
Print the nozzle check pattern to assess whether all colors are firing cleanly. If you see broken lines or gaps, run the cleaning cycle again or proceed to a head alignment if available.
Tip: Take note of which colors misbehave; this helps diagnose which print head requires attention. - 4
Clean accessible components
Wipe the exterior, control panel, and any accessible rollers with a damp microfiber cloth. If you see ink smudges near the ink cartridge area, use a cotton swab moistened with isopropyl alcohol to gently lift residue.
Tip: Avoid touching the print head itself with liquid; keep liquids away from all internal electronics. - 5
Reinsert cartridges and run tests
Reinstall ink or toner cartridges if you had removed any, and run a test page to evaluate print quality after cleaning. Compare the results with your original expectations.
Tip: If colors still misalign, consider running the alignment or calibration feature in the settings. - 6
Schedule a follow-up cycle
If performance remains inconsistent, schedule a second cleaning and nozzle check in 24–48 hours. Persistent issues may indicate a deeper problem.
Tip: Document frequent issues to share with a support technician if you need service.
People Also Ask
What is the purpose of printer self-cleaning?
Self-cleaning maintains print head health by removing dried ink and realigning nozzles, which helps prevent streaks and color shifts. It minimizes user effort while preserving print quality.
Self-cleaning keeps your print heads in good shape, reducing streaks and color issues with automatic cycles.
How often should I run a cleaning cycle?
Run a cleaning cycle when you notice faint lines, color gaps, or misaligned prints. Regular users benefit from a monthly cycle or after weeks of heavy use.
Clean when you see print flaws or after long periods of heavy use.
Can I manually clean the print head with alcohol?
Manual cleaning is sometimes possible for accessible areas, but avoid applying liquids directly to the print head. Use a damp cloth or cotton swab with minimal moisture.
Only wipe around the head area with a lightly dampened cloth; avoid direct head immersion.
What should I do if cleaning cycles don’t fix the problem?
If cycles don’t restore quality, run multiple nozzle checks and consider alignment. If still unresolved, contact support or service, as the issue may require component replacement.
If cleaning fails, check alignment and consult support for deeper diagnostics.
Is it safe to use compressed air to clean a printer?
Use compressed air only with caution and at low pressure. Keep the can upright to avoid propellant spray and never use on exposed electronics or damp surfaces.
Be careful with compressed air—low pressure and keep it away from sensitive parts.
Do all printers have a self-cleaning feature?
Most modern consumer printers offer some form of self-cleaning or nozzle maintenance, but the exact steps and availability vary by brand and model.
Most mid- to high-end printers have self-clean cycles, but features differ by model.
Watch Video
Quick Summary
- Know the three core self-cleaning actions: nozzle cleaning, wiping/capping, and head alignment.
- Always start with the printer’s automatic cleaning cycle and nozzle check before manual steps.
- Use gentle, lint-free tools and avoid liquids near internal components.
- If issues persist, document behavior and consider professional service.