How to Clean Printer Heads: Safe, Effective Techniques
Learn how to clean printer heads safely with step-by-step methods, tips for inkjet and laser systems, and maintenance routines to restore print quality in a home office.

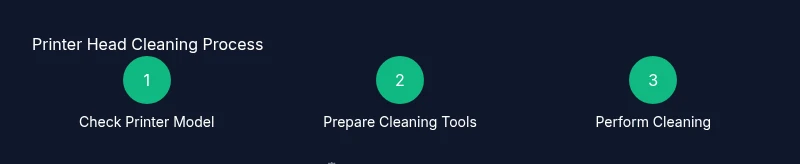
By the end of this guide, you will learn how to clean printer heads safely and effectively, restoring print quality and preventing clogs. We cover common methods, essential precautions, and a step-by-step workflow suited for home offices and small businesses. Before you start, identify your printer model, choose the approved cleaning solution, and gather the right tools. Print Setup Pro recommends following these steps carefully.
Why clean printer heads matter
Printer heads clogged with dried ink cause faded prints, color misregistration, and increased paper jams. Regularly cleaning the printer heads helps maintain alignment, extend cartridge life, and ensure consistent output. According to Print Setup Pro, clean printer heads are essential for reliable operation and high-quality results in a busy home office. When you neglect this maintenance, you’ll notice banding, missing colors, and longer warm-up times. The goal is to remove dried ink without compromising the delicate nozzles. This section explains what constitutes a clean head and how it relates to overall printer health. By adopting a routine, you minimize downtime and avoid expensive professional servicing.
A clean printhead contributes to sharper text, truer color reproduction, and fewer misfires in photo printing. In multi-color inkjet systems, a single clogged nozzle can ruin an entire color channel, forcing the printer to substitute or blend inks in ways that degrade quality. Regular cleaning should be part of a broader maintenance schedule that includes ink cartridge tracking, alignment calibration, and periodic nozzle checks. If you run high-volume batches, consider scheduling monthly checks as a safeguard against sudden degradation. Print Setup Pro notes that proactive care reduces downtime, saves materials, and preserves print quality over time.
What counts as clean printer heads
A clean printer head means the nozzles are free of dried ink and debris, with no visible clogs or misalignment in nozzle test patterns. Visible signs of dirty heads include color banding, missing colors, or ghosting in prints. For cartridges that sit in head cavities, ensure seating is proper; a loose cartridge can cause leakage and poor contact. A truly clean head is not just wiped; it requires a controlled cleaning cycle or manual swab technique using manufacturer-approved fluids. Always avoid abrasive contact or scrubbing. This clarity matters because improper handling can bend or damage delicate nozzles, resulting in expensive replacements. Keep your cleaning tasks as routine as part of printer maintenance, not as a one-off fix.
In color printing, misaligned nozzles can cause ghosting where a faint image trails behind the primary print. A good rule is to verify every color channel after cleaning with a nozzle check pattern. If bands or gaps persist after a cleaning cycle, you may need to repeat the process or move to more thorough manual methods. Remember that not all printers share the same head architecture; some use suction-based cartridges while others rely on dampers. Tailor your approach to your model's design and recommended fluids.
Methods for cleaning printer heads: wet cleaning, flushing, and cartridge-based cleaning
There are several legitimate ways to clean printer heads, and choosing the right method depends on your printer type, ink system, and how you use the device. Wet cleaning involves using a manufacturer-approved cleaning solution and soft swabs to gently remove dried ink from the nozzles and ink paths. The goal is to dissolve dried residues without abrading the delicate surfaces. Flushing is a more intensive method used for stubborn clogs; it requires proper containers, patience, and strict adherence to manufacturer guidance to avoid over-saturation of ink channels. Some printers offer built-in cleaning routines that flush the system with cleaning fluid; these are convenient but may require multiple cycles for complete results. Cartridge-based cleaning leverages the cleaning features already built into the printing system when the cartridge interfaces with the printhead. Regardless of the method, never force ink through a clogged head, and always test after each step to monitor progress. Print Setup Pro emphasizes starting with the least invasive method and escalating only if necessary.
For owners of desktop inkjet printers, a common starting point is a nozzle check followed by a light cleaning cycle. If colors still appear faint or mottled, proceed to a manual cleaning with damp swabs using the manufacturer’s cleaning fluid. High-volume environments or printers with stubborn clogging may require a professional service, especially if the printhead is integrated or sealed and not designed for user maintenance. Always consult your model’s manual before attempting any aggressive cleaning to avoid warranty voids or hardware damage.
Workspace setup and safety before you start
Preparing your workspace is a step often overlooked, but it reduces mess and protects your printer. Clear a wide, flat surface, and place a protective covering to catch spills. Unplug the printer and remove any connected USB cables or network lines to prevent accidental activation. Gather all required tools from your kit and lay them within arm’s reach. Work in a well-lit area so you can clearly inspect nozzle patterns and color alignment. If you’re using liquids, keep absorbent towels handy and have a waste container or sealable bag for used swabs. Finally, wear gloves if you want to avoid oily fingerprints on contact surfaces. Following these precautions minimizes slip hazards and helps you avoid accidental damage.
Common mistakes to avoid while cleaning printer heads
Several mistakes can undermine cleaning efforts. Avoid immediately discarding cartridges or tearing apart the printhead assembly; many printers have fragile seals that should remain intact. Do not use household cleaners, solvents, or tap water to rinse printhead assemblies, as contaminants can clog or corrode coils and nozzles. Never coil wires or twist cables around the paper feed, as this can cause misalignment or electrical shorts. Avoid applying excessive pressure with swabs or forcing ink through clogged channels; this can bend or scratch the nozzle plate. Finally, don’t skip the nozzle check before and after cleaning—relying solely on visual inspection can miss subtle issues that affect print quality. These missteps are common but easily avoided by following manufacturer guidance and a conservative approach to cleaning.
How to verify results after cleaning
After cleaning, run a nozzle check pattern to verify that each color channel prints cleanly and without gaps. If the pattern shows gaps or bands, repeat a lighter cleaning cycle or perform a careful manual cleaning on the affected color channel. Compare test prints against a known-good reference page to detect any remaining color shifts or alignment issues. If you still notice problems after multiple attempts, it’s prudent to perform alignment calibrations or seek professional service. Documenting the results helps you optimize future maintenance, and keeping a log of cleaning dates can help you predict when a deeper service will be needed.
Tools & Materials
- Manufacturer-approved printhead cleaning solution(Use only the solution recommended by your printer manufacturer; avoid household cleaners.)
- Soft lint-free swabs(Prefer cotton-free, non-linting swabs designed for electronics.)
- Lint-free microfiber cloth(Non-abrasive; used to wipe and blot without leaving fibers.)
- Distilled water(Use to dampen swabs; avoid tap water which can leave minerals.)
- Isopropyl alcohol 70%(Only if the manufacturer approves; some models disallow alcohol near printheads.)
- Gloves(Optional to keep hands clean and prevent oil transfer.)
- Paper towels(For blotting and catching drips; keep waste contained.)
- Small waste container(Dispose of used swabs and dirty liquids safely.)
Steps
Estimated time: 30-60 minutes
- 1
Identify model and read manual
Locate your printer model on the device or packaging. Open the manual or online help to confirm compatible cleaning methods and fluids. This initial check prevents incompatible techniques and protects the printhead.
Tip: Record the exact model and firmware version before proceeding. - 2
Power down and prepare workspace
Unplug the printer and remove any connected cables. Clear a clean workspace, lay down towels, and gather your cleaning kit. This minimizes accidents and keeps surfaces dry.
Tip: Let the device cool if it has been printing recently. - 3
Access printhead area and prepare fluids
Open the printer’s access cover to reach the printhead. Prepare your cleaning solution and damp swabs. Avoid squirting liquids directly into the head; apply to the swab first.
Tip: Do not touch nozzles with bare fingers or tools. - 4
Run automatic nozzle clean (if available)
Use the printer’s built-in nozzle cleaning function to begin dissolving dried ink. Run 1-2 cycles and check the nozzle pattern after each run. Stop if no improvement is seen after two cycles.
Tip: Do not chain multiple cycles without inspecting results. - 5
Perform careful manual cleaning on stubborn clogs
Dampen a swab with the approved solution and gently wipe the affected nozzles. Use a fresh swab for each color, and avoid scrubbing the nozzle surface. Let the printer rest briefly after application.
Tip: Use a light touch; damage is easier to incur than you think. - 6
Rinse, dry, and re-seat printhead
Moisten a clean swab with distilled water or manufacturer fluid to remove any residue. Gently dry the area and re-seat components if you loosened anything. Reclose the access panel carefully.
Tip: Ensure no moisture remains near electrical contacts. - 7
Run test print and document results
Print a test page to evaluate color accuracy and alignment. Compare against a reference and note improvements or remaining issues. Save the results for future maintenance planning.
Tip: If issues persist, consider professional service or replacement.
People Also Ask
Is cleaning printer heads safe for all printers?
In general, cleaning printer heads is safe when you follow the manufacturer’s guidelines and use approved fluids. Some models have sealed heads or warranty implications, so consult the manual if in doubt.
Yes, but only if you follow the manufacturer’s guidelines and use approved cleaners.
How often should I clean printer heads?
Frequency depends on usage and print quality. If you notice color gaps, banding, or fading, run a cleaning cycle and test print. Regular maintenance can prevent major clogs.
Clean when you notice print issues or on a scheduled maintenance basis.
Can I use tap water to clean printheads?
Tap water can contain minerals that leave deposits and cause clogs. Use distilled water or the manufacturer’s cleaning solution.
Avoid tap water; use distilled water or manufacturer-approved fluids.
What if cleaning doesn’t fix the problem?
If issues persist after cleaning, try a few more cycles and a careful manual clean. If still unresolved, contact the printer’s support or a service technician.
If cleaning fails to fix it, seek professional support.
Will cleaning void my warranty?
Cleaning with manufacturer-approved fluids generally does not void warranties, but check your warranty terms and avoid disassembling sealed components.
Refer to your warranty terms; use approved methods.
Watch Video
Quick Summary
- Identify model and use manufacturer fluids
- Start with built-in cleaning cycles
- Test prints after each step
- Document maintenance for future reference