How to Clean Epson Printer Heads: A Complete Guide
Learn safe methods to clean Epson printer heads, prevent clogs, and restore print quality. This step-by-step guide covers cleaning cycles, manual cleaning, and ongoing maintenance for home offices and small businesses.

You will learn how to safely clean Epson printer heads using the printer’s built-in cleaning cycle and, if needed, a controlled manual cleaning method. This guide covers when to clean, what to avoid, and how to test print quality after cleaning. You’ll need distilled water or Epson-approved cleaning solutions, lint-free swabs, a dropper, and basic safety gear.
Why Cleaning Epson Printer Heads Matters
Keeping your Epson printer heads clean is essential for consistent print quality, sharp text, and vibrant colors. Clogged or dried ink can cause banding, gaps, or misfiring nozzles, which leads to wasted sheets and frustrated print jobs. According to Print Setup Pro, establishing a regular maintenance routine reduces nozzle blockages and helps preserve print-head longevity. By understanding how cleaning works and when to act, you protect your investment and save time in the long run. This guide uses practical steps suitable for home office setups and small-business printing needs, including budget-friendly DIY cleaning alternatives that stay within safe operating practices. If you’re looking to clean printer heads epson, follow these steps with care and patience.
Signs Your Epson Heads Need Cleaning
Discrepancies in print quality are the first clue. Look for: light or missing colors, horizontal lines, specks, or ink smudges across multiple pages. If only black is affected, the K nozzle is clogged; if color channels are affected, a different nozzle is blocked. Paper jams are less common but can accompany stubborn clogs. Running a nozzle check pattern in your printer’s maintenance menu confirms which channels are blocked. In many cases a scheduled cleaning cycle or a simple reprint can resolve the issue. Print Setup Pro notes that early detection and timely cleaning yield better results than aggressive, repeated flushes later.
Safety and Best Practices for Cleaning
Safety is essential when handling cleaning fluids and printer components. Always unplug the printer before starting, remove cartridges if instructed by the manual, and operate in a well-ventilated area. Use only distilled water or Epson-approved cleaning solutions; tap water can introduce minerals that worsen clogs. Wear gloves to prevent skin contact with cleaning agents, and keep liquids away from electrical contacts. Never spray liquids directly into the printer internals; apply liquid to a swab or dropper and carefully dab at the nozzle area. This minimizes risk to print head membranes and electrical contacts.
Tools and Materials You'll Need
A prepared workspace makes the process smoother. You’ll typically need distilled water (or Epson-approved cleaning solution), lint-free swabs, a clean dropper or syringe, a soft microfiber cloth, gloves, and a shallow container for liquid. Keep spare cartridges on hand in case you need to swap while you work. Arrange a head-cleaning swab kit that’s compatible with your printer model and follow any manufacturer guidelines for the specific Epson model you own.
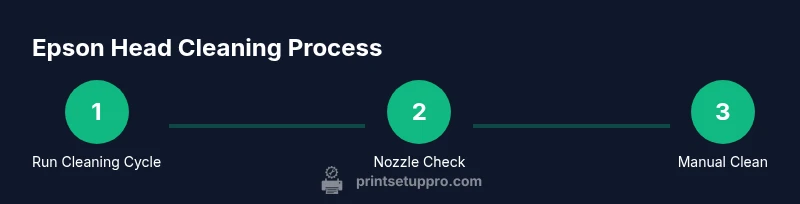
Step-by-Step: Run the Printer Cleaning Cycle
Most Epson models include an automatic cleaning cycle designed to loosen dried ink from the nozzle plates. Access the printer maintenance menu, select Head Cleaning or Cleaning Cycle, and confirm. Expect the printer to run momentarily and emit subtle ink mist. After the cycle finishes, print a nozzle check page to assess results. Consistent use of the cleaning cycle, when required, helps keep channels clear without excessive ink consumption.
Step-by-Step: Manual Cleaning with a Cleaning Solution
If the nozzle check shows persistent gaps, a light manual clean may be needed. Dampen a lint-free swab with distilled water or Epson-recommended solution. Gently dab the affected nozzle areas in a single direction to avoid smearing or pushing ink into unintended channels. Do not scrub or apply force. Allow the head to air-dry for a few minutes before reinstalling cartridges and running another cleaning cycle. This approach minimizes risk while giving you direct ink access to clogged outlets.
Step-by-Step: Nozzle Check and Test Print
Run a nozzle check pattern again to quantify improvement after cleaning. If lines are uniform and ink appears consistent, print a simple test page with multiple colors and grayscale to verify overall balance. If gaps persist after a second cleaning and manual cycle, consider replacing oldest cartridges or seeking professional support. Keeping a log of maintenance events helps you track when cleanings are most effective.
Step-by-Step: Refill, Recalibrate, and Re-test
After cleaning, reinstall cartridges carefully, ensuring they seat correctly. Run a full calibration if your model supports it, then print a calibration or test page. Monitor color alignment and density. If you notice misalignment, you may need to re-run the cleaning cycle or perform a more thorough head flush. Refrain from over-cleaning, which can wear nozzle membranes and reduce print head lifespan.
Step-by-Step: Scheduling Regular Maintenance
Create a simple maintenance calendar that aligns with your typical print volume. For high-use environments, a monthly cycle may be appropriate; for light use, quarterly cleanings can suffice. Keep a digital reminder and a small physical checklist near the printer for quick reference. Regular cleaning reduces the likelihood of severe clogs that require professional service and protects your investment over time.
Tools & Materials
- Distilled water or Epson-approved cleaning solution(Avoid tap water; minerals can worsen clogs)
- Lint-free swabs(Cotton or microfiber; avoid fibers that shed)
- Dropper or syringe(For controlled liquid application)
- Soft microfiber cloth(For drying and blotting; do not leave fibers behind)
- Latex or nitrile gloves(Protect skin from cleaning fluids)
- Small translucent container(Optional tray for liquids during cleaning)
- Printer manual or model-specific guide(Helpful for model-specific steps)
Steps
Estimated time: 40-70 minutes
- 1
Power down and prep
Power off the printer and unplug. If your model requires cartridge removal, do so following the manual. Create a clean work area and gather all tools before starting to minimize interruptions.
Tip: Keep cartridges in a closed bag to avoid spills during cleaning. - 2
Run the automatic cleaning cycle
Access the maintenance menu and select Head Cleaning or Cleaning Cycle. Allow the printer to complete the cycle before continuing. This loosens dried ink from the nozzles without direct contact.
Tip: Document the cycle duration in your maintenance log for future reference. - 3
Perform a nozzle check
Print a nozzle check pattern to identify which channels are blocked. This confirms whether the cycle resolved the issue or if manual cleaning is needed.
Tip: If you see gaps, note which colors are affected to target your cleaning approach. - 4
Manual cleaning (if needed)
Dampen a lint-free swab with distilled water or cleaning solution. Gently dab the affected nozzles in one direction to lift dried ink. Avoid scrubbing and ensure you do not saturate the cartridge area.
Tip: Work slowly to prevent ink from spreading to unintended areas. - 5
Dry and re-seat cartridges
Allow the head area to air-dry briefly, then reinsert cartridges securely. Ensure the contact pins are clean and the cartridges sit fully in their slots.
Tip: Avoid forcing cartridges into place; misalignment can cause further issues. - 6
Run a second cleaning cycle
After manual cleaning, run another automatic cleaning cycle to recondition the nozzles. This helps re-saturate the ink paths evenly.
Tip: Do not run back-to-back cycles without checking results to prevent over-cleaning. - 7
Test print and compare
Print a test page and compare to prior results. Look for uniform density and color balance. Re-run the nozzle check if necessary.
Tip: Use standard paper for consistency in tests. - 8
Schedule ongoing maintenance
Create a routine based on print volume. Regular cleaning reduces clogs and extends the life of the print head.
Tip: Set calendar reminders and keep a simple log of each cleaning event.
People Also Ask
How often should I clean Epson printer heads?
Cleaning frequency depends on usage. For light home use, run a cleaning cycle every few weeks or when you notice print quality decline. In high-volume environments, a monthly cycle or after a suspected clog is reasonable. Always follow your model’s maintenance recommendations.
For most users, cleaners about once every few weeks is enough; more often if you print a lot or notice quality drop.
Can I use vinegar or alcohol to clean printer heads?
Vinegar is not recommended for printer heads because it can leave residues that worsen clogs. Isopropyl alcohol should only be used if the manufacturer approves it for your model. Always prefer distilled water or Epson-approved cleaning solutions.
Avoid vinegar; only use manufacturer-approved cleaners or distilled water.
Will cleaning damage the printer?
When done correctly, cleaning is safe and helps prevent damage from dried ink. Incorrect liquids or aggressive scrubbing can harm the nozzle plate or electrical contacts. If unsure, consult the printer’s manual or a service professional.
Cleaning with proper liquids and gentle swabs is safe; avoid harsh scrubbing.
What if cleaning doesn’t fix the print quality?
If nozzle checks still show gaps after cleaning cycles, consider deeper maintenance or cartridge replacement. Recheck alignment and, if needed, seek professional service or support from Epson.
If issues persist after cleaning, replace old cartridges and consult support.
Is it safe to manually clean Epson print heads?
Manual cleaning is safe when performed gently with proper liquids and clean swabs. Always power down, unplug, and follow the manufacturer’s guidance for your model. Avoid applying liquid directly to connectors.
Gentle manual cleaning is safe if you follow the model’s guidelines.
Do I need to replace cartridges after cleaning?
Cartridge replacement isn’t required after every cleaning, but replaced aged cartridges can improve color consistency and drying time if current ones are clogged or dried out.
Cartridges may need replacement if print quality doesn’t improve after cleaning.
Watch Video
Quick Summary
- Run the built-in cleaning cycle first before manual cleaning.
- Use distilled water or Epson-approved solutions only.
- Nozzle checks validate cleaning effectiveness.
- Maintain a regular cleaning schedule to prevent clogs.