How to Clean Printer Ink Cartridges: A Step-by-Step Guide
Learn a safe, proven method to clean printer ink cartridges and restore print quality. This Print Setup Pro guide covers materials, steps, safety tips, and troubleshooting for reliable, smear-free output.

Clean a printer ink cartridge safely by removing the cartridge, flushing contact surfaces, and drying thoroughly before reinsertion. This process helps clear dried ink, restore nozzle performance, and improve print quality. You’ll need distilled water, lint-free cloth, cotton swabs, a shallow tray, isopropyl alcohol (70%), and optional gloves. Follow the steps and test print afterward to confirm results.
Why cartridge cleaning matters
Printer ink cartridges can develop dried ink, clogs, and residue on the contacts and nozzle areas. When this happens, you’ll see streaks, missing lines, or uneven colors. Cleaning the cartridge is a targeted maintenance task that can restore flow and improve print quality without replacing parts. According to Print Setup Pro, a careful cleaning routine can extend cartridge life and reduce wasted ink, especially for inkjet printers that see irregular use. By understanding the anatomy of your cartridge and following a controlled process, you minimize risk to electronics while reviving performance. This section explains the why and when behind cartridge cleaning, so you can decide if a cleaning is the right next step instead of a full cartridge replacement.
DIY vs. replacement: weighing your options
Not every printing problem requires cleaning. If you notice persistent color shifts, severe clogs, or obvious physical damage to the cartridge seals, replacement is often the safer and more cost-effective path. Cleaning is most effective for minor clogs, dried ink on the contacts, or when a cartridge has been idle for an extended period. Print Setup Pro recommends weighing the cost of a cleaning attempt against the price of a new cartridge and the impact on print quality. If you’re unsure, run a test page after a basic cleaning to see if the issue improves.
Safety and workspace preparation
Before you touch any internals, unplug the printer and move it to a clean, dry workspace with good lighting. Wear gloves if you’re handling ink directly, and lay down a protective sheet or newspaper to catch any drips. Only use cleaning fluids that are safe for electronics and specifically intended for ink cartridges. Keep liquids away from the printer’s power components. Have a shallow tray for catching liquid and a waste sheet to protect your surface. A calm, organized workspace reduces mistakes and protects both you and the printer.
Common mistakes and how to avoid them
Typical errors include using tap water, soaking the cartridge in water for too long, or applying excessive force on the cartridge seals. Avoid spraying liquids into the printer or applying liquid to any electronic contacts beyond the cartridge itself. Do not bend or pry components; cartridges have delicate seals that can be damaged easily. Always dry surfaces thoroughly and work slowly to prevent ink from spreading to unintended areas. If you feel uncertain at any point, stop and consult the printer’s manual or manufacturer support.
Cleaning the cartridge contacts and nozzles (the core technique)
Gently wipe the cartridge’s metal contacts and the nozzle area with a lint-free cloth dampened with distilled water or 70% isopropyl alcohol. Use small, light strokes to remove ink buildup without abrading surfaces. For stubborn residues, lightly dampen a cotton swab and target only the affected areas. Avoid soaking the cartridge; the goal is surface cleaning, not full submersion. Allow the contacts to air-dry for at least 5–10 minutes before testing. This careful approach minimizes risk while aiming to restore electrical contact.
Rinsing and drying: handling liquids safely
If the cartridge requires rinsing beyond surface cleaning, use distilled water sparingly and never submerge the cartridge in liquids. Rinse only the affected printhead contact zones and allow ample time to dry completely. Do not use household solvents other than isopropyl alcohol-based cleaners, and never leave liquids on or near the printer’s electronics. Patience during drying is essential; rushing drying can trap moisture in crevices and cause hidden issues later.
Reinstalling and running a test
After the cartridge is completely dry, reinstall it securely into the printer, ensuring it seats correctly in its slot. Reconnect power and run the printer’s built-in cleaning cycle if available. Print a test page with simple text and a color gradient to evaluate whether lines are clean and color balance is restored. If issues persist after one clean cycle, consider repeating the process in smaller steps or moving to a cautious full replacement decision.
Post-cleaning maintenance and best practices
Keep cartridges clean by avoiding touching the nozzle area and by using the printer regularly to prevent ink from drying. Store spare cartridges upright in a cool, dry place, and avoid exposing them to extreme temperatures. Schedule periodic inspections of cartridges and the carriage area to catch buildup before it becomes a larger issue. Regular maintenance reduces print defects and prolongs cartridge life.
Troubleshooting: what to do if results are not satisfactory
If streaking or color misalignment continues after cleaning, consider rechecking cartridge seating and re-running the printer’s calibration. Inspect the printhead for persistent blockages, and verify that you are using the correct cartridge model for your printer. If problems persist after multiple cleanings, consult the manufacturer’s support channels before attempting more invasive DIY fixes.
Tools & Materials
- Distilled water(For rinsing and dampening cloths. Avoid mineral-containing tap water.)
- Lint-free cloth or microfiber cloth(Use breathable, non-abrasive material to avoid residue.)
- Cotton swabs (lint-free)(For precise cleaning of contacts and crevices.)
- Shallow tray or dish(Catch any drips and keep your workspace clean.)
- Isopropyl alcohol 70%(Use sparingly on contacts; avoid liquid near electronics other than the cartridge surface.)
- Gloves (optional)(Protect hands from ink; not mandatory if you’re careful.)
Steps
Estimated time: 30-45 minutes
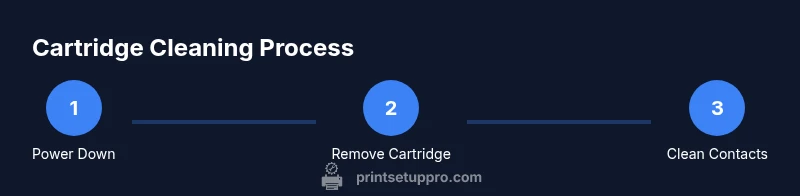
- 1
Power down and prepare workspace
Turn off and unplug the printer. Move it to a clean, well-lit area and lay down a protective sheet. This keeps you safe and prevents ink from staining surfaces. Keep all tools within reach and avoid distractions during the process.
Tip: Unplug first; never touch internal components with the printer powered. - 2
Remove cartridge and inspect visually
Open the printer’s access panel and carefully remove the cartridge. Check for cracks, leaks, or seals that look damaged. If you see obvious damage, stop and replace the cartridge rather than attempting a cleaning.
Tip: Handle cartridges by the sides and avoid touching the nozzles. - 3
Wipe contacts with a damp cloth
Gently wipe the metal contacts and surrounding edge with a cloth dampened in distilled water or 70% isopropyl alcohol. Use light strokes and avoid rubbing across fragile printhead areas. Let the exposed contacts air-dry for several minutes.
Tip: Do not oversaturate; moisture near electronics can cause issues. - 4
Target stubborn residues with cotton swabs
If residue remains, use a damp cotton swab to gently lift it from the contacts and nozzle areas. Avoid applying pressure that could bend pins or seals. Finish by letting the area air-dry completely.
Tip: Always use a fresh swab for each area to prevent cross-contamination. - 5
Rinse if necessary and dry thoroughly
If the cartridge required rinsing, use distilled water sparingly and dry the surface completely. Do not soak the cartridge; moisture inside can damage the internal electronics. Allow at least 5–10 minutes of air-drying.
Tip: Patience here prevents moisture entrapment and future issues. - 6
Reinstall cartridge and run a test print
Place the cartridge back securely into its slot. Reconnect power and perform the printer’s clean or diagnostic cycle. Print a test page with a simple line pattern to evaluate clarity and color balance.
Tip: If streaks appear, do not aggressively scrub; instead re-run the cleaning cycle gently. - 7
Evaluate test results and adjust as needed
Review the test print for uniform color distribution and sharp lines. If issues persist, consider repeating the steps with extra care or moving to cartridge replacement.
Tip: Document any changes you make so you can reproduce successful results later. - 8
Finalize maintenance note and store components
Return the printer to normal operation. Store spare cartridges upright in a cool, dry place and wipe away any ink spills on the workspace. Keeping a tidy setup helps future maintenance go smoothly.
Tip: Label cartridges to keep them in their original slots. - 9
Plan ongoing maintenance
Schedule periodic visual checks and occasional cleaning to prevent buildup. Regular use reduces drying and clogging, extending cartridge life and maintaining print quality.
Tip: Regular use is a simple form of preventive care.
People Also Ask
Is cleaning a clogged ink cartridge safe?
Yes, when you follow controlled steps and avoid soaking electronics. Use manufacturer guidance for best results and stop if you see damage.
Cleaning is safe if you follow the steps carefully and avoid soaking any electronics.
Can I use tap water to rinse cartridges?
Tap water often contains minerals that can leave residues; distilled water is preferred for rinsing and dampening cloths.
Distilled water is best for rinsing and dampening; avoid minerals in tap water.
Will cleaning fix every print quality issue?
Cleaning helps with minor clogs and drying issues but cannot repair damaged cartridges or old nozzles. If problems persist, replacement may be necessary.
It helps with minor clogs, but persistent problems may need cartridge replacement.
How often should I clean printer cartridges?
Clean only when you notice printing issues or after long periods of inactivity. Regular use reduces drying and buildup.
Clean when you see issues or after long inactivity; regular use helps prevent problems.
What should I do if ink still smears after cleaning?
Inspect cartridge seating, re-run calibration, and consider replacement if smearing continues. Contact manufacturer support if needed.
If smearing persists, recheck seating and calibration, and consider replacement.
Should I clean with the printer powered on or off?
Always work with the printer powered off and unplugged to avoid electric shock or damage to electronics.
Power off and unplug before cleaning.
Watch Video
Quick Summary
- Prepare safely; unplug and workspace ready.
- Use distilled water and lint-free tools for cleaning.
- Test print after cleaning to verify results.
- If issues persist, consider replacement rather than forcing a fix.