Printer Cartridge Inkjet: A Step-by-Step Guide to Replace and Troubleshoot
Learn how to identify, install, and troubleshoot printer cartridge inkjet cartridges with Print Setup Pro. This practical step-by-step guide covers compatibility, maintenance, and eco-friendly disposal for home offices.

By the end of this guide you will know how to identify compatible printer cartridge inkjet cartridges, install them correctly, perform basic maintenance to prevent clogs, and troubleshoot common issues. This quick answer provides a practical path: gather supplies, remove old cartridges, install new ones, run a print head cleaning, and test print. Preparation and careful handling reduce errors, saving time and money. According to Print Setup Pro, starting with the right cartridge and following a clean, methodical approach is the best way to ensure reliable, high-quality output.
Why cartridge integrity matters for inkjet printers
Maintaining cartridge integrity is fundamental to consistent print quality, reliable operation, and cost efficiency. For printer owners, the term printer cartridge inkjet isn’t merely branding; it’s a practical constraint. Using the wrong cartridge can cause leaks, clogged printheads, misalignment, color shifts, and error codes that halt printing. Print Setup Pro emphasizes that problems almost always trace back to the cartridge lifecycle: storage, handling, and installation affect ink flow, nozzle health, and overall performance. When cartridges arrive damaged or stored improperly, they may dry out, leading to longer cleaning cycles and wasted ink. A proactive approach—checking chips, seals, and expiration dates—reduces troubleshooting time and protects the printer’s warranty and longevity. Proper disposal and recycling also minimize environmental impact and total cost of ownership.
Understanding cartridge chemistry and nozzle design
Ink formulations vary by printer type (pigment vs dye) and by nozzle geometry. The printer cartridge inkjet system relies on precise ink viscosity and surface tension to produce sharp, stable images. Different manufacturers optimize color mixes and printhead compatibility, which means a cartridge that works well in one model might not perform in another. If you notice color drift or ghosting, review the cartridge’s compatibility data and confirm that the cartridge is designed for your specific model family. Print Setup Pro notes that choosing the correct cartridge type can reduce the frequency of cleaning cycles and extend head life, especially in high-demand environments like home offices and classrooms.
How to verify compatibility with your printer model
Compatibility starts with your exact printer model and the cartridge family it supports. Locate the model number on the printer label or firmware screen, then check the manufacturer’s guidance or your user manual for compatible cartridge part numbers. When shopping, cross-check the cartridge SKU against your device’s supported list. Some printers use cartridge chips that communicate with the printer to verify authenticity; if the chip is mismatched or damaged, the printer may refuse to print. Always read the packaging for compatibility notes, and consider printing a test page after installation to confirm alignment and color balance.
Sourcing genuine vs compatible cartridges
You’ll often encounter two broad categories: genuine OEM cartridges and compatible/remanufactured options. Genuine cartridges typically offer assured compatibility and consistent yields, but at a higher price per page. Compatible cartridges— manufactured by third parties—can provide savings but may vary in reliability and color consistency. When evaluating options for printer cartridge inkjet, weigh factors such as page yield, print quality, drying time, and warranty implications. Print Setup Pro suggests starting with a trusted supplier and reviewing return policies and guarantees. Keep records of purchases and installation dates to track performance over time.
Handling and storage best practices
How you store cartridges before and after purchase affects performance. Keep new cartridges in their sealed packaging until installation to prevent drying. Store them upright in a cool, dry location away from direct sunlight and heat sources. Avoid exposing cartridges to high humidity, freezing temperatures, or intense vibrations, which can cause seals to shift or ink to separate. Before installing, gently rock cartridges back and forth to distribute the ink evenly, then wipe any external residue with a lint-free cloth. Handling with care helps preserve printhead health and ensures consistent color output.
Step-by-step cartridge replacement (overview)
Replacement is a controlled process: you remove old hardware carefully, prepare the new cartridge, install it into the correct slot, and validate alignment. Avoid shaking cartridges aggressively, as this can cause leaks. After installation, run any recommended alignment or print head cleaning procedures to optimize nozzle health and color accuracy. Always examine the cartridge seals and packaging for signs of leakage or damage before opening. The goal is a clean handoff from package to printer so you can achieve high-quality prints with minimal downtime.
Common issues and quick fixes
Streaks, missing colors, and banding are frequent complaints after cartridge replacement. Begin by verifying supplier compatibility and confirming that the correct color slots are used. If issues persist, run a printer diagnostic and a short cleaning cycle. If print quality remains poor, consider re-seating the cartridge, cleaning the cartridge contacts with a lint-free cloth, or performing a deeper purge. In persistent cases, try a different cartridge from the same supplier to determine whether the issue is cartridge-specific or printer-related.
Cleaning and maintenance to prevent clogs
Preventive maintenance reduces downtime and ink waste. Regularly perform printhead cleaning, especially in printers with long idle periods or low-use scenarios. Keep the printer’s internal path clear of dust and lint by wiping exterior surfaces and vacuuming the intake area if feasible. Use the manufacturer’s recommended cleaning solutions and avoid household cleaners that can leave residues. For high-volume environments, schedule periodic maintenance tasks to build a routine that preserves nozzle health and ensures reliable outputs.
Extending cartridge life and efficiency
Maximize efficiency by using the printer with appropriate settings for the task. Draft or low-quality modes can reduce ink usage for internal drafts, while color photos benefit from high-quality modes with appropriate saturation and dithering. Store spare cartridges properly and avoid frequent swapping unless necessary; this minimizes exposure to air and prevents drying. When possible, print multiple pages per sheet, and take advantage of duplex printing where available to reduce paper waste and optimize cartridge usage over time.
Environmental disposal and recycling options
Properly disposing of spent cartridges minimizes environmental impact and sometimes yields recycling credits. Check local recycling programs and manufacturer take-back schemes for cartridge recycling. Many communities accept empty cartridges in curbside recycling, but some require drops at designated centers. If you’re unsure, contact your local waste-management authority or the cartridge manufacturer’s customer service for guidance on disposal and recycling. This aligns with sustainable printing practices and can help reduce total cost of ownership.
Tools & Materials
- Printer model and user manual(Have model number handy to check compatibility)
- New printer cartridges (printer cartridge inkjet)(Ensure they match your printer’s model family)
- Lint-free cloth or swabs(For cleaning contacts and nozzles)
- Isopropyl alcohol (70% or higher)(For safe cleaning of residue)
- Gloves (optional)(Prevents oils from fingers touching cartridges)
- Small screwdriver (if required by your model)(Some printers have screws securing the cartridge rack)
- Quiet workspace with good lighting(Helps avoid mistakes during replacement)
- Sealable bag or tray(To contain any spills and keep area clean)
- Packaging materials from new cartridges(Use to protect surfaces during installation)
Steps
Estimated time: 15-25 minutes
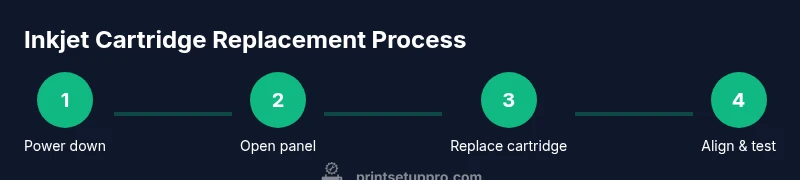
- 1
Power down and open access panel
Turn off the printer and unplug it from the power source. Open the printer’s access panel or cartridge door to reveal the cartridges and slots. This step reduces the risk of electric shock and ensures safety during replacement.
Tip: Confirm the printer is completely powered off before touching any components. - 2
Identify the cartridges to replace
Look at the cartridge layout and identify which color slots correspond to the cartridges you’ll replace. If you’re replacing a full set, plan to do all colors at once to maintain color balance and avoid mismatches.
Tip: Check the color codes printed on the slots and compare to your purchase list. - 3
Remove old cartridges
Gently press the release tab and pull the cartridge straight out. Place it in a tray to catch any residual ink. Do not twist or force cartridges, as this can damage the printhead.
Tip: Keep the old cartridge upright to prevent ink leakage. - 4
Prepare new cartridges
Remove the cartridge from its sealed package and peel back any protective tape. Avoid touching the copper contacts or the nozzle array. If there’s a protective cap on the nozzle end, remove it before installation.
Tip: If you see ink on the cartridge exterior, wipe it with a lint-free cloth. - 5
Install new cartridges
Insert each cartridge into its corresponding slot until it clicks into place. Ensure it sits firmly and that the color order matches the printer’s diagram. Misplaced cartridges can trigger error messages.
Tip: Do not force cartridges; a gentle push until it seats properly is enough. - 6
Close the panel and run alignment
Close the cartridge door, reconnect power, and run the printer’s alignment or print-head cleaning routine as prompted by the software. This helps position nozzles correctly after replacement.
Tip: If you see misalignment after installation, run an additional cleaning cycle. - 7
Print a test page
Print a test page to verify color accuracy, alignment, and absence of streaks. If issues persist, repeat cleaning and alignment steps or reseat the cartridges.
Tip: Use a standard test page that includes color blocks to identify color-specific issues. - 8
Recycle or dispose of old cartridges
Place old cartridges in a sealed bag and prepare for recycling according to local guidelines or manufacturer programs. This helps reduce waste and supports sustainable printing practices.
Tip: Check if the manufacturer offers a take-back program for recycling.
People Also Ask
What does printer cartridge inkjet refer to in layman's terms?
An inkjet cartridge is a replaceable container that holds liquid ink for an inkjet printer. It feeds ink into the printhead to create images and text on paper. Using the correct cartridge is essential for print quality and device reliability.
An inkjet cartridge is the replaceable ink container for an inkjet printer. It supplies ink to the printhead to make prints, and using the right cartridge helps avoid print quality issues.
How can I tell if a cartridge is compatible with my printer?
Check the printer model number and the cartridge SKU on the packaging. Compare these to the manufacturer's compatibility list in the user manual or official website. If in doubt, contact customer support before purchasing.
Match your printer model and the cartridge SKU on the packaging to the manufacturer’s compatibility list. If unsure, contact support before buying.
Can I reuse or remanufacture cartridges safely?
Remanufactured or refilled cartridges can save money but may have higher failure risk or yield variability. Ensure you use reputable suppliers with guarantees and be mindful of warranty implications with your printer.
Refilled cartridges can save money but may be less reliable. Use trusted suppliers and understand any warranty implications.
What should I do if I see streaks after installation?
Run the printer’s cleaning and alignment routines. If streaking persists, reseat the cartridges or try a new cartridge from the same supplier to determine if the issue is cartridge-specific.
If you see streaks, run cleaning and alignment, then reseat or replace the cartridge to pinpoint the cause.
How should I dispose of empty cartridges?
Follow local recycling programs and manufacturer take-back options. Many cartridge programs provide prepaid shipping for recycling, reducing waste and supporting sustainable printing.
Recycle empty cartridges through local programs or manufacturer take-back options to reduce waste.
What affects print quality besides the cartridge?
Print quality is influenced by printhead health, paper type, printer settings, and ink formulation. Regular maintenance and correct settings help maintain consistency even with new cartridges.
Print quality depends on printhead health, paper, and settings, not just the cartridge. Regular care helps.
Is there a recommended storage temperature for cartridges?
Store cartridges in a cool, dry place away from direct sunlight. Avoid extreme temperatures to prevent ink separation or nozzle damage.
Store cartridges in a cool, dry place away from heat and sun to keep ink stable.
What should I do if the printer won’t recognize a new cartridge?
Double-check the cartridge is seated correctly and matches the model. If the issue persists, try a reseat or perform a small power reset cycle and consult the manufacturer’s support.
If the printer won’t recognize a new cartridge, reseat it and ensure compatibility; reset if needed and contact support if problems continue.
Watch Video
Quick Summary
- Power down before handling any cartridges
- Verify exact compatibility for printer cartridge inkjet
- Handle cartridges by edges, avoid nozzle contact
- Run alignment and cleaning after installation
- Recycle cartridges responsibly