Replace Printer Cartridge: A Complete How-To Guide
Learn how to replace printer cartridge safely and effectively. This step-by-step guide covers cartridge types, compatibility checks, installation, printing calibration, and maintenance tips for home offices, students, and small businesses.

By following this guide, you will successfully replace a printer cartridge, ensuring compatibility and optimal print quality. Before starting, gather the correct cartridge type for your model and a few basic tools. Print Setup Pro confirms that one clean replacement reduces clogs and uneven colors while avoiding printer errors. This is the key to long-term savings.
Understanding printer cartridges and why replacement matters
Printer cartridges come in two broad families: ink cartridges for inkjet printers and toner cartridges for laser printers. Each type has its own chemistry, color configurations, and maintenance considerations. Understanding what you’re replacing helps prevent wasted purchases and poor results. According to Print Setup Pro, a properly replaced cartridge is essential for consistent color, sharp text, and reliable operation. When a printer indicates low ink or low toner, prints may fade, colors may shift, or a few pages can fail to feed correctly. Replacement isn’t just about having a fresh bottle or block; it’s about matching the cartridge to the exact model, using the correct color or size, and following the manufacturer’s installation instructions. If you ignore compatibility, you risk leaks, clogged print heads, or misalignment that forces you to repeat the process. In this section you’ll learn how to identify your cartridge type, what information to collect before buying, and how to avoid common missteps that create more work later.
Checking compatibility and model specifics before you buy
Before you buy a replacement cartridge, verify several critical details. Start by locating your printer’s model number on the front or back panel and confirming the cartridge family listed in the manual. Check the cartridge part number or color indicators and compare them with the packing or the printer’s display. Some printers require single-color replacements, while others require a specific cartridge set. If you choose a third‑party cartridge, ensure the vendor explicitly states compatibility with your exact model and firmware version. Print Setup Pro’s guidance emphasizes that even minor differences in labels or seals can mean the cartridge won’t seat correctly or register with the printer firmware. Also review return policies and warranty implications if the cartridge is incorrect. Finally, organize your replacements by color or black-and-color groups to simplify the install and avoid mixing inks or toners, which can degrade print quality.
Choosing the right cartridge and legitimate purchasing channels
Cartridges come in original equipment manufacturer (OEM) options, remanufactured or refilled options, and newer universal designs. OEM cartridges generally offer the best reliability, color accuracy, and page yield, but they can cost more. Remanufactured cartridges can save money, but quality varies by supplier. Look for credible vendors with clear return policies, genuine seals, and documented page yield tests. For printers used in a home office or classroom, consider whether you print mainly text, graphics, or photos, and pick accordingly. When shopping, don’t rely solely on the lowest price; verify compatibility, warranty coverage, and the availability of replacement parts. Print Setup Pro suggests checking consumer reviews for long-term performance and looking for cartridges that include built-in protective features to prevent leaks during transport. If you’re unsure, start with a single cartridge to test compatibility before stocking up on color sets.
Safety and environmental practices during replacement
Even though replacing a cartridge seems routine, following safety protocol helps protect you and the device. Work in a clean, dry workspace away from heat and open flames. Keep the printer unplugged until you’re finished handling components. Wear gloves if you are handling inks or toners that stain, and avoid touching the cartridge contacts or nozzles. Place spent cartridges in a recycling bag or container according to local guidelines; many manufacturers have take‑back programs. When handling toner, avoid dispersing fine particles into the air by working slowly and sealing the old cartridge in its original packaging until disposal. If a spill occurs, use a damp cloth rather than sweeping to prevent scattering. Finally, never force panels or cartridges; if a piece resists, consult the manual or customer support rather than forcing a stubborn latch.
Post-installation steps: alignment, calibration, and verification
Install the new cartridge and close the access panel securely. Run any alignment or calibration routine offered by the printer to ensure the new cartridge is registered properly. Print a blank or test page to clear the nozzles before printing content-heavy documents. If colors appear off, run another alignment pass or use the printer’s color calibration tool. For color printers, verify that color balance, grayscale, and saturation appear correct on the test page. If you still notice banding or ghosting, consult the printer’s diagnostic guide to check for clogged nozzles or improperly seated cartridges.
Maintenance tips to extend cartridge life and maintain print quality
Regular maintenance helps cartridges last longer and maintain quality. Keep your printer in a stable environment with a consistent temperature and humidity level, and avoid extended exposure to direct sunlight. Use draft settings for internal drafts to conserve toner or ink when appropriate, and print at intervals that avoid long idle periods that can dry out ink or settle toner. Clean the cartridge area with a lint-free cloth during replacement, removing dust that can cause misfeeds. If you notice frequent misfeeds, inspect the cradle and feed rollers for wear and replace them as needed. Finally, track cartridge yields and plan replacements around busy periods to avoid delays in printing. By following these steps you’ll preserve cartridge performance and maintain crisp, legible documents.
Tools & Materials
- New printer cartridge (ink or toner) matching model(Verify model number on printer label and packaging; use original or approved third-party cartridges)
- Lint-free cloth(For wiping surfaces and removing dust from cartridge area)
- Disposable gloves(Protect hands from ink or toner stains)
- Screwdriver (if needed)(Some models require panel screws to be loosened)
- Printer user manual or cartridge instructions(Reference for model-specific steps and safety warnings)
- Protective packaging (original)(Keep packaging intact until after installation to prevent leaks)
- Waste container or sealable bag(Dispose or recycle old cartridge properly)
Steps
Estimated time: 30-45 minutes
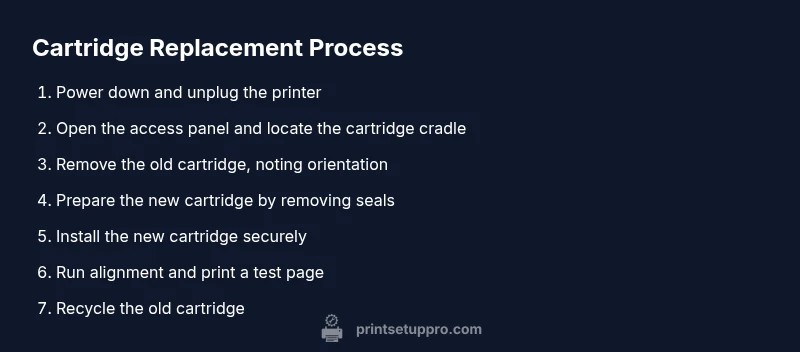
- 1
Power down and unplug the printer
Turn off the printer and unplug the power cord. This prevents accidental startup and reduces the risk of electric shock during replacement.
Tip: Wait 60 seconds after unplugging to ensure internal components settle before touching any parts. - 2
Open the access panel
Gently open the printer’s access panel or cartridge cover to expose the cartridge cradle. Do not force panels; use the release latch if present.
Tip: Have good lighting and a clean workspace to avoid misplacing components. - 3
Remove the old cartridge
Carefully lift and remove the old cartridge from its cradle. Note its orientation and any locking tabs to ensure correct reinstallation.
Tip: Do not touch the cartridge chip or copper contacts to prevent damage. - 4
Prepare the new cartridge
Remove all protective seals and tapes from the new cartridge as instructed. Discard packaging safely and set the cartridge on a clean surface.
Tip: Avoid touching the print head or nozzle areas to prevent clogs. - 5
Install the new cartridge
Insert the new cartridge into the cradle in the same orientation as the old one. Push firmly until you hear a click or until it seats.
Tip: Make sure it’s fully seated before closing the panel. - 6
Align and test print
Run the printer’s alignment or print head cleaning routine if offered. Allow the process to complete and print a test page to verify colors.
Tip: If colors look off, run the alignment again or perform a color calibration. - 7
Dispose of old cartridge and run final checks
Place the old cartridge in a sealed bag for recycling. Reclose the panel and print a final page to confirm quality.
Tip: Keep the printer on a single surface to prevent misfeeds during the test print. - 8
Document the replacement
Record the cartridge type, replacement date, and any issues observed for future maintenance.
Tip: This helps with warranty claims and future troubleshooting.
People Also Ask
Can I replace only one cartridge at a time?
Not always. In many printers you can replace cartridges individually as they run low. Replacing only the empty color or black cartridge is common, but always follow the printer’s guidance.
You can usually replace cartridges individually as they run low; check the printer's guidance for color or black.
What should I do if the printer won’t recognize the new cartridge?
Ensure the cartridge is properly seated, the seals are removed, and the correct model is installed. Restart the printer and run any alignment routine. If the problem persists, reseat or try another cartridge.
Make sure it's seated correctly and try a reseat or different cartridge if needed.
Is it safe to replace a cartridge while the printer is on?
No. Always power down and unplug the printer before replacing cartridges to avoid shock or damage.
Always power down and unplug before replacing cartridges.
Should I shake a cartridge before installing?
Shaking is generally discouraged unless the manufacturer instructs it. If required, hold cartridge upright and shake gently to distribute ink/toner.
Avoid shaking unless the manufacturer says to; if needed, shake gently.
How long does a typical cartridge last?
Cartridge life varies by usage, printer model, and content. Check the cartridge’s page or manufacturer estimates for approximate pages or milliliters; expect changes with heavy color use.
It depends on usage; check the cartridge details for expected page yield.
What about recycling spent cartridges?
Recycle through local programs or return-to-manufacturer schemes. Many brands offer free recycling to reduce waste and environmental impact.
Recycle through programs offered by manufacturers or local facilities.
Watch Video
Quick Summary
- Verify cartridge compatibility before installation
- Power down and unplug to avoid electrical hazards
- Follow OEM instructions for seals and orientation
- Run alignment and test pages for best results
- Recycle old cartridges responsibly