How to Change Ink in Canon Pixma Printer: A Step-by-Step Guide
Learn how to change ink in Canon Pixma printers with our detailed, model-agnostic guide. From cartridge compatibility to post-install alignment, get practical steps, safety tips, and troubleshooting to keep your prints sharp and reliable.

According to Print Setup Pro, correctly changing the ink in a Canon Pixma printer is essential for maintaining print quality and reliable performance. This guide explains model-agnostic steps, safety checks, and maintenance tips to help home office users and students avoid clogs, leaks, and misfeeds. You will learn how to identify cartridges, prepare your workspace, and complete a secure ink swap.
Why changing ink correctly matters for Canon Pixma printers
Keeping ink fresh and properly installed is crucial for print quality, color accuracy, and long-term printer health. The Canon Pixma line uses individual color cartridges and multiple print heads; when ink is old or improperly seated, you can experience streaks, banding, or skipped colors. The Print Setup Pro team emphasizes that using the right cartridge type and following a clean replacement workflow reduces head clogs, avoids air pockets, and preserves warranty coverage where applicable. In short, a careful ink swap protects your investment, saves time on reprints, and yields consistent results for documents and photos alike. As you read this guide, you will see practical steps, safety notes, and maintenance habits that align with canonical best practices.
This article targets home office users, students, and DIY enthusiasts who want a reliable, repeatable process. We cover compatibility checks, workspace setup, replacement steps, post-installation tasks, and common issues. The goal is to empower you to complete an ink change confidently on most Canon Pixma models without guesswork.
Understanding Canon Pixma ink systems and cartridge types
Canon Pixma printers typically rely on color cartridges that include black, cyan, magenta, and yellow inks, with some models using pigment black for sharp text while others prefer dye-based black for richer grayscale tones. The print head management for these devices often requires cartridges to be seated firmly so the printer can recognize each color channel. The distinction between dye and pigment inks matters not only for print longevity but also for storage and handling; pigment inks can be more prone to drying if the printer sits unused for extended periods. Regardless of your model, using high-quality, compatible cartridges designed for Pixma printers reduces the chance of air bubbles or misreads by the printer’s cartridge sensor.
If you’re unsure which cartridge family your model uses, consult the printer’s user manual or Canon’s official support site. Many Pixma models support a standard color set plus a separate black cartridge option; understanding this helps you avoid purchasing an incompatible cartridge and wasting time and ink.
How to identify the right ink cartridge family
Start by confirming your Canon Pixma model family, such as the MG, TS, or IX series. From there, check the color configuration your model supports and whether it uses a single black cartridge or a separate pigment black. When shopping, look for cartridges labeled for Pixma printers and verify they are compatible with your exact model. If you’re unsure, ask a professional or refer to Canon’s compatibility charts. While third-party cartridges can be cost-effective, they may introduce print quality inconsistencies or sensor recognition issues on certain models. When in doubt, opt for Canon-recommended inks or reputable third-party options with clear compatibility statements.
Keep your receipt and packaging so you can return cartridges if they don’t fit your model. Writing down your model number and cartridge colors helps you verify compatibility at a glance during future replacements.
Preparing your workspace and safety basics
A clean, stable workspace makes ink changes safer and neater. Lay down a protective sheet or disposable mat to catch any spills, and stock basic supplies such as lint-free cloths, paper towels, and isopropyl alcohol for quick cleanup. If you’re handling dye inks, consider wearing disposable gloves to protect your hands from stains. Ensure the printer is powered off and unplugged before opening the access panel or removing cartridges. Avoid applying excessive force when removing cartridges, as this can damage cartridge seals or the carriage assembly. Finally, review the printer’s manual for any model-specific warnings about touching the print head or cartridge contacts. A tidy setup minimizes risk and speeds up the replacement process.
Pre-replacement checks and timing considerations
Before you replace cartridges, confirm that the printer is on and has had a moment to cool if it was in use. If a cartridge is empty, you’ll often see an alert or a blinking light. Take note of the color order in the cartridge map for your model, so you don’t mix colors during installation. It’s also a good idea to run a light cleaning cycle or reset once all new cartridges are in place to ensure the print heads are primed for optimal ink flow. If you plan to store the printer for an extended period, consider removing ink from the carriage and closing the access panel to prevent dust intrusion.
A well-timed replacement minimizes waste and ensures the printer is ready to produce high-quality output.
The actual replacement workflow: post-removal preparation and cartridge seating
During a cartridge change, handle cartridges by their labeled sides and avoid touching copper contact strips or micro-mesh nozzles. Place removed cartridges on a clean, lint-free surface to prevent ink transfer. If the cartridge packaging included a plastic seal or protective tape, remove these components only as directed by the manufacturer. When inserting new cartridges, align carefully with the color-coded slots and push until you hear a click, which confirms correct seating. Do not force cartridges if they do not slide in smoothly; recheck alignment and try again. Once all cartridges are seated, close the printer’s lid and proceed with initialization steps.
For best results, avoid over-tightening any cartridge or forcing it into place, as that can damage the carriage or seals.
Post-installation steps: cleaning, alignment, and a test page
After installation, the printer will typically run an automatic priming sequence. If not, manually initiate a cleaning cycle from the printer’s control panel or the printer software on your computer. Run at least one cleaning cycle to clear any air pockets and to evenly distribute the ink across the print heads. Perform an alignment after the cleaning to ensure colors line up precisely on the page. Finally, print a test page with a color strip and a grayscale gradient to verify color balance, density, and sharp text. Note any color bias or banding and run an additional cleaning or alignment if necessary.
Regular calibration helps maintain print quality over time and prevents wasted prints due to misalignment.
Troubleshooting common issues after ink change
If the printer does not recognize a newly installed cartridge, check that the cartridge is seated properly and that the contact strips are clean and dry. Wipe away any ink smudges with a dry, lint-free cloth. If colors appear off or streaked, run a couple more cleaning cycles and weights for head alignment. For persistent problems, consult Canon support or the printer’s service manual for model-specific steps. Do not attempt to reseat cartridges while the carriage is moving, as this can cause jams or internal damage. A calm, methodical approach will usually restore normal operation.
Maintenance tips to maximize cartridge life and print quality
To prolong cartridge life and maintain consistent results, store unused cartridges in their sealed packaging until you’re ready to install them. Use high-quality papers compatible with your printer and avoid frequent, excessive cleaning cycles, which can waste ink. Keep the printer in a stable environment away from extreme heat and humidity, and dust the exterior periodically with a soft, dry cloth. If you regularly print in color, consider a monthly alignment check and a preventive clean to prevent nozzle blockages. Finally, document your replacement schedule to anticipate future cartridge needs and adjust your workflow accordingly.
Tools & Materials
- Canon ink cartridges compatible with your Pixma model(Check model family (MG/TS/IX) and color set; prefer Canon-recommended inks or clearly compatible third-party inks)
- Lint-free microfiber cloth(For cleaning contacts and wiping spills without leaving fibers)
- Isopropyl alcohol 70%(Used to clean contacts and any ink smears; let surfaces dry before reseating cartridges)
- Paper towels or clean cloth(Absorb spills and dry surfaces after cleaning)
- Latex or nitrile gloves (optional)(Protect hands from ink stains; not strictly needed if you’re careful)
- Printer owner’s manual or Canon support page(Model-specific steps and warnings; handy for reference during replacement)
- Protective mat or disposable tray(Catches drips; keeps your workspace clean)
- Soft brush or cotton swabs (optional)(Gently remove dried ink from contact areas if needed)
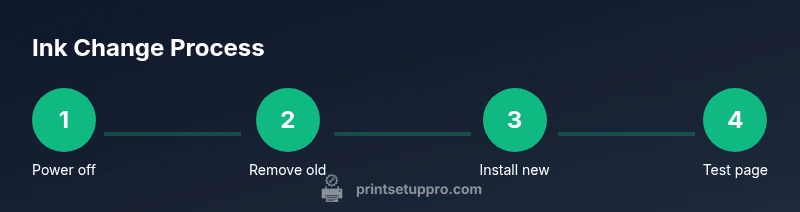
Steps
Estimated time: 15-25 minutes
- 1
Power down and prepare
Turn off the printer and unplug it from the wall. Open the printer cover to access the ink carriage. Let the device cool briefly if it was recently in use, and place a protective mat beneath the workspace to catch any spills.
Tip: Wait for the carriage to stop moving before touching any components; moving parts can pinch or misalign. - 2
Remove old cartridges
Gently press the cartridge until it clicks and lifts out of its slot. Place it on a clean surface for recycling or disposal. If ink is leaking, blot with a lint-free cloth and clean the area.
Tip: Keep cartridges in upright positions to prevent leaks. - 3
Prepare new cartridges
Remove packaging and protective tapes from the new cartridge. Do not touch the copper contacts or nozzles. Shake the cartridge lightly if indicated by the manufacturer to distribute the ink evenly (only if required for your model).
Tip: Keep the cartridge in its protective wrapper until you’re ready to install to avoid drying out. - 4
Install new cartridges
Insert each cartridge into its matching color slot and push until it clicks into place. Ensure colors match the slot colors and that each cartridge is firmly seated.
Tip: If you feel resistance, remove and reinsert, ensuring proper alignment before pushing again. - 5
Close the cover and power on
Close the printer cover, plug the unit back in, and turn it on. The printer may perform a brief initialization; allow it to finish before proceeding.
Tip: If the printer does not automatically initialize, use the printer software to start a routine initialization. - 6
Run cleaning and alignment
From the control panel or your computer, run at least one print head cleaning cycle followed by alignment. This primes the print heads and ensures accurate color alignment.
Tip: Avoid excessive cleaning cycles; a couple of cycles is usually sufficient to prime the heads. - 7
Print a test page
Print a test page that includes color bars and grayscale to verify color accuracy and text sharpness. Compare against a previous page to assess improvements.
Tip: If colors are off, perform an additional cleaning and alignment, then reprint the test page. - 8
Document and store
Record the cartridge replacement date and color set in your notes. Store any unused cartridges in their sealed packaging in a cool, dry place.
Tip: Keep receipts for future warranty or return considerations.
People Also Ask
Do I need to turn off the printer before changing ink in a Canon Pixma?
Yes. Turn off and unplug the printer before opening the access area or removing cartridges to prevent moving parts from causing damage.
Always power off the printer before starting and unplug it to ensure safety and prevent mechanical damage.
Can I use third-party ink cartridges for Canon Pixma printers?
Third-party inks can be compatible with some Pixma models, but they may cause color mismatch or sensor warnings on others. Check the model's compatibility notes and proceed with caution.
Third-party inks may work, but they can affect quality or sensor readings. Verify compatibility first.
What should I do if the printer won’t recognize a new cartridge?
Ensure the cartridge is seated correctly, the contacts are clean and dry, and that you’re using the correct color slot for each cartridge. Re-seat if needed and restart the printer.
If recognition fails, re-seat the cartridge, clean contacts, and restart the printer.
How can I tell if ink is low or empty on a Canon Pixma?
Check the printer’s status monitor or LCD in the printer software for ink levels. Some models estimate levels by color channel; others provide a precise readout.
Use the printer software to check ink levels; physical cues like faded prints can also indicate low ink.
Is it necessary to run a cleaning after replacing ink?
Most models benefit from at least one cleaning cycle and a test print after a change. This primes the heads and ensures consistent output.
Yes, run cleaning and a test print after changing cartridges.
What should I do if ink leaks during replacement?
Wipe spills immediately with a lint-free cloth, replace the cartridge quickly, and reseal the packaging. Allow surfaces to dry before continuing.
If ink leaks, wipe it up and re-seat cartridges carefully after drying.
How often should I replace Canon Pixma ink cartridges?
Replacement timing depends on usage. Replace when a cartridge is empty or when print quality declines. Storing spares in a sealed bag helps readiness.
Replace when empty or print quality drops; keep extras ready.
Can I mix cartridge brands in the same printer?
Mixing brands can cause color imbalance and sensor warnings. Prefer the same brand per color set and follow manufacturer guidance.
Mixing brands is not advised; stick to the same brand for each color.
Watch Video
Quick Summary
- Verify model compatibility before purchasing cartridges.
- Prepare a clean, protected workspace to prevent spills.
- Install cartridges correctly and run head cleaning after replacement.
- Test with a color/gray scale print to confirm alignment and accuracy.