Canon Pixma Printer Setup and Troubleshooting: A Comprehensive Guide
A comprehensive, step-by-step guide to setup, connect, and troubleshoot a Canon Pixma printer. Learn driver installation, wireless setup, maintenance, and common fixes for reliable home-office printing with Print Setup Pro.

This quick guide helps you set up and troubleshoot a canon pixma printer with a reliable connection and optimal print quality. You will learn driver installation, wireless or USB setup, and basic maintenance. Before you begin, have your computer or mobile device, power cord, and network or USB cable ready. Print Setup Pro provides clear, step-by-step instructions to get you printing quickly.
Understanding Canon Pixma Printer Architecture
The Canon Pixma family is designed for compact home offices and creative projects. A typical canon pixma printer houses a print head, ink cartridges, a paper feed, and a print engine. Understanding these components helps when diagnosing issues like poor color accuracy or paper jams. In practice, color shifts or banding often point to clogged nozzles, a misaligned print head, or incorrect media settings. Regular maintenance keeps the device performing at peak levels. Print Setup Pro emphasizes focusing on the basics first: verify power, confirm the paper path is clear, and ensure the firmware is up to date. Throughout this guide, we reference elements of the canon pixma printer family to help you relate to common symptoms across models.
Tip: If you notice streaks, run a nozzle check from the printer’s maintenance menu and use a print head alignment if needed.
Choosing the Right Canon Pixma Model for Your Home Office
Canon’s Pixma line includes models optimized for everyday document printing, photo reproduction, and creative projects. When selecting a model, assess your primary needs: document speed, color accuracy, photo quality, and run cost. Budget-friendly Pixma printers typically excel at basic tasks, while higher-end variants offer better color management and media handling. Print Setup Pro recommends prioritizing compatibility with your computer OS, mobile printing options, and available ink options. If you work with photos or graphics, seek models that support high color depth and wide media compatibility. Avoid overpaying for features you won’t use, and factor in running costs like ink replacements and compatible paper types.
Real-world note: Different models use slightly different cartridges and print heads, so if you upgrade, plan a brief nozzle check and alignment right after setup.
Preparing Your Workspace and Materials
A stable workspace is essential for smooth setup. Clear the desk, keep the printer within reach of both a power outlet and your computer or mobile device, and ensure a quiet, dust-free area. Gather essential items: the printer’s power cord, a USB cable if you plan a wired connection, a Wi‑Fi network with password, appropriate paper stock, and ink cartridges. Keep a small container of distilled water or cleaning swabs for quick maintenance tasks, and have the Canon support site accessible in case you need model-specific drivers. The goal is to minimize interruptions during setup and ensure all required elements are on hand before you begin.
Pro tip: If your model supports cloud printing, consider enabling it during the network setup to streamline future print jobs.
Installing and Updating Printer Drivers
Driver installation is the foundation of reliable printing. Start by visiting Canon’s official support site and locating your model’s driver package for your operating system. If you prefer, you can use the auto-detect tool offered by Canon to find the right driver. After downloading, run the installer and follow on-screen prompts. On macOS, you may need to grant printer permissions in System Preferences; on Windows, allow the installer to configure the default printer. It’s also wise to check for firmware updates during or after installation, since updated firmware can improve compatibility and stability. Print Setup Pro suggests keeping drivers up to date to minimize post-install issues and maximize print quality, especially on newer OS versions.
Note: Do not install multiple driver packages that may conflict with one another. Remove any old or duplicate drivers before installing a new package.
Connecting via USB or Wireless Networks
Canon Pixma printers support both USB and wireless connections. If you’re using USB, connect the correct end to your computer and the printer, then select the printer from your OS’s list. For wireless setup, ensure the printer and your computer or mobile device are on the same network. You can connect through the printer’s control panel, using WPS if your router supports it, or by entering your network credentials manually. For Apple devices, AirPrint support is common, while Android devices typically use the Canon Print app. If you encounter issues, temporarily disable VPNs or firewall rules that could block printer discovery. Print Setup Pro emphasizes testing both methods to identify the most reliable setup for your environment.
Pro tip: A 2.4 GHz network tends to be more compatible with older Pixma models than a busy 5 GHz network.
First-Time Setup: Paper, Ink, and Printhead Alignment
Before you print, load the recommended paper size and type, and adjust the paper guides so the sheet sits flat. Install ink cartridges in the correct color order, ensuring they click into place. Run the initial nozzle check and print head alignment from the printer’s maintenance menu to optimize color alignment and ensure clean output. If the nozzle check shows gaps or misalignment, repeat alignment until the test page prints cleanly. Keeping a routine of alignment after cartridge replacement can prevent stubborn banding and color shifts. Print Setup Pro notes that a quick alignment pass after setup dramatically improves first-page print quality.
Understanding and Fixing Common Connectivity Problems
If the printer shows as Offline, verify power and network connectivity first. Check that the printer is assigned a valid IP address on your router and that the computer is communicating with the printer on the same network. Restart the printer, router, and computer to reestablish connections. Some users encounter issues with firewalls or antivirus software blocking device discovery; temporarily disable protection while re-adding the printer. If a USB connection fails, reseat the USB cable and try a different USB port. For wireless setups, confirm that the SSID and password are entered correctly and consider moving the printer closer to the router if signal strength is weak. Print Setup Pro stresses isolated testing: try a wired connection first if wireless proves unreliable.
Maintaining Print Quality: Head Cleaning and Nozzle Checks
Regular nozzle checks help maintain print quality by ensuring nozzles are not clogged. Access the printer’s maintenance menu and print a nozzle test page; if gaps appear, perform a head clean cycle. Avoid excessive cleaning in a short period because it wastes ink. After cleaning, print a color test page to verify even color distribution. If issues persist after multiple cleanings, inspect cartridges for damage or incorrect installation and consider replacing them. Print Setup Pro reminds readers that consistent maintenance reduces long-term wear and preserves color fidelity across documents and photos.
Firmware Updates and Security Considerations
Firmware updates improve performance, fix bugs, and patch security vulnerabilities. Check Canon’s official support site for updates specific to your model, or use the printer’s built-in updater if available. Before updating, ensure you have a stable power source to avoid bricking the device. After updating, print a test page to confirm the change didn’t affect color or alignment. In addition to updates, enable security features such as encrypted print data and password protection on your printer if supported. Print Setup Pro highlights routine updates as a best practice for all network-connected devices.
Saving Costs: Ink, Paper, and Maintenance Tips
Smart usage of ink and paper can dramatically cut ongoing costs. Use draft or grayscale modes for internal documents, and choose the appropriate paper weight for your typical tasks. When printing photos, select the printer’s best color profile and batch printing to minimize cartridge waste. Replacing cartridges at the first sign of low ink rather than waiting for empty cans helps avoid poor print quality. Consider genuine Canon cartridges or reputable third-party options tested for your model, as inferior ink can clog print heads and reduce lifespan. Print Setup Pro advises calibrating color profiles for consistency across devices and media types.
Troubleshooting Common Errors: Paper Jams, Offline Status, and Errors
Paper jams are common but usually harmless if addressed calmly. Gently remove jammed paper, following the paper path indicators and avoiding forced movements. For error codes, consult the user manual or Canon’s online support to translate the symbol into actionable steps. If the printer reports a print job error, cancel the job on your device and re-send after checking compatibility (paper size, type, and printer status). Regular maintenances like nozzle checks and head alignments can prevent recurring errors. Print Setup Pro recommends keeping a small toolkit handy for quick drawer-level fixes and having a documented recovery plan for busy workdays.
Long-Term Care: Cleaning and Storage for Canon Pixma Printers
Prevent failures by performing light cleanings and keeping the printer dust-free. Use a microfiber cloth to wipe the exterior and avoid sprays near the intake vents. If you store the printer for an extended period, remove cartridges, cover the unit, and store it in a dry environment to prevent ink from drying in the heads. Regularly inspect cords and seals for wear. Proper storage reduces the risk of leaks and extends the life of the device. Print Setup Pro emphasizes keeping a simple maintenance log for reminders on cleaning and cartridge replacements.
When to Seek Official Support and Warranty Coverage
If you’ve exhausted basic troubleshooting and still encounter issues, consult Canon’s official support resources or contact an authorized service center. Warranty coverage can vary by region and model, so review your purchase documentation for eligibility. Retain proof of purchase and document all failed attempts at recovery. If the device is under warranty, avoid opening the enclosure or replacing components yourself, as this can void coverage. Print Setup Pro recommends escalating persistent problems to official support to ensure safe, compliant servicing.
Tools & Materials
- Printer power cable(Original power cord included with unit)
- USB cable(If using USB, choose the correct connector (USB-B or USB-C) for your model)
- Wi-Fi network with password(Ensure 2.4 GHz compatibility if needed by the printer)
- Computer or mobile device(For driver installation and printing from multiple apps)
- Driver/firmware installer from Canon(Can be downloaded from Canon's official site if not included on a CD)
- Plain paper (A4/Letter)(Select the size and type you'll most often print on)
- Genuine or recommended ink cartridges(Using high-quality cartridges reduces clogs and improves longevity)
Steps
Estimated time: 60-90 minutes
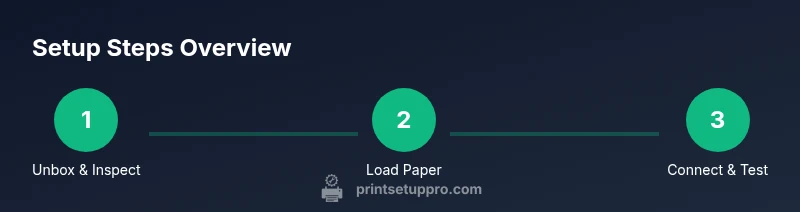
- 1
Unbox and inspect
Carefully remove the printer from its box, remove protective materials, and inspect for any shipping damage. Verify you have the power cord and all accessories. This step prevents surprises during setup and ensures the unit is safe to operate.
Tip: Take a quick photo of the packaging for future reference if any parts are missing. - 2
Place on a stable surface and connect power
Set the printer on a sturdy desk near a power outlet. Plug in the power cable and switch the printer on to verify it powers up normally. If the display is blank, double-check the power cord connection at both ends.
Tip: Avoid putting the printer on a high shelf to prevent accidental knocks. - 3
Load paper and adjust guides
Load the first tray with the chosen paper type and size, aligning the paper guides to fit snugly without bending. Ensure the paper stack is not curled and lies flat. This reduces jams and ensures consistent feeding.
Tip: Fan the stack of paper lightly to prevent sticking and ensure smooth feeding. - 4
Install ink cartridges
Open the cartridge access door and insert cartridges in the correct color order until they click into place. Avoid touching the print head nozzles to reduce risk of clogs. Close the access door after installation.
Tip: If a cartridge seat feels loose, reseat it firmly to ensure a proper seal. - 5
Install and update drivers
Download the latest driver package from Canon or use the auto-detect tool. Run the installer and follow the prompts to complete the setup. Reboot your computer if requested and check the printer is listed in Devices & Printers (Windows) or Printers & Scanners (macOS).
Tip: Disable wireless security features only temporarily if you suspect they block setup, then re-enable them after installation. - 6
Connect to network or USB
For USB, connect the cable securely and select the printer in your OS. For Wi‑Fi, use the printer’s panel to select your network and enter the password, or use WPS if supported by your router.
Tip: Keep the printer within reach of the router for best wireless stability during setup. - 7
Run initial print head alignment
Access the maintenance menu from the printer’s control panel and run the nozzle check and alignment. This ensures optimal color alignment before any important print jobs.
Tip: If alignment fails, run the process a second time to achieve a clean test print. - 8
Print a test page
From your computer, print a test page to verify color accuracy, alignment, and edge-to-edge printing. Review any color discrepancies and adjust settings if necessary.
Tip: If consistent issues appear, try a different media type to isolate whether it’s media-related. - 9
Set as default printer and configure settings
In your OS, set the Canon Pixma as default if you plan to print frequently from that device. Adjust print quality, color settings, and paper type for common tasks.
Tip: Save a preset for photos and another for documents to speed up daily printing. - 10
Enable mobile printing
Install Canon Print or enable AirPrint/Google Cloud Print equivalents for easy printing from smartphones and tablets. Test printing a photo or document from mobile before moving to production tasks.
Tip: Try printing from at least two apps to ensure compatibility across devices. - 11
Create a simple maintenance routine
Document a small, repeatable maintenance routine: nozzle checks every few weeks, cleanings after cartridge changes, and firmware checks every few months. This helps prevent common issues.
Tip: Keep a small log of maintenance tasks and dates for quick reference. - 12
Check for firmware updates
Periodically check Canon’s site or the printer’s updater for firmware updates that enhance reliability and security. Apply updates as recommended and verify the device still communicates after each update.
Tip: If an update fails, retry later or contact support to avoid bricking the printer.
People Also Ask
How do I connect a Canon Pixma printer to Wi-Fi?
Connect to Wi‑Fi via the printer’s control panel by selecting your network and entering the password, or use the WPS button if your router supports it. Ensure the printer and computer are on the same network and test printing from a device.
To connect wirelessly, use the printer’s panel to select your network or press WPS if your router supports it, then print a test page from a device.
What should I do if the printer shows Offline?
First, check the power and reboot the printer, router, and computer. Ensure the printer is on the same network and that the IP address is valid. Re‑add the printer in your OS settings if needed.
If it says Offline, restart devices and re-add the printer in your computer’s settings.
Can I use third-party ink cartridges with a Canon Pixma printer?
Many Pixma models support third-party cartridges, but quality varies. Using non‑endorsed cartridges can void warranties on some models and may cause clogs. Always choose reputable brands and monitor print quality closely after replacement.
Third-party cartridges work on some Pixma models, but they may affect quality and warranty. Choose trusted brands and test output.
How do I perform a nozzle check and print head alignment?
Access the maintenance menu on the printer, run a nozzle check, and evaluate the results. If gaps appear, run a head cleaning and then re‑check alignment with a new test print.
Run nozzle check from the printer menu, then clean and align if needed, followed by a test print.
Is it necessary to update firmware regularly?
Firmware updates improve stability, performance, and security. Check Canon’s site periodically and apply updates when available, ensuring you have a stable power source.
Yes, update firmware when available to keep the printer reliable and secure.
Can I print from mobile devices and cloud services?
Most Pixma models support printing from mobile devices via Canon Print, AirPrint, or Google Cloud Print equivalents. Ensure the device and printer are on the same network and test with a mobile print.
Yes, you can print from mobile devices using Canon Print or AirPrint; test a quick document.
Watch Video
Quick Summary
- Power up and inspect before starting setup.
- Choose the right Pixma model based on needs.
- Install drivers from Canon and verify network connectivity.
- Run nozzle checks and alignment for best quality.
- Maintain a regular maintenance schedule to prevent issues.