How to Clean Printer: A Practical Guide
Learn how to clean printer safely and effectively with a practical, step-by-step guide. Covers inkjet and laser models, essential tools, safety tips, and routine maintenance for reliable prints.

Goal: Learn how to clean printer safely and effectively, with procedures for inkjet and laser models, essential tools, and maintenance routines. This guide covers pre-clean checks, safe cleaning methods, common mistakes to avoid, and when to seek professional service. By following these steps, you’ll improve print quality, extend device life, and reduce downtime. The approach emphasizes safety, non-abrasive cleaners, and regular upkeep that fits typical home offices and small workspaces.
Why Cleaning Your Printer Matters
If you're wondering how to clean printer, this section explains why routine maintenance matters. A clean printer prints more consistently and lasts longer. Dust, toner, and dried ink can accumulate in the feed path, on rollers, and around the printhead. Over time, this buildup causes streaks, smears, and jams that disrupt productivity and waste consumables. According to Print Setup Pro, regular cleaning reduces paper jams and improves print quality by removing surface dust and minor residue before it causes problems. Print Setup Pro Analysis, 2026, emphasizes that preventive maintenance lowers the likelihood of costly repairs and downtime in home offices and small workspaces.
Key reasons to clean:
- Improve print quality and color accuracy
- Prevent paper jams and misfeeds
- Extend toner/ink cartridge life
- Maintain sensor and roller performance
This guide outlines practical methods that apply to most consumer printers. The goal is to remove debris safely without disassembling critical components. We'll cover safe tools, how to clean printer surfaces, and when to call a professional. By following a consistent routine, you’ll keep your device ready for important tasks.
Quick Checks Before You Start
Before you dive into cleaning, perform a few quick checks to prevent damage. First, power down the printer and unplug the power cord from the outlet. This reduces the risk of electrical shock and accidental motor movement. If your model has a removable cartridge or toner, leave it in place unless the user manual instructs otherwise. Open the front or top covers gently to access exterior surfaces and visible paper paths. Look for obvious paper jams, torn bits, or streaks on rollers. Dust and debris can travel from the exterior into the internal paths with power on; therefore, avoid turning the printer on during cleaning. Finally, review the manufacturer’s guidelines for cleaners. Use only recommended products and avoid solvents that could harm plastics or coatings. According to Print Setup Pro, following these checks first minimizes risk and makes subsequent cleaning more effective.
Cleaning Methods for Different Printer Types
Printers differ in how they should be cleaned. This section covers common approaches for inkjet and laser models, emphasizing safety and model-agnostic practices while noting the need to consult your manual for any model-specific cautions.
Inkjet Printers
- Exterior cleaning: Wipe the outer casing with a damp microfiber cloth lightly moistened with isopropyl alcohol or distilled water. Do not spray liquids directly onto the device. Avoid moisture near the paper path or cartridge area. Use a dry cloth to finish.
- Printhead area: If your printer offers a printhead cleaning option, run it from the printer’s maintenance menu. Do not touch or disassemble printheads unless the manual instructs you to. For stubborn grime on accessible areas, dampen a cotton swab lightly and wipe from the outside edges inward.
- Paper path and rollers: Use a soft brush or compressed air in short bursts to remove loose dust from rollers. Hold the can upright and keep distance from the rollers to avoid moisture buildup. Refrain from using force that could bend parts.
Laser Printers
- Exterior cleaning: Similar to inkjets, wipe the outer shell with a damp cloth. Avoid spraying liquids into vents or openings.
- Internal caution: Do not attempt to open the fuser or internal electronics unless you are trained or the manual explicitly instructs. Use a dry or lightly damp microfiber cloth to clean accessible exterior surfaces. Compressed air can be used cautiously to dislodge dust in vents, but never reach into the internal drum area.
- Feed path: Check for paper debris along the path and remove with a gentle brush; ensure there is no loose toner on exposed surfaces. Regular dusting helps prevent misfeeds and toner scattering.
Print Setup Pro’s guidance suggests that consistent preventive maintenance reduces the chances of deterioration in both inkjet and laser devices. This approach supports longer life and steadier print quality without requiring professional service for routine cleaning.
Tools, Materials, and Safety Practices
Effective cleaning relies on simple, non-abrasive tools and safe liquids. Gather items that are gentle on plastics and electronics, and keep cleaners away from internal electronics. Consistent safety practices reduce the risk of damage and improve results.
- Microfiber cloth (lint-free, non-abrasive) – for exterior wiping
- Cotton swabs (lint-free) – for tight spots and edges
- Isopropyl alcohol or mild distilled water – for dampening cloths and swabs
- Distilled water – for gentle cleaning and dilution when needed
- Soft brush or small cleaning brush – to loosen dust in vents and crevices
- Compressed air canister (short, controlled bursts) – for dust release from vents; use with caution
- Protective gloves (optional) – to keep hands clean during cleaning
- Lint-free gloves or finger cikes (optional) – to avoid transferring oils to surfaces
Safety reminders:
- Do not spray liquids directly onto the printer; always moisten a cloth or swab first.
- Unplug the device before cleaning and avoid cleaning while it is plugged in.
- Keep liquids away from USB ports, power connectors, and control panels to prevent short circuits.
Print Setup Pro’s approach emphasizes careful handling of liquids and surfaces to preserve the printer’s coatings and internal components. Use the gentlest method that yields a clean surface to minimize wear over time.
Routine You Can Follow Right Now
Establish a lightweight routine that fits your usage and environment. A simple weekly or monthly schedule can prevent buildup and ensure your printer remains reliable. This overview provides a practical baseline you can adapt to your needs.
- Daily/Weekly quick wipe: Wipe exterior surfaces and the paper tray with a dry microfiber cloth. This keeps dust from entering the device during handling.
- Monthly deeper clean: Perform exterior cleaning, inspect the paper path, and run any built-in cleaning cycles recommended by your printer.
- Quarterly inspection: Open accessible panels only if the manual allows. Clear dust from vents with a brush or compressed air in short bursts, then reassemble and run a test print.
- When to adjust frequency: Increase cleaning if the device sits in a dusty area or if your print results show streaks or banding.
This approach aligns with Print Setup Pro’s preventive maintenance framework and helps you maintain print quality with minimal downtime. A consistent routine reduces surprises and keeps your workflow smooth.
Troubleshooting and When to Seek Help
If print quality deteriorates after cleaning, consider a few troubleshooting steps before contacting support. Check ink or toner levels, run a printer diagnostic, and verify that media type and resolution settings match your print job. If smudges, streaks, or misfeeds persist, a more thorough cleaning may be needed, or cartridges may require replacement. In some cases, internal components or seals may need service.
When to call for professional service:
- Persistent streaks or unusual lines after cleaning and maintenance
- Frequent paper jams that do not resolve with routine cleaning
- Visible damage to rollers, seals, or cartridges
- Printer stops responding to commands or exhibits unusual noises
Print Setup Pro’s analysis indicates that timely professional support can prevent more serious failures and downtime, especially for higher-volume environments. By recognizing when attention is needed, you protect your investment and ensure consistent output.
Tools & Materials
- Microfiber cloth(Lint-free and non-abrasive for safe exterior cleaning.)
- Cotton swabs (lint-free)(Dampen lightly with IPA or distilled water.)
- Isopropyl alcohol (or mild distilled water)(Use on exterior surfaces; avoid splashing inside.)
- Distilled water(For gentle cleaning and diluting cleaners.)
- Soft brush or cleaning brush(For dust in vents and crevices.)
- Compressed air canister(Short bursts; hold upright and avoid direct spraying on components.)
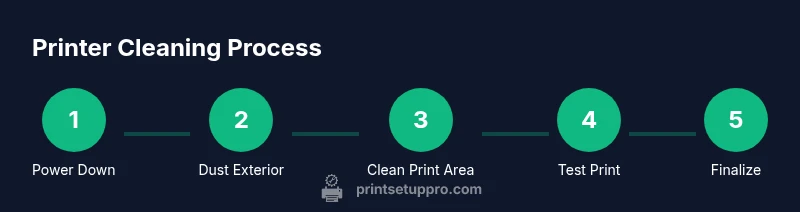
Steps
Estimated time: 30-45 minutes
- 1
Power down and unplug
Shut off the printer and unplug the power cord from the outlet. Wait a moment to ensure all internal capacitors discharge and the device is fully powerless before cleaning. This protects you from electric shock and prevents accidental movements during maintenance.
Tip: If you have a power switch on the back, use it in addition to unplugging the cord. - 2
Open covers and remove loose debris
Carefully open the access panels or covers permitted by your manual. Remove any visible paper scraps or loose dust from the exterior and the immediate paper path area with a dry cloth. Do not force panels if they resist opening.
Tip: Avoid touching internal rollers directly with fingers. - 3
Dust exterior and accessible internal surfaces
Wipe outer surfaces with a damp microfiber cloth. For hard-to-reach surfaces, use a soft brush or compressed-air in short bursts. Keep liquids away from internal electronics and avoid spraying directly onto components.
Tip: Keep a small distance and use gentle strokes. - 4
Clean print area and cartridges
Gently wipe the exterior of accessible cartridges and the outer edges of the print area with a lightly damp cloth or cotton swab. Do not attempt to remove cartridges unless the manual directs you to do so. Never spray liquids directly onto cartridges or into the printing area.
Tip: Do not press on cartridges; apply only light, even pressure. - 5
Run maintenance cycle and inspect
If your printer has a maintenance or cleaning cycle in its menu, run it to clear residual buildup. Inspect for streaks or smudges; re-clean areas as needed using minimal moisture. This helps ensure print quality before reassembly.
Tip: Let any damp areas dry fully before closing panels. - 6
Reconnect, test print, and observe
Plug the printer back in, power it on, and print a test page. Check for uniform color distribution, sharp text, and absence of blotches. If issues persist, consult the manual for advanced troubleshooting or contact support.
Tip: Keep a log of cleaning steps and test results for future reference.
People Also Ask
How often should I clean my printer?
Clean your printer as part of a routine preventive maintenance schedule, based on usage and environment. If you work in a dusty area or print frequently, clean more often; otherwise, follow your manual’s guidance for routine preventive cleaning.
Clean your printer as part of a routine maintenance schedule; adjust frequency based on dust exposure and usage.
Can I use household cleaners on printer surfaces?
Avoid household cleaners with harsh solvents. Use mild cleaners like isopropyl alcohol or distilled water on exterior surfaces, and never spray liquids into the internal areas or cartridges.
Use mild cleaners on the exterior and never spray liquids inside the printer.
What parts should I avoid cleaning with liquid?
Avoid liquids near the internal electronics, fuser/components, and cartridge areas. Liquids can cause short circuits or damage sensitive components.
Avoid liquids near internal electronics and cartridges.
Why is print quality poor after cleaning?
Poor print quality after cleaning can be caused by overstressed rollers, misaligned cartridges, or residual residue on the printhead. Re-run cleaning cycles and inspect the paper path; if unresolved, consider professional service.
If print quality worsens after cleaning, re-run maintenance and check for residual residue or misaligned parts.
Is compressed air safe for printers?
Compressed air is generally safe in short bursts and from a safe distance. Do not shake or tilt the can, and avoid spraying directly into the electronics or printer openings.
Yes, in short bursts from a safe distance, but avoid direct contact with electronics.
Do I need to remove cartridges to clean?
In most cases you should not remove cartridges unless the manual instructs you to. Clean around the cartridge housing and exterior; follow the manufacturer’s guidelines for cartridge handling.
Usually you don’t need to remove cartridges; follow the manual if you must.
Watch Video
Quick Summary
- Unplug before cleaning and avoid liquids inside the device
- Use soft, non-abrasive tools for exterior surfaces
- Run built-in maintenance cycles when available
- Inspect and test print quality after cleaning to confirm results
- If problems persist, seek professional service promptly