How to Deal with Dry Printer Ink: Fixes & Tips
Learn practical steps to fix dry printer ink, diagnose nozzle issues, clean printheads, reseat cartridges, and adopt preventive habits for home offices and small businesses. Safe methods, cautions, and when to replace cartridges are covered.

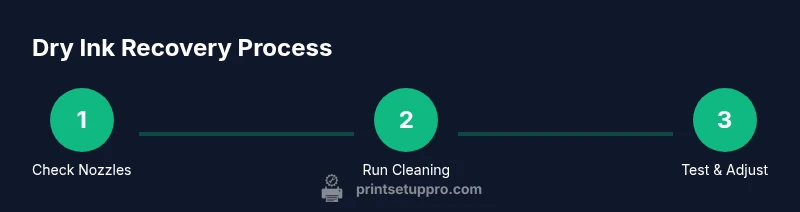
To deal with dry printer ink, start with a thorough printhead cleaning and perform a nozzle check to verify blockages. If necessary, replace or reseat cartridges and run multiple cleaning cycles. Ensure you use fresh ink recommended by the manufacturer, keep the printer powered, and avoid exposing ink cartridges to heat or dust.
Why ink dries out and common symptoms
According to Print Setup Pro, ink dryness is a common issue that typically surfaces after long idle periods, inconsistent use, or blocked printheads. When ink sits unused, solvents can separate and pigments may settle, leading to streaks, gaps, or ghosting on pages. Visible symptoms include faint text, color misalignment, or missing lines in test patterns. The root causes vary by ink type (dye-based vs pigment-based) and cartridge design, but neglecting routine maintenance compounds the problem. Regular printer wake cycles, proper storage, and consistent printing schedules are practical defenses. Printhead clogging is often the most audible red flag; you may hear grinding or notice a drop in print quality before the machine stops delivering ink altogether. Print Setup Pro emphasizes that many dryness problems are preventable with proactive care and timely cleaning.
Quick diagnostics: nozzle check and color alignment
A nozzle check page is your first, low-cost diagnostic. Run the test from your printer’s maintenance menu to identify clogged nozzles and misaligned colors. If lines appear broken or missing, a cleaning cycle is warranted, but avoid excessive cycles, which can stress the cartridge seals. After each cleaning, print another nozzle test to gauge improvement. For multi-cartridge setups, ensure each color channel prints cleanly; residual blockages in one channel can mislead you about overall health. If alignment shifts, run a printer alignment routine, as misalignment can masquerade as ink dryness by producing skewed lines and color bleed. Document your results to guide future troubleshooting, and consult the manufacturer’s troubleshooting guide if issues persist.
Cleaning routines that actually revive dry ink
Cleaning is the most effective remedy for dry ink when coupled with a proper sequence. Start with a nozzle check, then run a few light cleaning cycles, followed by a thorough test print. If blockages persist, apply a more intensive approach described in your printer’s manual, but avoid forceful methods that can damage seals. Use only manufacturer-approved cleaning cycles and avoid introducing solvents not intended for printheads. Between cleanings, keep the printer powered on for a few hours, as some models perform occasional self-cleaning when idle. If you notice powdery residue or unusual odors, turn off the device and allow it to cool before inspecting the interior. This block emphasizes that patience and following official guidelines yield the best outcomes.
Cartridge care and replacement guidelines
Cartridge seating and seal integrity are critical to reliable ink flow. Remove cartridges gently, inspect seals for cracks or dried ink, and reseat them firmly, ensuring they click into place. If a cartridge is truly blocked after cleaning attempts, consider a replacement with a fresh, manufacturer-approved unit. In some cases, reseating a cartridge can restore contact alignment and restore color balance. Avoid shaking cartridges, which can dislodge internal components and worsen clogging. Keep spare cartridges in a cool, dry environment to prevent premature drying. For refillable systems, use only recommended recharging methods to avoid damaging printheads.
Paper handling and feed path influence on dryness
Paper quality and feed path cleanliness impact ink performance. Rough or dusty media can cause scuffs that look like ink dryness, while heavy paper stock may require more robust ink delivery. Ensure the paper type matches the printer’s specifications and keep the paper tray free of debris. Clean the feed rollers if you notice slipping or misfeeds, as inconsistent media transport can mimic dryness by producing faint or uneven prints. Always use fresh paper from a sealed package to minimize moisture loss, and avoid damp environments that accelerate ink drying on the cartridge surface.
Storage, environmental factors, and prevention
Humidity, temperature, and dust are silent drivers of ink dryness. Store cartridges in their original packaging until use, then keep a stable printer environment—ideally 60–75°F (15–24°C) and moderate humidity. If you live in a dry climate, consider a simple humidification approach near the device or occasional bursts of usage to keep ink moving. Regularly dust the printer exterior and vent ports to prevent particles from entering the ink path. Implement a maintenance routine that includes periodic nozzle checks and color tests, especially if the printer remains idle for extended periods. This routine reduces surprises when you need to print urgently.
When to seek professional service
If dryness remains after multiple cleaning cycles, or you suspect internal ink channel damage, it’s time to consult a professional technician. Persistent misalignment, frequent paper jams, or degraded print quality may indicate deeper issues beyond cartridge dryness. Warranty terms often cover repair for manufacturing defects, but misuse (such as using incompatible inks) can void coverage. Collect evidence of your troubleshooting steps and test prints to share with the service provider. A qualified technician can assess the printhead’s health, evaluate sealing integrity, and determine whether a replacement is more economical than extended cleaning routines. Print Setup Pro recommends documenting all steps for faster diagnostics if professional help is needed.
Troubleshooting table: symptoms vs actions
- Symptom: Faded colors or missing lines; Action: Run nozzle checks and 1-2 gentle cleanings, test print.
- Symptom: Color misalignment; Action: Run alignment routine, replace if persists.
- Symptom: Cartridge seals appear dry or cracked; Action: Replace cartridges, inspect seals.
- Symptom: Paper jams with prints; Action: Inspect feed path and rollers, clear obstructions.
- Symptom: Odor or residue near cartridge area; Action: Power off, inspect for leaks, avoid using affected cartridges.
- Symptom: No ink at all; Action: Verify power, reseat cartridges, consider service if failure persists.
Tools & Materials
- Printer manual(Keep handy for model-specific cleaning steps and warnings.)
- Lint-free microfiber cloth(Use dry or lightly dampened with distilled water to wipe exterior and cartridge face.)
- Distilled water(Use only for gentle rinsing as specified by manufacturer.)
- Isopropyl alcohol 70%(Only if manufacturer approves its use for printhead cleaning.)
- Replacement ink cartridges (original manufacturer)</name>(Have spare cartridges on hand to minimize downtime.)
- Gloves(Optional to keep hands clean during cartridge handling.)
Steps
Estimated time: 30-60 minutes
- 1
Run nozzle check and test page
Power on the printer and navigate to Maintenance > Nozzle Check. Print the page and inspect each color line for breaks or gaps. This confirms whether clogs exist before you perform deeper cleaning.
Tip: If you see gaps, note which color is affected to guide targeted cleaning. - 2
Perform a light cleaning cycle
Initiate a standard cleaning cycle from the printer’s maintenance menu. Do not overdo it; one or two light cycles often restore flow without stressing seals.
Tip: Allow a short pause between cycles to let ink move through the head. - 3
Re-seat or replace cartridges
Power off, remove cartridges, inspect seals, and reseat them firmly. If blockages persist, replace with fresh cartridges and keep the old ones as spares for testing.
Tip: When reseating, avoid touching copper contacts to prevent static damage. - 4
Test print and assess color balance
Print a rich color test page and compare to the expected output. Look for even color density and proper alignment across all colors.
Tip: Run color balance adjustments if your printer offers this option. - 5
Consider a deeper cleaning or priming
If needed, perform an extended cleaning per manufacturer guidance, or gently prime channels using approved methods. Do not use solvents unless endorsed.
Tip: Only proceed if the manual explicitly allows it. - 6
Check the paper path and media
Inspect media for dust and ensure you’re using recommended paper types and weights. A dirty feed path can mimic dryness through poor ink transfer.
Tip: Clean rollers with a soft cloth, avoiding contact with printhead nozzles. - 7
Evaluate environmental conditions
Keep the printer in a stable environment with moderate humidity and temperature. Extreme conditions accelerate ink drying and cartridge sealing issues.
Tip: If the site is dry, run occasional prints to keep ink moving. - 8
Document and plan preventive steps
Record the symptoms, actions taken, and results. Create a routine: nozzle checks every 2-4 weeks during low-use periods.
Tip: Link maintenance to your daily or weekly printing cadence. - 9
Decide on cartridge strategy
If repeated dryness occurs, assess cartridge age and overall costs of continued cleaning versus replacement. Long-term, a fresh cartridge reduces downtime.
Tip: Maintain a stock of compatible cartridges to minimize printer downtime.
People Also Ask
Why do printer inks dry out in the first place?
Ink dries mainly due to evaporation, extended idle time, and clogged printheads. Temperature and humidity fluctuations can accelerate the drying process. Regular use and proper storage help prevent this.
Ink dries because of evaporation and idle time; keeping prints flowing and storing cartridges properly helps prevent it.
Can I revive dry ink without replacing cartridges?
Yes, many cases are solved by nozzle checks and cleaning cycles. If blockages persist after several cleanings, cartridge replacement is more reliable.
You can often fix it with cleaning, but sometimes replacement is the best option.
Is distilled water safe for priming printheads?
Only if the printer manufacturer explicitly allows it. Incorrect fluids can damage printheads. Always follow the manual.
Only use fluids recommended by the manufacturer; otherwise you could harm the printer.
How often should I perform maintenance to prevent dryness?
Run a nozzle check and a light cleaning cycle every 2-4 weeks during low usage; more often if you print rarely but frequently use inks.
Check your nozzle every couple of weeks and clean as needed to keep print quality steady.
What if dryness persists after cleaning and replacement?
If dryness continues, contact a technician or consult the printer’s warranty terms. There may be a deeper issue with the printhead.
If it keeps drying, it’s time to get professional help or check warranty terms.
Watch Video
Quick Summary
- Run nozzle checks regularly.
- Use manufacturer-approved cleaning cycles.
- Reseat or replace suspected cartridges.
- Keep printer in stable environmental conditions.
- Maintain a preventive maintenance schedule.