How to Prevent Printer Clogging: A Practical Guide
Learn proven steps to prevent printer clogging, improve reliability, and extend printer life. This guide covers causes, routine maintenance, paper quality, cleaning, and when to seek professional help.

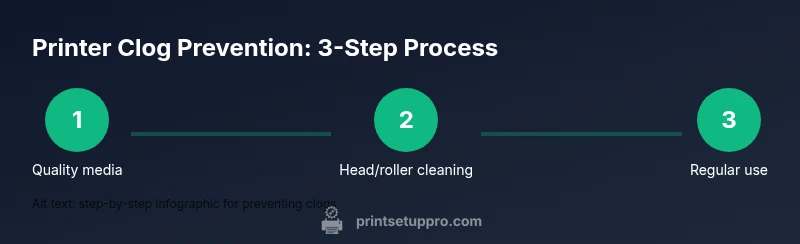
According to Print Setup Pro, you can prevent printer clogging by adopting a proactive maintenance routine for inkjet and laser printers. Start with quality media and cartridges, keep nozzles and rollers clean, and run cleaning cycles only when needed. Store cartridges upright, avoid long gaps, and follow manufacturer guidance to minimize ink or toner buildup.
Why printers clog: understanding the culprits
Clogging happens when residual ink or toner dries and forms deposits that block flow through print heads, nozzles, or the printer’s cleaning mechanisms. For inkjet printers, dried ink can create stubborn barriers that impair droplet formation; for laser printers, residue can accumulate in the cleaning rollers or fuser area. Common culprits include aging cartridges, long periods of inactivity, and using paper that sheds fibers or leaves dust behind. While it’s tempting to blame one factor, most clogs result from a combination of consumables, usage patterns, and media quality. Print Setup Pro Analysis, 2026, notes that routine maintenance and high-quality consumables greatly reduce clogging risk. By understanding these drivers, you can tailor a prevention plan rather than chase symptoms after a jam.
Pro tip: keep a simple notebook or digital reminder to track cartridge dates, cleaning cycles, and paper changes to identify patterns before a clog forms.
Building a preventive maintenance routine
A solid prevention plan is repeatable and simple enough to do weekly. Start with essential supplies, set a reminder, and keep the printer in a clean, dust-free area away from direct sunlight and humidity spikes. Create a micro-routine: inspect consumables for leaks, reseat cartridges, perform a nozzle check (for inkjets) or alignment (for lasers), and verify tray settings with the target media. Consistency matters more than intensity: small, regular actions beat sporadic deep cleaning. Include firmware and driver checks on your calendar to ensure the software isn’t contributing to clogs via miscalibrations. This approach reduces downtime and helps you detect early signs of trouble before a clog becomes a jam.
Note: Print Setup Pro emphasizes that predictable maintenance beats reactive fixes when dealing with print head health and media handling.
Cleaning and replacement practices: safe methods that work
Gently cleaning print heads, nozzles, and rollers is often enough to prevent subtle clogs. Use microfiber or lint-free cloths and only the recommended cleaners, never spray liquids directly into ports. For inkjets, run the nozzle check and cleaning cycle as prescribed by the manufacturer, and avoid excessive cleaning—over-washing can wear fragile heads. For laser printers, periodically inspect the cleaning roller and fuser area for toner buildup and use manufacturer-approved cleaning methods. When replacing cartridges, choose genuine or high-quality compatible brands and store them upright in a cool, dry place to prevent leakage and sediment formation. Regular maintenance reduces the likelihood of dried ink and toner causing flow issues.
Pro tip: document your cleaning schedule and the results of each nozzle test to spot trends that might indicate a failing head or clogged pathway.
Paper quality, storage, and environment: how media choices impact clogging
The media you feed your printer directly affects clog risk. Low-quality paper or paper that feathers and sheds fibers can deposit residues inside the feed path and cleaning system. Use the weight and finish recommended by the printer manufacturer, store paper flat in a dry, controlled environment, and avoid curling caused by humidity fluctuations. Keep the printer area free of dust and liquids, and ensure feeding trays are clean and free of scraps that could introduce debris. Periodically rotate stock to avoid old paper getting brittle. By standardizing your media choices, you reduce the chance of fiber buildup that traps ink or toner during cleaning cycles.
Extra care: consider humidity controls in rooms that store large paper quantities to minimize static and dust migration into the printer.
When to seek professional service and documenting issues
If you notice persistent head clogs, repeating paper jams, or print quality that can’t be resolved by routine cleaning, it’s time to escalate. Document symptoms with dates, affected pages, and error codes, then consult the printer’s official support resources or contact a certified technician. Regular maintenance plans with a local service provider can catch wear or component failures early, before they lead to costly replacements. Share your notes, the model and firmware version, and your recent maintenance history to help the technician diagnose the root cause quickly. In many cases, timely professional service prevents minor issues from becoming major operational disruptions.
Quick-start maintenance checklist (printable)
- Use manufacturer-recommended media and cartridges.
- Perform nozzle checks and cleaning cycles only as needed.
- Inspect and reseat cartridges during each maintenance window.
- Store consumables upright and keep the printer area clean.
- Update firmware and drivers to support optimal cleaning routines.
- Schedule routine maintenance on a calendar to build a predictable habit.
Tools & Materials
- Quality printer paper(Choose weight/finish per manufacturer guidance (e.g., 20-24 lb equivalent) and keep packaging intact to avoid moisture.)
- Original or high-quality compatible cartridges(Check expiry date; store upright; avoid storing empty or near-empty cartridges long-term.)
- Lint-free cloth or microfiber cloth(Use only for gentle surface cleaning; avoid abrasives.)
- Isopropyl alcohol (70%) or manufacturer-approved cleaning solution(Only use if recommended by the printer manufacturer; never spray directly into ports.)
- Soft brush or cotton swabs(Helpful for removing dust from exterior surfaces and accessible gaps.)
- Firmware/driver update access(Ensure you can connect to the internet or a computer to apply updates if needed.)
Steps
Estimated time: 30-60 minutes
- 1
Power down and unplug
Turn off the printer and unplug the power cord before starting any maintenance. This prevents electric shock and accidental movements of internal rollers. Wait at least 60 seconds for any residual power to dissipate, then open access panels if your model allows.
Tip: Always unplug before touching internal components. - 2
Inspect cartridges and reseat
Remove cartridges gently and inspect for leaks or dried ink. Reinsert cartridges firmly and ensure they click into place in their correct slots. If a cartridge is nearing end-of-life, replace it to prevent dry-out-related clogs.
Tip: Hold the cartridge by its edges to avoid touching the nozzle area. - 3
Run nozzle check and cleaning cycle
For inkjets, run a nozzle check to identify gaps and droplets. If gaps appear, run a manufacturer-recommended cleaning cycle, then recheck. Do not over-clean, as repeated cycles can wear heads.
Tip: If you see consistent gaps after cleaning, consider a professional service. - 4
Clean print head and rollers
Wipe accessible print head contacts and rollers with a damp microfiber cloth or cotton swab lightly dampened with cleaning solution. Avoid liquid pools; moisture can damage components. Let components dry completely before reassembly.
Tip: Never spray cleaner directly onto the print head or into internal ports. - 5
Check paper path and tray settings
Inspect the paper path for scraps, dust, or curled sheets. Ensure the tray guides match the paper size and that the media is loaded correctly. Misfeeds can deposit debris that contributes to clogs during cleaning cycles.
Tip: Fan or shake new paper to prevent static and reduce feeding problems. - 6
Update firmware and drivers
Connect the printer to the internet and apply any available firmware or driver updates. Updates can improve cleaning routines, waste less ink, and optimize head calibration for your media.
Tip: Back up settings before performing major firmware updates. - 7
Run a test print
After completing maintenance, run a test page to verify print quality. Look for even density, clean lines, and no repeating artifacts. If problems persist, repeat approved cleaning steps once or consult support.
Tip: Use a standard test page to compare before/after results. - 8
Set a maintenance cadence
Schedule a brief maintenance session weekly or monthly based on usage. Record results to spot trends and trigger professional service when needed.
Tip: Consistency over intensity yields better long-term head health.
People Also Ask
What causes printer heads to clog in inkjet printers?
Inks can dry in the nozzle assembly and form deposits that block flow. Infrequent use, aging cartridges, and low-quality media increase the risk. Regular nozzle checks and careful cleaning help maintain flow.
Head clogs are usually caused by dried ink, infrequent use, or old cartridges. Regular checks can prevent buildup.
How often should I run a cleaning cycle?
Run a cleaning cycle only when you notice degraded print quality or missing lines. Over-cleaning can wear the print head and reduce lifespan.
Only run cleaning when you see print quality issues; avoid over-cleaning.
Can using low-quality paper cause clogs?
Low-quality paper can shed fibers and dust that accumulate in the feed path and cleaning system, contributing to clogs over time. Use manufacturer-approved media.
Yes, cheaper paper can shed fibers that lead to clogging.
Is it safe to use alcohol for cleaning?
Only use isopropyl alcohol or manufacturer-approved solutions as directed, and never spray directly into ports. Many cleaners can damage sensitive components.
Only use approved cleansing solutions and avoid direct spraying into ports.
What if cleaning cycles don’t fix the issue?
If cleaning cycles don’t restore quality, document symptoms and contact support or a certified technician. Persistent issues may indicate a worn head or failed component.
If cleaning doesn’t help, seek professional support.
Does updating firmware help prevent clogs?
Firmware updates can improve calibration and cleaning algorithms, reducing clog risk. Keep drivers and firmware current.
Keeping firmware updated can improve cleaning and head health.
Watch Video
Quick Summary
- Start with quality media and cartridges
- Run cleaning cycles only when needed to avoid wear
- Regular maintenance reduces clog risk and downtime
- Document maintenance to spot trends early