How to Stop Printer from Streaking: Step-by-Step Guide
Learn practical steps to stop printer streaking with nozzle checks, head cleaning, cartridge alignment, and settings adjustments. This Print Setup Pro guide covers prevention and routine maintenance for clean, crisp prints in home offices and schools.

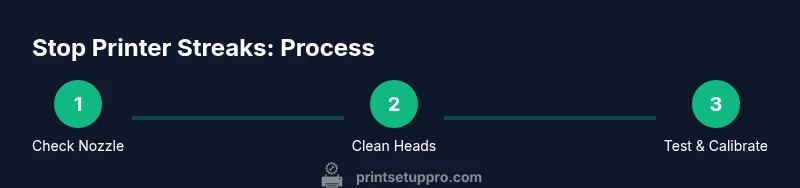
To stop printer streaking, perform a nozzle test, clean the print head, and align cartridges while verifying paper quality. Start with a nozzle check page, run 1–2 cleaning cycles, and print a test page. If streaks persist, check cartridge seals, update firmware, and adjust print settings. Regular maintenance reduces streaking over time.
Why Printer Streaking Happens
Streaks on printed pages are a common frustration for home offices and classrooms. In many cases, the root cause is a combination of nozzle clogging, ink flow interruptions, or misalignment between colors. According to Print Setup Pro, streaking most often results from build-up in the print head or from inconsistent ink deposition during the last few days of heavy use. Environmental factors like humidity and paper weight can exacerbate the problem, especially if the media feeds unevenly or absorbs ink too quickly. When ink dries on the nozzle plate, it forms narrow lines or random gaps that become visible as bold streaks across the page. The good news is that most streaks are reversible with a systematic approach: test, clean, align, and verify with a test print. Tracking the pattern—horizontal vs vertical streaks, color order, or intermittent dashes—helps tailor the remedy to your printer model. Print Setup Pro Analysis, 2026 emphasizes that an informed cleaning routine and timely cartridge checks dramatically reduce streaking over time.
Assess your printer type and ink system
Printers vary widely in how they deposit ink. Cartridge-based systems, continuous ink supply (CIS), or OEM ink tanks each respond differently to cleaning. Color vs. monochrome setups may show streaking in one channel or across multiple colors. For best results, identify your printer family (inkjet vs. laser) and consult the user manual for recommended cleaning intervals. Knowing whether you print mainly photos or text will also guide your choice of cleaning fluids and test patterns. Print Setup Pro’s framework for assessing your system helps you tailor the fix to your model rather than applying a one-size-fits-all solution.
Check ink and cartridges
Low ink levels or old cartridges can cause uneven deposition and stale ink splashes that appear as streaks. Check the cartridge seals, ensure cartridges are seated properly, and verify alignment of all colors. If a color channel runs dry, you may need to replace that cartridge rather than cleaning alone. After replacing or reseating cartridges, run a nozzle check and a test page to see if the streaks persist. Regularly inspecting cartridges minimizes surprises during important print jobs.
Clean the print head and nozzles
Head cleaning removes dried ink and debris that block droplets from exiting the nozzle. Start with the printer’s built-in cleaning function, then perform a manual clean if the streaks stay. When manually cleaning, power off and unplug the printer, remove the cartridges, and use a lint-free swab lightly moistened with distilled water or a manufacturer-approved cleaning solution. Wipe from the outside edges toward the center to avoid dragging ink across clean areas. Avoid forcing the head or touching delicate components. A careful, patient approach prevents damage and improves print quality.
Use proper cleaning materials
Avoid harsh solvents on the print head. Use distilled water, isopropyl alcohol (70%), and lint-free swabs or pads. Keep cleaning materials separate for each color to prevent cross-contamination. Always test cleaners on a small, inconspicuous area or a practice page before applying to the active print head. If your printer has a dedicated cleaning kit, follow the manufacturer’s instructions to avoid voiding warranties.
Run calibration and test prints
After cleaning, run the printer’s alignment and nozzle calibration routines. Print a standard test page to evaluate streak patterns and verify color alignment. If misalignment persists, perform another cleaning cycle or run the alignment again. Keep a log of the results and the date of each maintenance event to identify patterns over time. Regular calibration helps maintain crisp lines and consistent color output.
Paper quality and feed path
Streaking can also stem from poor paper quality or a bent feed path. Use printer-recommended media with appropriate weight and gloss level for your job. Ensure the paper is loaded correctly and feeds straight through the carriage path. Humidity affects paper stiffness and ink take-up; store media in a controlled environment to minimize curling and static. A stable media environment reduces random streaks and feathering on the page.
Preventive maintenance routines
Set a maintenance schedule that matches your printing workload. Clean the print head, run nozzle checks, and replace cartridges at the first sign of color drift. Keep ink transport tubes and feed rollers free of dust and dried ink; wipe the exterior regularly with a dry microfiber cloth. Maintaining a regular cadence minimizes surprises during critical print jobs and extends printer life.
Final thoughts and Print Setup Pro verdict
If streaking persists after thorough cleaning and calibration, consider documenting the issue and reaching out to the manufacturer’s support for model-specific guidance. The Print Setup Pro team recommends a structured maintenance routine: nozzle checks, head cleaning, alignment, and using quality supplies. With consistent care, streaking becomes unlikely and overall print quality improves.
Authority sources
- OSHA.gov provides general safety guidelines for chemical cleaners and handling solvents when servicing printers. https://www.osha.gov
- NIST.gov offers calibration and measurement best practices relevant to color alignment and device performance. https://www.nist.gov
- HP Support provides model-specific cleaning and maintenance steps for many inkjet printers. https://www.hp.com
Tools & Materials
- Lint-free microfiber cloth(For wiping print head surfaces and cartridges)
- Distilled water(For gentle cleaning and flushing solution)
- Isopropyl alcohol 70%(Use with swabs, dilute if necessary)
- Cotton swabs(For precise head cleaning)
- Printer cleaning kit (optional)(Contains swabs and cleaning solutions)
- Gloves(Keep hands clean and prevent ink transfer)
- Soft brush(Dust paper path and exterior gently)
- Compressed air canister(Use with caution to avoid moisture; never shake)
Steps
Estimated time: 45-90 minutes
- 1
Power off and unplug
Shut down the printer and unplug from the power source. This prevents electric shock and keeps internal components safe during cleaning.
Tip: Wait 60 seconds after unplugging to allow capacitors to discharge. - 2
Open access panel and remove cartridges
Open the top cover and carefully remove ink or toner cartridges as required for access to the print head.
Tip: Keep cartridges upright to prevent leaks; place them on a protected surface. - 3
Run nozzle check
Use the printer menu to print a nozzle check pattern to identify which colors streak or fail to lay down.
Tip: If the test page shows gaps, note the color channels affected for targeted cleaning. - 4
Initiate automatic cleaning cycle
Run the built-in cleaning cycle once or twice to clear minor clogs. Do not overuse; excessive cleaning wastes ink.
Tip: If streaks persist after two cycles, proceed to manual cleaning. - 5
Manual print head cleaning
Dampen a lint-free swab with distilled water or manufacturer-approved cleaner and gently wipe the print head area following the nozzle pattern direction.
Tip: Avoid heavy rubbing and don't saturate the head; excess moisture can damage electronics. - 6
Re-seat cartridges and run alignment
Reinsert cartridges securely and run the printer’s alignment routine to correct color offsets.
Tip: Run alignment after every major cleaning to lock color registration. - 7
Print a test page again
Print a test page to verify whether streaks persist and confirm color accuracy after cleaning and alignment.
Tip: If any color still streaks, repeat cleaning steps for the affected channel. - 8
Verify media and path cleanliness
Inspect media for curl or texture that may feed unevenly; gently clean the paper path area if dust is visible.
Tip: Avoid loading damp or warped paper which increases streak risk. - 9
Update firmware and drivers
Check for the latest firmware and driver updates that address print quality and alignment issues.
Tip: Install updates during low-priority print times to avoid disruption. - 10
Document maintenance
Record the date of cleaning, cartridge replacement, and outcomes to track progress and plan future maintenance.
Tip: Keep a simple log in a notebook or digital note for quick reference. - 11
If problems persist, seek guidance
If streaking remains after every step, consult the printer’s support resources or professional service.
Tip: Note model and recent maintenance events to aid troubleshooting. - 12
Return to duty
Resume normal printing with a test page and monitor for a few print cycles to ensure stability.
Tip: Regular maintenance reduces the likelihood of streaks returning.
People Also Ask
What causes streaking in printers?
Streaking is typically caused by clogged nozzles, dried ink, misalignment, or low-quality media. Environmental factors like humidity can worsen streaking. Identifying which colors are affected helps tailor the solution.
Streaking usually comes from clogged nozzles, dried ink, or misalignment. Check the affected colors and fix those first.
Can streaks be fixed without professional service?
Many streaks can be resolved with nozzle checks, head cleaning, and alignment. If streaking persists after these steps, consult the manufacturer’s support for model-specific guidance.
Most streaks can be fixed with cleaning and alignment. If not, contact support for your model.
Should I run a head cleaning cycle after replacing ink?
Yes. After replacing cartridges, run a cleaning cycle and nozzle check to ensure ink flows evenly and colors align properly.
After replacing ink, run a cleaning cycle and test page to confirm even deposition.
Is manual cleaning safe for all printers?
Manual cleaning can be safe if your printer supports it and you use proper fluids. Avoid aggressive scrubbing and never apply liquid to electrical contacts.
Manual cleaning is okay if your manual allows it; be gentle and avoid electronics.
How often should I update firmware or drivers?
Check for updates every few months or when you notice print quality issues. Updates can fix bugs that contribute to streaking and alignment problems.
Update when you notice issues or on a scheduled basis; updates help stability.
What paper should I use to avoid streaks?
Use manufacturer-recommended paper with appropriate weight and brightness. Poor quality or incompatible media increases smear and streak potential.
Choose the right paper as recommended by the manufacturer to avoid streaks.
Watch Video
Quick Summary
- Run nozzle checks regularly to catch issues early
- Use quality paper and ink to prevent streaks
- Clean and calibrate after changing cartridges
- Maintain a simple maintenance log for trend spotting
- Keep firmware and drivers up to date