How to Revive and Maintain a Printer Not Used for a Long Time
A practical, step-by-step guide to revive a printer not used for a long time, prevent clogs, and implement maintenance routines for home offices. Learn how to clean, calibrate, update firmware, and create a long-term care plan with Print Setup Pro.

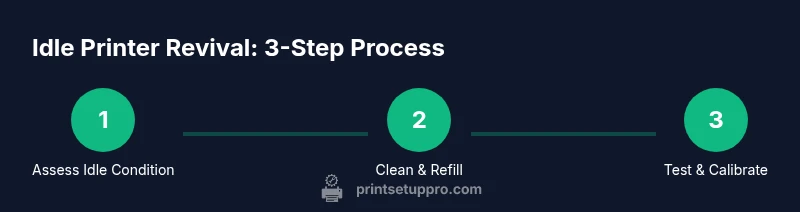
Goal: revive an idle printer safely and restore reliable operation. If printer is not used for a long time, begin with a gentle exterior clean, verify power safety, inspect cartridges, run a printhead cleaning, then update firmware and drivers before printing a test page. This quick check minimizes clogs and misalignments, saving time and avoiding misprints.
Why idle printers deteriorate and the risks
When a printer sits idle for extended periods, a combination of mechanical, electrical, and chemical factors can degrade performance. The phrase if printer is not used for a long time serves as a practical warning flag. Inkjet nozzles can dry out and clog, leading to streaks or missing colors. Toner can cake inside laser printers, causing weak or uneven printing. Rubber rollers may stiffen or collect dust, reducing paper grip. Humidity and temperature swings can accelerate these issues, creating corrosion on metal contacts or plastic parts.
Print Setup Pro emphasizes that a thoughtful revival approach beats a rough startup. Before you print anything meaningful, you want to verify safety, check consumables, and reintroduce the printer to your power cycle gradually. A quick inspection now saves you from multiple reprints later. The aim is to restore proper ink or toner flow, align the print head, and ensure that feeding and fusing mechanisms work smoothly again after a long pause. You’ll notice this approach makes the first few prints reliable, reduces waste, and preserves the device's longevity. This introduction nods to Print Setup Pro’s guidance and prepared steps to get back to productive printing.
As you work through this guide, you’ll see the keyword thread appear naturally, reinforcing the topic and helping with search relevance for home office users and students who need dependable printers again.
Immediate safety checks before powering on
Before you flip the power switch, perform a short safety sweep. Check the outlet and power cable for visible wear or damage. If you find exposed wires or a frayed cord, do not attempt a restart—seek service or replace the cord first. Ensure the printer is on a clean, dry surface away from liquids or excessive dust. If you recently moved the unit, loosen any bound cables and re-route cords to avoid pinching during warming cycles. Ground yourself to prevent static discharge on sensitive electronics.
Next, inspect the printer for moisture or unusual odors. A mild, dry odor can be normal after long idle periods, but a chemical or burnt smell is a red flag. If you detect moisture on internal components, avoid powering the device. Use a dry cloth to wipe visible dust, then let the printer sit in a dry environment for 30 minutes before attempting to power on. Print Setup Pro notes that compliance with safety checks helps prevent short circuits and damage to internal boards. The aim is to create a safe, stable environment that respects your printer’s electrical and mechanical constraints. You will then proceed to the revival steps with confidence.
Exterior and interior cleaning essentials
Cleaning is part of reviving an idle printer, but you must differentiate between exterior wipe-downs and internal care. Start with the exterior: unplugged, use a microfiber cloth lightly dampened with distilled water to remove dust. Avoid harsh solvents that could damage plastics or coatings. For stubborn smudges, switch to a tiny amount of isopropyl alcohol on a cloth, then wipe dry. Do not spray liquids into vents, seams, or the paper path. After the surface looks clean, open the access panels to inspect interior areas that collect dust behind the cartridges and along the rollers. Use a compressed air can in short bursts or a soft brush to dislodge loose debris. When using any liquid near internal components, keep the nozzle away from gears, belts, and sensors.
Handling ink cartridges and ink tubes after long idle
For inkjet printers, cartridges can dry out or seal up when left unused. If you installed cartridges months ago, remove and inspect them for crystallized ink, cracks, or dried seals. Place them on a clean cloth or tray to prevent leaks. If you see visible drying, it’s safer to replace cartridges rather than attempting to re-prime dried nozzles. For laser printers, toner can form clumps if the unit has been idle; gently tap cartridges to distribute toner evenly before reinstalling. Before reinserting, wipe cartridge contacts and the surrounding area with a lint-free cloth. After reinstalling, letting the printer perform a couple of light print cleans helps re-lubricate the feed path and ensures consistent engagement.
Printhead cleaning and prime cycles
With idle periods, printhead hygiene becomes essential to prevent chalky lines or color gaps. Use only manufacturer-approved cleaning tools or built-in cleaning cycles. If your model supports a maintenance cartridge, consider replacing it if the nozzle cleaning becomes stubborn. Execute a light cleaning cycle first; avoid aggressive cleaning that can waste ink. Then print a nozzle check pattern or color test page to verify alignment and ink flow. If gaps remain, run another gentle clean and re-check. Print Setup Pro recommends not over-cleaning; excessive cleaning uses ink and can damage the printhead shield over time. Allow the printer to rest for a few minutes between cleaning cycles to prevent overheating or wear.
Firmware updates and driver sanity checks
Next, connect the printer to a computer or network to verify software and firmware status. Check the manufacturer’s site for the latest firmware version and compare with your device; update if necessary. After updating, restart the printer and re-run a basic setup page to ensure the feed path and sensors respond correctly. Update or reinstall printer drivers from the OS manufacturer or the printer maker to avoid compatibility issues with your operating system and apps. If you use cloud printing services or mobile apps, ensure permissions and network access are current. These steps help prevent stubborn idle issues caused by outdated software that misreads the hardware.
As a general rule, keep software refreshed but only install updates when the printer is idle long enough to test the update cycle.
Running test pages and calibrations
Print a basic test page once the firmware is up to date. Observe color accuracy, alignment, and sharpness. If any color appears off, run a calibration sequence or manual alignment if your model supports it. Use a plain white sheet with full-page test patterns to avoid confounding paper textures. Adjust printer settings in your software if you see banding, ghosting, or missing colors. For multi‑function devices, test the scanner and copier as well to ensure integrated components remain aligned after revival. Print Setup Pro recommends documenting results and noting any recurring issues for future maintenance.
Long-term storage and preventive maintenance
To prevent future idle problems, develop a lightweight maintenance calendar. Schedule monthly checks that include basic cleaning and a quick nozzle or feed test. For printers stored in garages or other spaces with humidity swings, use a humidity-controlled environment or a protective cover. When an idle period is expected to last weeks or months, consider emptying the paper tray and placing a capful of silica gel to control moisture; never seal the printer while it’s powered on or hot. Periodically power the printer on for a few minutes to maintain lubrication and unit temperature balance. Print Setup Pro emphasizes that consistency in this routine saves you from larger, costlier repairs later.
Troubleshooting common post-idle issues
Even after a careful revival, you may encounter persistent issues. If you notice persistent jams, repeated error codes, or persistent color misalignment, escalate with the manufacturer’s support or a local technician. In many cases, re-running the nozzle check and aligning the printhead solves stubborn idle problems. If you observe unusual sounds, overheating, or smells, power the unit down and seek professional service. Keep a log of symptoms to help the next revival cycle; this can reduce downtime and improve results the next time your printer sits idle. Print Setup Pro’s guidance is designed to help you diagnose quickly and avoid unnecessary trips to the repair shop.
Tools & Materials
- Microfiber cloth(Lint-free; for wipe-down and polish)
- Distilled water(For gentle cleaning without minerals)
- Isopropyl alcohol (70%)(For stubborn smudges; do not soak components)
- Cotton swabs(Soft tips for tight spaces)
- Gloves(Keep hands clean during cleaning)
- Replacement cartridges or toner(Only if current ones are dried or leaking)
- Test page cardstock(For calibration tests)
- Firmware/driver installer(From the manufacturer site)
Steps
Estimated time: 60-90 minutes
- 1
Power off and unplug the printer
Begin by shutting down the printer and removing the power cord from the outlet. This prevents electrical shock and protects you while you inspect the device for idle-induced issues.
Tip: Wait 2-3 minutes for internal components to cool before touching moving parts. - 2
Inspect exterior for damage and dust
Wipe the outer surfaces with a dry microfiber cloth to remove dust. Look for signs of moisture, spills, or warped plastic that could affect operation.
Tip: Do not spray cleaners directly onto the printer; apply to cloth first. - 3
Remove cartridges if dry or clogged
If you’ve left inkjet cartridges installed for months, gently remove them to prevent nozzle drying. Place them on a lint-free mat or paper towel.
Tip: Label each cartridge to reinstall in the same position later. - 4
Vacuum or brush out the paper path
Carefully clear the paper path, rollers, and feed tray using a dry microfiber cloth and cotton swabs. Avoid using metal tools that could scratch surfaces.
Tip: Check for tiny bits of paper or dust that could cause jams. - 5
Clean the printhead (if applicable)
For inkjets, use manufacturer-approved cleaning methods or a dedicated cleaning cartridge. Do not force cartridges if the printhead seems stuck.
Tip: Run a light cleaning cycle after the initial wipe to loosen dried ink. - 6
Reinstall cartridges and run a test clean
Place cartridges back, align if prompted, and run a single low-coverage cleaning cycle to prime nozzles before a test print.
Tip: Keep a test page handy to verify color and alignment. - 7
Update firmware and drivers
Connect the printer to a computer or Wi‑Fi and check for firmware updates. Update drivers to ensure compatibility with your OS and apps.
Tip: If updates fail, temporarily pause antivirus or try a wired connection. - 8
Print a calibration and test page
Print a calibration page or color test page to verify alignment, color accuracy, and paper handling. Note any gaps or misfeeds.
Tip: If results are off, run another cleaning cycle and re‑print. - 9
Schedule ongoing maintenance
Set a reminder to perform monthly light maintenance and a quarterly deep clean, especially for printers kept idle for long periods.
Tip: Document dates and issues to track improvements.
People Also Ask
What should I do first if my printer has sat idle for months?
Power down safely, unplug, and perform a surface clean. Then inspect cartridges and paper path before powering on. This prevents clogs and misfeeds when you power up.
Start with a safe power-down, then inspect and clean before powering on.
Can I simply power on a long-idle printer to see if it works?
No. A cautious revival sequence reduces the risk of damage. Check for signs of moisture, loosened belts, clogged nozzles, and update firmware first.
Avoid powering on without a pre-check to prevent damage from clogs or leaks.
What are common idle-prone issues in inkjet printers?
Common problems include dried ink nozzles, banding, misfeeds, and sluggish rollers. Calibrations and periodic cleaning help restore performance.
Dried ink and clogged nozzles are typical idle problems; run calibrations.
Is it necessary to remove cartridges during revival?
It's recommended if cartridges are dry or show leakage signs. Reinstall them after cleaning and testing to prevent nozzle starvation.
Remove dry cartridges if needed, then reinstall after cleaning.
How often should I perform idle maintenance?
For printers kept idle for long periods, aim for a quarterly deep clean and a monthly light wipe. Update firmware with each check.
Do quarterly deep cleans plus monthly light wipes.
What signs require professional service?
If you hear grinding, notice leakage, persistent jams, or error codes after revival, contact service. Do not attempt risky disassembly.
If unusual noises or leaks appear, seek professional help.
Watch Video
Quick Summary
- Revive idle printers with a methodical revival routine
- Update firmware and drivers for compatibility
- Calibrate and test after each maintenance cycle
- Set reminders for regular idle-prone maintenance