Ink on Printer: Troubleshooting and Fixes
Ink on printer issues? This urgent Print Setup Pro guide guides home offices through quick checks, safe fixes, and prevention tips to restore clean, smudge-free prints.

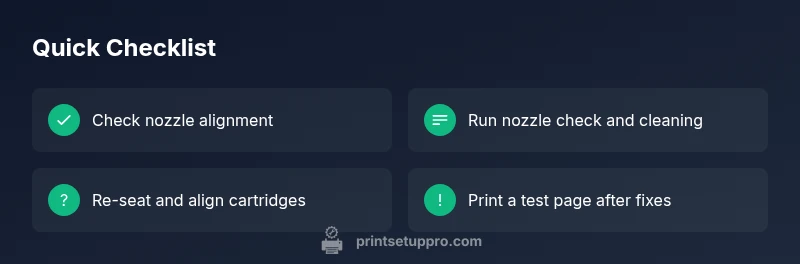
Most ink-on-printer issues are caused by dried ink, clogged nozzles, or misaligned cartridges. Start with a nozzle check, then run a full print head cleaning. Re-seat and realign the cartridges, and print a test page. If smudges remain, continue with the diagnostic flow below to identify the exact cause and the safest fix.
What Causes Ink on Printer Issues
According to Print Setup Pro, most ink-on-printer problems stem from cartridge handling and print-head health. When ink ends up on the printer exterior or inside the chassis, the usual suspects are misaligned cartridges, overfilling during replacement, or dried ink that clogs nozzles. Start by inspecting the cartridge area for leaks or smears, then verify that cartridge contacts are clean and dry. A small misalignment can create smear patterns that worsen at higher print speeds. Addressing these root causes early can prevent ongoing damage and reduce the chance of ink transferring to pages mid-print.
In many home office setups, a quick reseat of the cartridge, a fresh alignment, and a brief cleaning cycle resolves the majority of issues without professional help. If the problem persists after a couple of cycles, it’s time to move to targeted diagnostics. Print Setup Pro recommends logging issues and noting when they occur (specific file types, colors, or paper stock) to help pinpoint root causes later.
Safety first: power off, unplug, and inspect
Before you touch any printer internals, power down and unplug the device. Do not attempt to clean internal components while the printer is powered; this reduces the risk of electric shock and accidental ink spray. Wear gloves if available and use lint-free towels to dab up visible ink leaks on exterior surfaces. Keep spill-prone areas well-ventilated and avoid mixing cleaning solutions that could react with ink.
If you notice significant ink leakage inside the chassis, avoid turning the printer on until you’ve identified and addressed the source. In some cases, a leaking cartridge can be the cause; replace the cartridge and re-test. Print Setup Pro emphasizes safety first: never disassemble the print head or reseal cartridges while the unit is powered, and always handle cartridges and print heads with care to prevent personal injury and further damage to the device.
Common sources of ink smudges on prints
Smudges on printed pages are rarely random. The most frequent culprits include dried ink that has loosened from the nozzle, over-saturated paper due to incorrect print settings, or damaged print heads that create streaks. Misaligned cartridges can deposit ink unevenly, producing dots or lines that smear when paper feeds through the path. Paper type also matters: glossy or coated stock can smear if the ink isn’t curing properly or if the printer uses a profile not suited to the material. Humidity and temperature changes can affect ink viscosity, increasing smearing risk.
Another frequent source is improper cartridge installation. If cartridges resist seating or don’t make proper contact, one color may overprint or fail to discharge cleanly, creating smudges or halos around characters. Finally, a clogged nozzle is a classic cause; even a partially blocked color channel can produce faint smears or ghosting on prints. Regular maintenance helps mitigate these issues.
Diagnosing by symptoms: symptom → diagnosis → solutions
- Symptom: Smudges appear on fresh pages after printing multiple pages. Diagnosis: Ink is spreading due to nozzle or feed issues. Solution: Run nozzle check, perform cleaning, and test print.
- Symptom: One color consistently smears or leaks. Diagnosis: A cartridge or print-head problem specific to that channel. Solution: Remove and re-seat the cartridge, clean contacts, and replace if necessary.
- Symptom: Smudges only with certain paper stocks. Diagnosis: Paper–ink interaction or incorrect media type setting. Solution: Switch to recommended paper and adjust print settings.
- Symptom: Nozzles fail the test print. Diagnosis: Clogged or partially blocked nozzle. Solution: Deep-clean the head and run several nozzle checks.
- Symptom: External printer casing shows fresh ink. Diagnosis: Cartridge overfill or leak near the carrier. Solution: Wipe spills, check seals, and replace the cartridge if leaking.
Tip: Keep a simple log of symptoms, colors, and media so you can track patterns and faster pinpoint root causes. Print Setup Pro suggests documenting the sequence of steps you take to avoid repeating ineffective fixes.
Step-by-step fixes for the most common cause
This section provides a concise, repeatable sequence you can follow now. If you cannot complete any step safely, stop and seek professional help.
- Power off and unplug the printer. 2) Open printer cover and inspect cartridges for obvious leaks or misalignment. 3) Remove, re-seat, and secure cartridges firmly in their slots. 4) Run the printer’s nozzle check and then perform a light head-cleaning cycle. 5) After cleaning, print a test page to evaluate color alignment and smear levels. 6) If needed, repeat cleaning once more, then run a full alignment. 7) Replace any cartridge showing signs of leakage or poor ink discharge. 8) Document results and proceed to a deeper diagnostic if issues persist.
Prevention and routine maintenance
To minimize future ink-on-printer issues, adopt a simple maintenance routine:
- Use only recommended paper stock and keep it dry and flat in a cool area.
- Use genuine or high-quality compatible cartridges and replace them before they run completely dry.
- Regularly perform nozzle checks and head-cleaning cycles as part of monthly maintenance, especially if you print infrequently.
- Store ink cartridges in their original packaging or upright to prevent leaks.
- Keep the printer in a clean, dust-free environment and avoid exposing it to humidity or extreme temperatures.
These steps reduce clogging, misalignment, and leaks, resulting in more reliable print quality and fewer ink-spread issues over time.
When to seek professional help
If you notice persistent ink leaks, severe head damage, or the printer won’t print despite multiple cycles, it’s time to involve a pro. A technician can check pump seals, internal ink pathways, and cartridge circuitry that are not accessible to users. Contact the manufacturer’s service line or an authorized repair center for assessment and safe refurbishment if needed. Do not attempt to disassemble the print head or replace internal components yourself.
Real-world troubleshooting scenarios and tips
In real-world settings, users often encounter a mix of issues that require a layered approach. For example, a printer that smears only with photo paper may require adjusting color profiles and enabling a higher-quality print mode. A printer that leaves ghost images might have residual ink on the drum or improper paper path alignment. Consider environmental factors: humidity can affect ink drying times and cause smudges if pages are handled too quickly after printing. Maintain a short log of print jobs where smudges occurred to identify recurring patterns and adjust accordingly. Printing at a slower speed can also reduce smear in some printers, but always test to ensure the trade-off is acceptable for your needs.
Steps
Estimated time: 30-60 minutes
- 1
Power off and unplug
Safely power down the printer and disconnect the power. This prevents electric shock and unintended ink spray while you inspect the cartridge area.
Tip: Always unplug before starting any maintenance. - 2
Inspect cartridges and feed path
Open the access cover and check cartridge seating. Look for obvious leaks or excessive ink around the cartridge housing and along the feed path.
Tip: If you see leaks, replace the cartridge before continuing. - 3
Re-seat cartridges
Remove each cartridge, wipe the contact surfaces with a lint-free cloth, then reinsert firmly until it clicks. This ensures proper ink transfer and alignment.
Tip: Avoid touching the print head nozzles. - 4
Run a nozzle check
Print a nozzle check pattern to see whether colors are uniform and continuous. If gaps appear, run the cleaning cycle.
Tip: Run at least one cleaning cycle before the second nozzle check. - 5
Perform a head cleaning
Use your printer’s maintenance menu to perform a light or deep cleaning to clear dried ink in the nozzles.
Tip: If you use a manual cleaning method, be gentle and avoid pushing debris into the head. - 6
Print test page and adjust
Print a test page to verify color alignment and check for remaining smudges. If necessary, perform a second alignment.
Tip: Test prints help confirm the fix before resuming normal use.
Diagnosis: Ink smudges or leaks on printed pages or printer exterior
Possible Causes
- highClogged or dried nozzles
- highMisaligned or loose cartridges
- mediumOverfilled cartridge or leakage inside the chassis
- lowIncorrect paper type or settings
- mediumDamaged print head
Fixes
- easyRun nozzle check and perform a print head cleaning
- easyRe-seat and realign cartridges
- easyInspect for and clean any ink leaks or spills inside the printer
- easyReplace leaking or non-discharging cartridges and re-test
- mediumIf problems persist, contact the manufacturer for a professional service
People Also Ask
Why does ink smear only on certain papers?
Paper and ink interaction matters. Thin or glossy stock can smear if the ink isn’t fully absorbed or if the printer profile isn’t configured for that media. Try a different paper and adjust print settings to use a compatible profile.
Ink smear on certain papers usually means the media type isn’t matched to the ink or printer profile. Switch paper and check the settings, then print a test page.
How can I tell if the print head is clogged?
A nozzle check that shows gaps or missing colors indicates a clogged head. Run cleaning cycles, and if needed, perform a deeper cleaning or contact support.
If your nozzle test has gaps, the print head is likely clogged. Run the cleaning cycle and test again.
Is it safe to clean inside the printer myself?
Only clean exterior surfaces and accessible cartridge areas. Do not disassemble internal components. If you suspect internal ink leaks, seek professional service.
Don’t take apart the printer. If you think there’s a leak inside, contact a professional.
When should I replace a cartridge instead of cleaning?
If a color channel consistently under-performs after cleaning and nozzle checks, replace the cartridge rather than repeatedly cleaning. Persistent issues point to worn or damaged components.
If cleaning doesn’t fix the issue after several attempts, replace the cartridge.
Can high humidity affect ink performance?
Yes, high humidity can affect ink drying and lead to smudging. Ensure your workspace is within the printer’s recommended environment and allow pages to dry before handling.
Humidity can slow drying and cause smudges; keep the printer in a stable environment.
Watch Video
Quick Summary
- Run nozzle checks and cleanings first.
- Re-seat and align cartridges for optimal ink flow.
- Inspect for leaks and replace faulty cartridges promptly.
- Engage professional service if leakage persists or the unit won’t power safely.