Printer Not Aligned: Quick Fixes & Troubleshooting
Learn how to diagnose, fix, and prevent printer not aligned issues with a clear, step-by-step guide, covering alignment techniques, software updates, and routine maintenance tips.

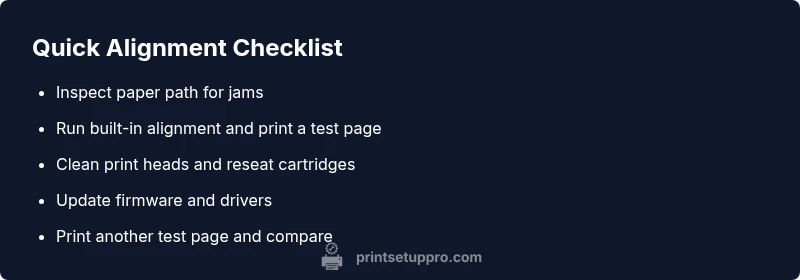
Run a quick alignment: 1) Check for paper jams and feed path obstructions. 2) Use the printer's built-in alignment utility or print a test page. 3) Clean print heads (if applicable) and reseat cartridges. 4) Update drivers and firmware. If alignment persists, perform a hardware reset. Keep spare parts ready. Document the steps you take.
What “printer not aligned” really means
When a printer is said to be not aligned, the output appears shifted, skewed, or margin-inconsistent across pages. This isn't a mystery condition—it's a symptom of either mechanical misalignment or software misconfiguration. In many cases, aligning the printer resolves the issue quickly, restoring crisp text and proper margins. Throughout this guide, you’ll see the exact steps Print Setup Pro recommends to fix a printer not aligned problem and to prevent it from returning.
Common causes of misalignment
Misalignment can stem from several root causes. These are the most frequent culprits:
- Dirty or dried print heads, which can cause skewed or faint output.
- Paper feed path obstructions or a misfed sheet, leading to horizontal shifts.
- Worn or damaged carriage belts or rollers, especially in older models.
- Incompatible or low-quality paper, causing feed irregularities.
- Outdated drivers or firmware, which can misinterpret the print job.
- Incorrect printer settings (page size, margins, or orientation) in the software sending the job.
- Cumulative jams or partial blockages that confuse the printer’s registration system. Understanding these causes helps you target the right fix quickly when the printer not aligned issue appears.
Quick checks to rule out obvious problems
Before diving into deeper troubleshooting, perform these checks:
- Inspect the paper path for jams or foreign objects and clear obstructions.
- Ensure you’re using the correct paper type and size as configured in your print settings.
- Print a known-good test page from the printer’s control panel to see if the misalignment persists on a basic job.
- Verify that the printer is connected to a stable power source and a reliable data connection.
- Check for any error messages on the display and address hardware warnings if present.
- Update or reinstall drivers if the printer shows communication or page formatting issues. If these steps don’t fix the problem, it’s time to move into a structured alignment process that covers hardware and software.
Step-by-step: realign the printer (most common scenario)
This section walks you through a comprehensive alignment routine designed for most consumer and office printers. The goal is to recalibrate the printer’s paper path and head alignment to restore accurate margins and consistent output.
- Gather supplies: printer, test page, clean soft lint-free cloth, isopropyl alcohol optional for stubborn residues.
- Run the built-in alignment utility from the printer’s control panel or software. Follow the on-screen prompts and print any offered alignment pages.
- Inspect the alignment page for residual tilt or skew. If noticeable, proceed to cleaning.
- Perform a gentle cleaning: power off, remove cartridges (if safe), and wipe accessible print heads and contact points with a lightly dampened cloth. Reinstall cartridges.
- Reprint the alignment page. Compare the results against the reference marks. If alignment is still off, continue to firmware and settings checks below.
- Update firmware and drivers. Reboot the printer after updates and re-run alignment.
- If all else fails, reset the printer to factory defaults and rerun alignment from scratch.
- Print a full-page test with sample text and graphics. Validate margins, parallelism, and image registration across page ranges.
Printer alignment: inkjet vs laser differences
Inkjet printers typically rely on precise nozzle alignment and carriage calibration, whereas laser printers depend on toner transfer alignment along the drum and paper path. The alignment steps overlap, but the exact process can differ: inkjets may require nozzle checks and partial head cleanings, while lasers usually focus on drum and toner settling plus registration with imaging units. Always consult your printer’s manual for model-specific alignment procedures.
Software alignment vs hardware alignment: which to fix first
Software alignment uses the printer’s built-in calibration routines and driver-level page alignment. Hardware alignment involves mechanical inspection of the paper path, rollers, and carriage. Start with software alignment because it’s safer and quicker; if issues persist, proceed to hardware checks. Don’t skip firmware updates, as they can correct registration logic that affects both software and hardware alignment.
Preventing future misalignment: best practices
To minimize printer not aligned issues, adopt these preventive habits:
- Use high-quality, consistent paper and avoid damaged or curled sheets.
- Keep the printer in a stable environment with controlled temperature and humidity.
- Schedule routine maintenance that includes cleaning print heads, feed rollers, and check belts where applicable.
- Regularly update firmware and drivers to ensure accurate registration logic.
- Run periodic alignment checks, especially after transporting the printer or refilling consumables.
When to seek professional help
If misalignment persists despite following manufacturer guides and a thorough cleaning, or if you hear unusual noises or notice mechanical wear, contact a certified technician. Persistent misalignment after factory resets or hardware servicing may indicate a failing carriage, worn rollers, or damaged sensors needing professional intervention.
Steps
Estimated time: 45-60 minutes
- 1
Prepare and inspect printer
Power down and unplug the printer. Gather test pages and cleaning supplies. Check for obvious obstructions in the paper path and verify paper type and size.
Tip: Have a spare test page ready to compare results. - 2
Run alignment from control panel
Navigate to Maintenance or Tools > Alignment. Run the alignment routine and print the alignment page. Review the results for residual skew.
Tip: If prompted, choose the most conservative alignment option first. - 3
Clean heads and reseat consumables
Carefully remove and reseat ink or toner cartridges. If applicable, perform a light wipe of the print head nozzles with a lint-free cloth.
Tip: Avoid touching the nozzles directly to prevent damage. - 4
Update firmware/drivers
Check the printer manufacturer’s site for the latest firmware and driver updates. Install and reboot, then re-run alignment.
Tip: Only download firmware from official sources to prevent bricking. - 5
Reset to defaults if needed
If misalignment remains, reset the printer to factory defaults and re-run the full alignment process from scratch.
Tip: Back up configurations if the option exists. - 6
Evaluate results with a test print
Print a media test page or a document with text and graphics to confirm alignment across multiple areas of the page.
Tip: Take photos of the test page for future reference.
Diagnosis: Printed output is misaligned or skewed across pages
Possible Causes
- highPrint head misalignment due to clogged nozzles or wear
- highPaper feed path obstruction or skewed feed
- mediumOutdated or corrupted driver/firmware causing incorrect registration
- lowIncorrect page size or margins in software settings
Fixes
- easyRun the built-in alignment utility and print a test page
- easyClean print heads and reseat cartridges or toner
- easyUpdate drivers/firmware to the latest version
- easyCheck and correct paper size/margins in application settings
- mediumReset printer to factory defaults and re-run alignment
- hardInspect and replace worn rollers or carriage components
People Also Ask
What does printer not aligned mean, and why does it happen?
Printer not aligned means printed output is not centered or properly registered on the page. Causes include dirty print heads, paper feed issues, or outdated firmware. Software settings can also mislead alignment if margins or page size are incorrect.
Printer not aligned means your prints sit off center or have skewing. Causes include dirty heads or feed problems, and outdated firmware. Start with a quick alignment and check settings.
Why did alignment fail after transporting the printer?
Moving a printer can misalign internal components or loosen cartridges. Re-run the alignment, check the feed path, and reseat consumables. If the problem persists, perform a factory reset and update firmware.
Transport can loosen parts or misalign components. Re-run alignment, reseat cartridges, and update firmware if needed.
Can misalignment be fixed without replacing parts?
Often yes. Start with software alignment, cleaning, and firmware updates. If mechanical wear is suspected, a professional assessment is recommended before considering part replacements.
Usually, software alignment and cleaning fix it. If wear is likely, get a professional check.
Is alignment different for inkjet and laser printers?
Yes. Inkjets focus on nozzle and carriage alignment, while lasers emphasize drum/toner registration. The basic approach—cleaning, factory resets, and firmware updates—applies to both, but model-specific steps vary.
Inkjet focuses on nozzle alignment; laser on drum alignment. Use model-specific steps for each.
How often should I run alignment checks?
Run alignment after a major ink/toner change, after paper jams, or following a firmware update. Periodic checks help prevent visible misalignment before it becomes a problem.
Do it after toner changes, jams, or firmware updates, and periodically as a precaution.
What if alignment still fails after resets?
If resets don’t fix it, consult the printer’s service handbook or contact customer support. There may be a mechanical fault that requires technician intervention.
If resets fail, contact support or a technician for mechanical inspection.
Watch Video
Quick Summary
- Start with built-in alignment and a test page.
- Clean heads and reseat cartridges if needed.
- Update firmware and drivers to fix registration issues.
- Use quality paper and proper settings to prevent misalignment.
- If persistent, consider professional service.