Epson Printer Head Alignment Not Working: Quick Troubleshooting Guide
Urgent guide to fix Epson printer head alignment not working issues. Learn quick checks, nozzle cleaning, and step-by-step alignment methods to restore clean prints.

Most Epson head alignment problems stem from dried or clogged printheads or mis-seated cartridges. Start with a nozzle check, run a light cleaning, and then perform a print head alignment from the printer’s maintenance menu or Epson software to restore proper alignment.
Why Epson printer head alignment not working: what it means and why it happens
Head alignment is a calibration process that ensures each printhead nozzle deposits ink at the same horizontal reference across the page. When Epson reports a head alignment error or prints with uneven rows, it signals misalignment beyond normal variation. If you search for epsons printer head alignment not working, you will often see a familiar set of symptoms: streaks, gaps, or misregistered text. The root causes are usually practical, not mysterious: the printhead may be clogged by dried ink from long idle periods, cartridges might be seated incorrectly, ink levels could be inconsistent or low, or the wrong paper type and print settings can throw off the alignment algorithm. Firmware or driver glitches can also trigger misalignment, especially after an update. Print quality issues can be subtle at first but rapidly worsen with extended use. The Print Setup Pro team emphasizes that most head alignment failures are solvable with a systematic process that starts with basic checks and progresses through targeted maintenance steps. By framing the problem this way, you can regain alignment without unnecessary replacements and downtime.
In practice, the quickest path to a fix is to verify fundamentals before jumping into advanced troubleshooting. Verify the printer is on a flat, stable surface, paper is loaded correctly, and no unusual jams or debris are present. Check ink levels and reseat all cartridges to ensure a solid electrical and fluid connection. Run a nozzle check to reveal clogged nozzles or missing segments, then perform a light cleaning if needed. If misalignment persists after cleaning, initiate the printer head alignment routine. If you find the issue repeating after multiple cleanings, there may be a more stubborn clog or a failing printhead, which may require professional service. The Print Setup Pro team notes that recurring alignment failures beyond routine maintenance often point to deeper hardware or firmware issues that warrant closer inspection.
This guide will walk you through a practical troubleshooting flow, starting with quick checks, then moving to step-by-step fixes, and finally addressing advanced options and prevention. Your goal is a clean, aligned print with minimal downtime. Maintaining regular printhead care, using quality ink, and keeping firmware up to date will reduce future head alignment problems and extend the life of your Epson printer.
wordCountBlock1
Steps
Estimated time: 30-60 minutes
- 1
Power check and initial inspection
Power on the printer and confirm it is stable on a flat surface. Open the printer lid and inspect for any visible debris or paper scraps. Check ink cartridges for proper seating and confirm all four colors are present and not leaking. This initial pass prevents false positives from simple setup issues.
Tip: Make sure the printer has cooled after any recent usage before touching cartridges. - 2
Print nozzle check pattern
Access the maintenance menu and print a nozzle check pattern. Look for broken or missing lines in any color. A clean pattern indicates ink flow is generally good; gaps or inconsistent lines point to clogged nozzles or air in the lines and require cleaning.
Tip: Use plain printer paper and avoid glossy media for accurate results. - 3
Run a light printhead cleaning
If the nozzle check shows gaps, run a light cleaning cycle from the maintenance menu. Do not run repeated deep cleanings in a row, as this wastes ink and may not fix the root cause if nozzles are only partially clogged.
Tip: Allow a short cooldown between cleaning cycles to prevent overheating. - 4
Perform print head alignment
After cleaning, run the head alignment routine. Compare the alignment test page with the reference. If you notice any persistent deviations, proceed to re-seat cartridges or run a firmware check.
Tip: Choose the standard alignment option first; only use the advanced mode if you see persistent misalignment. - 5
Re-seat cartridges and test again
Power off the printer, remove each cartridge gently, wipe contacts if needed, reseat firmly, and power back on. Print another nozzle check and then re-run alignment. This ensures contact reliability after reseating.
Tip: Avoid touching the gold contact areas to prevent static damage. - 6
Update firmware and drivers
Check Epson’s support site for the latest firmware and driver updates for your model. Install updates, reboot, and re-run the nozzle check and alignment. Updates can fix alignment logic or compatibility issues introduced by previous software versions.
Tip: Backup important settings if your model uses a custom configuration. - 7
When to seek professional help
If alignment still fails after a full cycle of checks, cleaning, reseating, and firmware updates, there may be a hardware fault such as a damaged printhead. In this case, contact approved service providers or Epson support for diagnosis and part replacement options.
Tip: Have your printer model, serial number, and recent maintenance steps handy when contacting support.
Diagnosis: Printer reports head alignment error or prints with misaligned lines
Possible Causes
- highPrinthead clogged with dried ink or debris
- highLow or inconsistent ink levels or uneven cartridge seating
- mediumMis-seated cartridges or damaged printhead
- lowOutdated firmware or driver conflicts
Fixes
- easyRun a nozzle check to identify clogs, then perform a light printhead cleaning
- easyRun the head alignment from the printer control panel or Epson software
- mediumRe-seat or replace problematic cartridges and re-run alignment
- easyUpdate firmware and reinstall drivers, then re-run alignment
People Also Ask
What causes Epson head alignment to fail after ink replacement?
Replacement activities can disturb cartridge seating, introduce air in lines, or trigger firmware rechecks. Running a nozzle check, reseating cartridges, and performing alignment after replacement often resolves the issue.
Replacement activities can unsettle cartridges; try reseating and re-aligning after replacement.
Is it safe to run multiple cleanings in a row?
Frequent cleaning can waste ink and may not fix the root cause if a clog is minor. Use a few light cleanings, then test alignment before running more cycles.
A few light cleanings usually enough; don’t overdo it.
Will replacing ink cartridges fix misalignment?
If misalignment is caused by inconsistent ink flow, reseating or replacing troublesome cartridges can help. Always run alignment after changes.
Sometimes a bad cartridge can cause misalignment, so replace or reseat it and test alignment.
Should I update firmware to fix alignment issues?
Firmware updates can fix bugs that affect alignment. Check Epson’s site and install any available updates, then re-run nozzle checks and alignment.
Updating firmware can resolve alignment bugs; then test again.
When should I seek professional help?
If you’ve tried standard maintenance and alignment repeatedly without improvement, a hardware fault or failing printhead may be present. Contact Epson support or a qualified service center.
If alignment still fails after basic steps, it’s time to get professional help.
Watch Video
Quick Summary
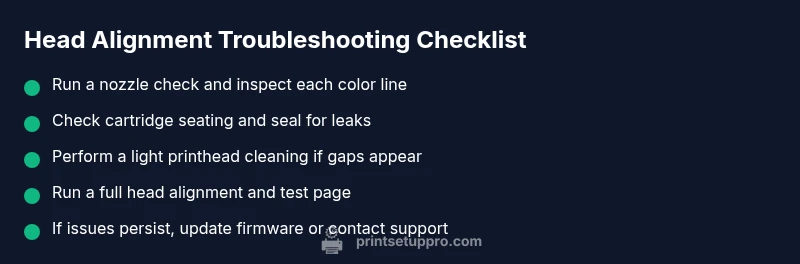
- Run a nozzle check and align head after any cleaning.
- Check ink levels and cartridge seating first before deeper fixes.
- Update firmware and drivers if issues persist.
- If alignment still fails, seek professional service to avoid hardware damage.