Printer Test Page Guide: Check Print Quality & Alignment
Learn how to generate and use a printer test page to verify alignment, color accuracy, and print health. This step-by-step guide covers access, interpretation, fixes, and best practices for home offices and small businesses.

Using a printer test page, you will verify alignment, color accuracy, and print health across your device. Start by opening the built-in test page tool from your printer or driver software, then print a blank page and a color page to compare results. This guide walks you through access, interpretation, and fixes for common misalignment issues.
What is a printer test page?
A printer test page is a specially designed printout that lets you quickly assess core print quality attributes: alignment, color accuracy, ink or toner consistency, and print head health. Most modern printers offer a built-in test page or calibration page you can print from the control panel or through the printer software on your computer. When you print this page, you’ll see patterns such as alignment lines, color bars, grayscale ramps, and text samples. These elements help you identify misalignment, banding, ghosting, and color drift before you commit time and ink to important projects. Regularly reviewing a test page is a proactive step toward reliable output and reduced waste, especially in small offices and student setups.
From Print Setup Pro’s perspective, a well-executed test page is your baseline. If later prints drift or colors look off, you’ll know you’re starting from a valid reference rather than guessing.
Why run test pages regularly?
Regular test-page runs act like a health check for your printer. They help you detect telltale signs early, before serious printing tasks begin. Reasons to test routinely include: detecting click-by-click misalignment after carriage movement or paper loading, catching color skew that affects charts and posters, and confirming that black text remains crisp without ghosting. For home offices and DIY projects, consistent test-page checks save time, ink, and frustration. Print Setup Pro’s approach is to schedule a quick quarterly test or run a diagnostic before big print jobs. By keeping a clean baseline, you’ll quickly notice when a cartridge needs replacing or when the printer head needs cleaning.
Keep in mind that test pages are not a substitute for professional service if there is persistent hardware failure, but they are a first line of defense for most routine issues.
How to access and print a test page
Accessing a test page varies by brand and operating system, but the general workflow is similar. On most printers, you can print a test page from the control panel by navigating to Maintenance or Tools and selecting Print Test Page or Calibration Page. If you prefer computer control, open your printer settings in Windows or macOS, locate the Diagnostics or Services section, and choose the option to print a test or alignment page. Some printers offer a dedicated calibration page that covers both grayscale and color channels. When you print, use standard office paper for consistency, and avoid glossy stock that can skew results. If you’re testing color accuracy, print a color block page and compare it against your monitor’s reference image.
Tip: Have your printer connected to a reliable power source and a fast network to prevent hiccups during printing. If the page doesn’t print, verify the driver is up to date and the printer is selected as the default device.
Interpreting the test page results
The interpretation stage translates the printout into actionable steps. Look for the following:
- Alignment: If vertical or horizontal lines are stepped, wavy, or offset, you likely need a carriage alignment or print-head cleaning.
- Color bars: Inconsistent color blocks indicate ink or toner gaps, clogged nozzles, or miscalibrated color profiles.
- Grayscale ramp: Banding or streaks across grayscale bars can point to mechanical friction, toner distribution issues, or head misalignment.
- Text clarity: Blurry or feathered fonts hint at print-head pressure problems or paper feed consistency.
- Consistency across pages: Variations between pages may reveal fluctuating cartridge performance or calibration drift.
Document the exact pattern and compare it to the printer’s service notes or user guide. Print Setup Pro recommends keeping a simple log with date, model, cartridge status, and any observed deviations. This makes it easier to track recurring issues and plan replacements or calibrations.
Common issues shown on test pages and fixes
Several issues repeatedly show up on test pages. Here are typical patterns and practical fixes:
- Banding in grayscale or color: Run a head cleaning and then a calibration. If banding persists, consider replacing low-yield cartridges or flushing the ink system per manufacturer guidance.
- Color drift or tint skew: Recalibrate color profiles and reprint color test pages. Ensure ICC profiles match your paper type and print engine. Calibrate monitors to maintain color consistency across devices.
- Ghosting or double images: Check paper quality and loading. Use the correct paper type setting and slow print speeds if necessary. Align the print head if the problem recurs.
- Misfeed or misalignment after paper load: Re-load paper, adjust guides, and run a carriage alignment. Use a few sheets of plain paper to avoid jams during calibration.
- Ink/toner depletion indicators: Schedule cartridge replacement and re-run tests after installation to confirm the fix.
Note that persistent issues may indicate hardware wear or clogged nozzles that require professional service. Use the test page results to decide when to seek repair.
Best practices for different printers and media
Printer behavior can vary by model, brand, and media type. General guidelines:
- Always use recommended paper stock for calibration, especially when testing color accuracy.
- Perform color and grayscale tests separately to isolate issues.
- Run calibration after changing ink/toner cartridges or paper type to establish a new baseline.
- Keep printer firmware and drivers up to date to ensure consistent test-page results across software updates.
- If your printer supports individual nozzle checks, run them before heavy color tasks for best results.
In work-from-home and student environments, schedule regular calibration windows to maintain reliable output across a range of projects.
Tools & Materials
- Printer(Powered on and connected to computer or network)
- Computer or mobile device(With printer driver installed; networked or USB connected)
- Printer manual or online help(Model-specific steps for access and calibration)
- Quality printing paper(Plain white 20 lb or similar for accurate test results)
- Color cartridges or toner(Test color accuracy when available)
Steps
Estimated time: 25-45 minutes
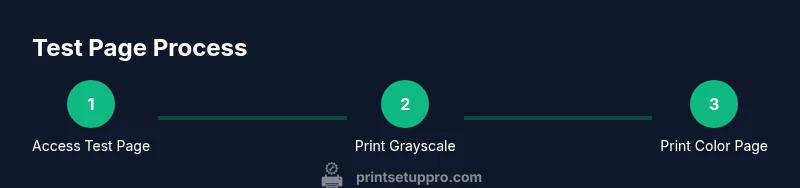
- 1
Open test page tool
Access the printer’s maintenance or diagnostics menu and select the Test Page or Alignment Page option. If using a computer, navigate to the printer’s Diagnostics panel and print a test page from there.
Tip: If your device doesn’t show a test page option, update the driver or consult the manual for alternative calibration pages. - 2
Print grayscale test page
Print a grayscale or black-and-white test page to assess sharpness and grayscale ramp without color variables. Look for banding, ghosting, or uneven density across the page.
Tip: Use plain white paper and a mid-speed print setting to reduce mechanical variation. - 3
Print color test page
Print a color test page that includes primary colors, skin tones, and a color gradient. Check for color balance and any color casts on neutral areas.
Tip: When color looks off, recalibrate color profiles or swap cartridges if necessary. - 4
Evaluate alignment
Review alignment rows and lines. Misalignment manifest as diagonal shifts, staggered lines, or off-center text. Run carriage or print-head alignment as needed.
Tip: Repeat alignment steps if lines remain offset after the first calibration. - 5
Run nozzle tests and cleaning
If color blocks show gaps or streaks, perform nozzle checks and a light cleaning cycle. Reprint the color test page to confirm.
Tip: Do not over-clean; repeated cleaning wastes ink and can worsen results. - 6
Document results and adjust
Record the results, cartridge status, and any settings changed. Use this baseline for future comparisons and to plan replacements.
Tip: Create a simple log with date, model, and observed deviations for quick reference.
People Also Ask
What is a printer test page and why do I need one?
A printer test page is a diagnostic printout that helps you evaluate alignment, color accuracy, and print-head health. It gives a baseline so you can spot problems early and avoid wasting ink on poorly calibrated prints.
A printer test page is a diagnostic printout used to check alignment, color accuracy, and print-head health. It provides a baseline to spot problems early and save ink on imperfect prints.
How often should I print a test page?
Print a test page whenever you notice print quality changes, after replacing cartridges, or on a regular maintenance schedule (e.g., quarterly). Consistency depends on usage and hardware.
Print a test page when you notice changes in print quality, after replacing cartridges, or on a quarterly maintenance schedule.
What do I do if I see banding on the grayscale page?
Banding usually indicates head alignment or nozzle issues. Run a nozzle check and cleaning, then print a test page again. If banding persists, calibrate the printer or replace the affected cartridge.
Banding often means a nozzle or alignment issue. Check nozzles, run cleaning, calibrate, and replace cartridges if needed.
Can I test color accuracy without color ink installed?
Testing color requires color inks or toners. Without color cartridges, you can only assess grayscale quality; for full color testing, install the appropriate cartridges and reprint the color page.
Color tests require color inks. Without them you can only test grayscale quality; install color cartridges to test colors.
Why did my test page misalign after changing paper?
New paper can affect feed and alignment. Re-load correctly, adjust guides, and re-run the carriage alignment. If misalignment continues, check paper type settings and re-calibrate.
Paper changes can affect alignment. Re-load properly, adjust guides, recalibrate, and re-test.
Is calibration different from alignment?
Calibration aligns color and grayscale across the print engine, while alignment focuses on line up of cartridges and heads. Both improve accuracy and should be performed as part of routine maintenance.
Calibration fixes color and grayscale accuracy; alignment fixes head-to-cartridge alignment. Do both as part of maintenance.
Watch Video
Quick Summary
- Run a test page to establish a reliable baseline.
- Interpret alignment, color, and grayscale patterns methodically.
- Calibrate color profiles and printer settings before large projects.
- Log results to track changes and plan cartridge replacements.
- Escalate to service if persistent hardware issues occur.