Test Page for HP Printer: Step-by-Step Testing Guide
Learn to create and use a test page for HP printers to verify alignment, color accuracy, and print density in your home office. This educational guide covers setup, testing patterns, interpretation, and troubleshooting for reliable printing.

Create and print a dedicated test page to verify alignment, color accuracy, and print density on an HP printer. Gather your device, printer software, and standard paper; select a built-in or custom test page, print it, and compare results against reference patterns. Then adjust printer settings and re-test until results are consistent.
What a test page does for HP printers and why it matters
A test page acts as a diagnostic snapshot for your HP printer. It helps you verify core print quality metrics such as alignment, color reproduction, density, and consistency across pages. According to Print Setup Pro, establishing a repeatable test page process is an effective way to catch drift early and keep home-office printing reliable. This guide uses the keyword test page for hp printer to anchor practical steps that you can perform without specialized equipment. You’ll learn how to select patterns, interpret results, and decide when a recalibration or driver update is warranted. By approaching testing as a routine task rather than a one-off fix, you preserve print quality over time and minimize wasted paper and ink. The goal is not perfection on the first try, but repeatable improvement that a busy user can maintain.
Top-level concepts: patterns, pages, and patience
A robust test page includes alignment grids, color blocks, and density ranges. Alignment patterns help you detect shifts in mechanical or feed accuracy; color blocks reveal hue accuracy and printer calibration; density scales show how well the printer renders light and dark values. When you run these tests, you’re measuring a system that includes the printer hardware, the driver software, and the communication channel between computer and device. Print Setup Pro emphasizes consistency: use the same paper type, same printer settings, and the same print order in every test cycle to obtain meaningful comparisons over time.
Prerequisites and planning: what you should gather beforehand
Before you print, assemble the essentials: a HP printer that’s connected to a computer or mobile device, the latest printer driver installed, standard letter or A4 paper, and a sample test page (built-in options or a printable template). Having a quiet workspace reduces distractions while you inspect details. If you regularly print photos or graphics, consider separate color-managed workflows to isolate issues that come from media choice rather than the printer itself. Planning your test sequence in advance helps you interpret results faster and reduces rework.
Understanding alignment, color, and density: what to look for
Alignment issues appear as misregistered lines, text that bleeds off the page edge, or diagonal shifts in grids. Color problems show as tinted blocks, oversaturated hues, or muted grayscale. Density problems manifest as banding in gradients or patches that appear lighter or darker than expected. Your HP printer may have built-in calibration tools; if not, driver-based adjustments often address most concerns. The objective is to identify which subsystem (mechanical, color profiling, or ink flow) is causing the deviation and apply targeted corrections.
Interpreting color vs. grayscale tests: practical tips
Color tests reveal how accurately the printer reproduces primary colors and skin tones, while grayscale tests check tonal fidelity and shadow detail. In a grayscale test, watch for smooth grays instead of steps or banding. If color blocks appear skewed, verify color profiles in the printer software, confirm the media type setting matches your paper, and consider recalibrating color management. The key is to isolate variables: if grayscale is off but color blocks are correct, focus on grayscale calibration rather than full-color settings.
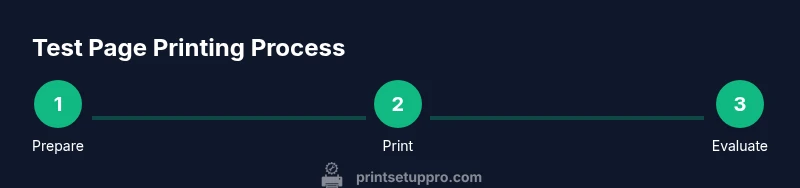
Step-by-step testing workflow: a repeatable routine
- Connect and prepare the printer: ensure it is online, drivers up to date, and the paper tray is loaded properly. 2) Select a test page template that includes alignment grids, color blocks, and density scales. 3) Print a single page and inspect it under good lighting. 4) Compare against reference patterns and note any misalignment, color drift, or density issues. 5) Adjust driver or printer settings one variable at a time and reprint. 6) Repeat until results align with reference values, then save the page as a baseline.
How to choose the right test page template for HP printers
HP printers often include built-in test pages or can be paired with printable templates from HP support sites. When selecting a template, prefer those that cover all three axes of testing: alignment, color, and density. If you’re using third-party templates, ensure they use standard color spaces (sRGB or Adobe RGB) and compatible paper sizes. Keeping templates consistent across tests makes trend analysis easier and more reliable for troubleshooting.
Practical workflow for home offices and students
For home offices and students, consistency beats perfection. Create a monthly testing routine: run a test page after printer maintenance, color cartridge changes, or when a new driver is installed. Keep a small log noting the date, template used, and any adjustments made. Over time, this record helps you detect gradual drift before it becomes noticeable, saving time and preventing productivity losses due to printing issues.
Data-driven interpretation: turning results into actions
Document the observed issues with clear notes such as which blocks misregistered, where color drift appeared, and how density varied across pages. If problems persist after driver updates and calibration, consider media-related adjustments (paper type, weight, and coating). Finally, if misalignment or banding recurs, contact HP support or a local service provider with your recorded results to tailor a targeted solution.
Tools & Materials
- HP printer(Ensure it is connected and powered on)
- Computer or mobile device(For driver access and template selection)
- Printer driver/software(Latest version installed)
- Standard paper (Letter/A4)(Plain or lightly textured paper)
- Test page template or built-in test page(Choose one with alignment, color, and density sections)
- Cable or reliable wireless connection(Ensure stable data transfer)
- Notebook or logging sheet(Record results and changes)
- Color calibration sheet (optional)(Extra reference if available)
Steps
Estimated time: 30-45 minutes
- 1
Verify prerequisites and connect
Confirm you have all required items and that the printer is connected to your computer or network. Ensure drivers are up to date and that you can print a standard page. This initial check prevents wasted pages and confusion later.
Tip: Double-check network status and ensure the printer shows as online before proceeding. - 2
Load test page media
Open the printer tray, load standard paper, and adjust the paper type and tray guides for a snug fit. Avoid overfilling or using damaged media, which can skew results.
Tip: Use the correct paper size and ensure the paper is against the stop to prevent skew. - 3
Open printer software to select test page
Access the printer settings and choose Print Test Page or a dedicated template that includes alignment, color, and density sections. Decide whether to test color or grayscale first.
Tip: Choose a single template that includes all necessary sections to keep tests comparable. - 4
Print the test page
Send the print job and wait for completion. Do not cancel mid-page, as partial prints can mislead assessments. Use normal print quality unless testing a high-precision range.
Tip: If printing fails, check for paper feed jams and verify the tray is properly seated. - 5
Evaluate the printed page
Assess alignment, color blocks, and density against the reference. Note any misregistrations, color drift, or banding. Photograph the printed page for future comparison.
Tip: Create a quick scoring rubric to standardize your evaluation across tests. - 6
Make adjustments and re-test
Tweak one variable at a time—color profiles, calibration, or driver options—and reprint. Allow enough time for ink to settle if recently changed.
Tip: Avoid changing multiple settings at once; this preserves the ability to identify the cause. - 7
Document results
Record the date, template used, settings, and observed outcomes. Save baseline test pages for future reference and trend analysis.
Tip: Store logs in a dedicated folder and keep a backup copy.
People Also Ask
How do I access the test page on an HP printer?
Open the printer settings from your computer or printer control panel, select Print Quality or Maintenance, and choose Print Test Page. If available, select a template that includes alignment, color, and density patterns.
Open printer settings, pick Print Test Page, and choose a template with alignment and color blocks.
What does misalignment look like on a test page?
Misalignment appears as shifted text or lines, off-register color blocks, or a grid that doesn’t line up with the page edges. Confirm tray alignment and reprint after corrections.
Look for lines or blocks that don’t line up with the edges and fix tray alignment first.
Can I test color accuracy if I’m low on ink?
Color tests rely on available ink. If you’re running low, prioritize grayscale tests to verify tonal accuracy until you replenish ink.
If color ink is low, focus on grayscale tests until you replace cartridges.
How often should I run a test page?
Run a test page after printer maintenance, after replacing ink or toner, or when you notice color drift or alignment issues. Regular tests help catch problems early.
Do a test after maintenance or when you notice drift to catch issues early.
What should I do if issues persist after calibration?
If problems persist, document results, re-check driver versions and media settings, and contact HP support with your test-page log. A service visit may be warranted for hardware issues.
If testing doesn’t fix it, log results and reach out to HP support with your data.
Watch Video
Quick Summary
- Run a test page to verify alignment and color accuracy.
- Test pages provide a repeatable baseline for future checks.
- Document results and actions to track printer health over time.
- Isolate variables and test one setting at a time for clear results.
- Maintain a monthly or quarterly testing cadence for best results.