Test Page for Printer: Step-by-Step Guide
Learn how to create a reliable test page for printer setup, verify print quality, alignment, connectivity, and drivers with a clear, step-by-step guide from Print Setup Pro.

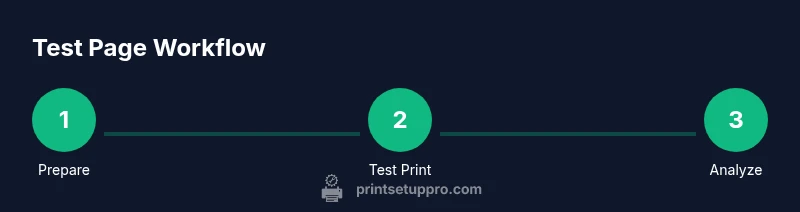
Create a dedicated test page for printer to quickly verify print quality, alignment, color accuracy, and driver status. Gather a template, good paper, and up-to-date drivers, then print and interpret the results to pinpoint issues. This guide walks you through generating, printing, and using a test page to diagnose problems efficiently.
What is a test page for printer?
A test page for printer is a purpose-built document that exercises core printing functions, including color reproduction, grayscale tonal range, alignment, and feed accuracy. It serves as a diagnostic baseline, helping you identify where a problem originates—whether from media, head alignment, ink consistency, or driver settings. For home office users and students, starting with a test page makes troubleshooting faster and less intimidating, especially when facing stubborn print quality issues. According to Print Setup Pro, a dedicated test page is foundational to reliable printer setup and ongoing performance. By keeping a simple, repeatable test page on hand, you’ll reduce guesswork and improve confidence when you print essential documents.
The concept is straightforward: you design or download a template that contains diverse elements—color blocks, grayscale ramps, fine lines, and text samples—that reveal how your printer handles each aspect. Regular use of such pages makes it easier to spot drift after maintenance, cartridge changes, or firmware updates. This page becomes your go-to reference whenever you notice unexpected color shifts, faint text, or misaligned images. Print Setup Pro Team recommends treating this as a routine check, much like calibrating a photo monitor before editing.
width7602000
Why a test page matters for home office users
In a busy home office, reliable printing is a productivity multiplier. A test page gives you a quick, repeatable method to verify that your printer is operating as intended after a setup change, an ink or paper switch, or a software update. It helps you catch misfeeds, color misregistration, or head clog symptoms early, before they impact important documents or school assignments. Print Setup Pro analyses indicate that routine test-page checks reduce escalations to paid service calls and minimize downtime during critical tasks. By confirming alignment and color accuracy upfront, you can trust that your next printer job will look the way you expect, without wasting time on trial prints.
The test page also supports better driver and firmware decisions. When you compare printable results from the same page across driver versions, you gain insight into which settings yield the most stable output. For students who rely on accurate color reproduction for graphics or presentations, a consistent test-page workflow is essential to maintaining professional quality. In short, a test page is a practical, low-effort investment that pays off through fewer reprints and clearer documents. Print Setup Pro Team emphasizes that routine checks keep your workflow smooth and your printer ready for the next project.
width7602000
Core elements of a test page for printer
A robust test page should include several key sections that stress different aspects of the printer:
- Color blocks and color bars to evaluate hue accuracy and saturation.
- A grayscale ramp to reveal tonal fidelity and gradient smoothness.
- Fine lines and text samples to test sharpness and anti-aliasing.
- Alignment targets to verify color registration between printheads.
- Uniform areas to detect banding or shading irregularities.
Designing or selecting a template that covers these elements makes interpretation straightforward. Keep the layout simple and consistent so you can compare results across multiple sessions. As you use the test page over time, you’ll notice how changes like a new cartridge or a firmware update affect output. Print Setup Pro notes that consistent test-page content helps you isolate issues quickly and repeatable testing builds confidence in your printer’s baseline performance.
width7602000
Preparing your test page file and templates
Start by choosing a template that matches your paper size (A4 or Letter) and printer language (PCL or PostScript). If you prefer, create a custom page using a basic document editor or a lightweight graphic tool. Include labeled regions for color blocks, grayscale ramps, and alignment targets so you know exactly what you’re evaluating. Before printing, confirm that the printer properties reflect the same page size, orientation, and media type you’re using. If you’re unsure, print a simple test page to verify that the printer recognizes the settings before attempting a full test page with color sections. Print Setup Pro Team advises keeping a small collection of templates for different media types (plain, photo, or label stock) and occasions.
width7602000
Printing considerations: paper, ink, and drivers
Your test page is only as good as the media and supplies you use. Use fresh, high-quality paper that matches your typical printing tasks to minimize feed or curl issues. Ensure your ink or toner is within its shelf life and the nozzles are clean to avoid blotchy results. Driver settings can greatly affect outcomes; for example, color management profiles, printing preferences, and quality modes can shift how colors render on paper. Always print the test page from a consistent driver version and save the settings you used for future reference. If you notice consistency problems across prints, consider updating or reinstalling drivers from the manufacturer’s site to ensure you’re testing on an accurate baseline.
width7602000
Reading your results: color blocks, grayscale, lines
When you review the printed page, compare each section against your reference. Look for color drift, tinting, or oversaturation in color blocks, and check whether grayscale gradients transition smoothly without banding. Fine lines should appear crisp without blurring or misregistration. If you see any misalignment, note which colors appear offset and in which areas. Documenting observations helps you determine whether the issue is related to media, printer hardware, or driver settings. This disciplined approach reduces guesswork and speeds up resolution. Print Setup Pro Team highlights that consistent evaluation criteria improve diagnostic accuracy over time.
width7602000
Common issues diagnosed by test pages
Test pages reveal a range of problems from simple to complex. Color misregistration often points to alignment issues or swapped printheads, while banding may indicate clogged nozzles, low ink, or head-cleaning needs. Uneven shading can signal driver misconfigurations or media incompatibility, whereas ghosting suggests residual image transfer from prior prints. When a test page consistently shows color bias toward a particular hue, it’s a strong hint that a color cartridge needs replacement or a profile adjustment is required. Each of these observations narrows the field so you can perform targeted fixes rather than random trial-and-error attempts. The aim is to isolate the root cause and restore predictable, high-quality output.
width7602000
Next steps: when to repeat and escalate
After completing a test page, implement the identified fixes and reprint the page to confirm improvements. If results remain inconsistent, repeat the process with a different template or media type to rule out media-related issues. When persistent problems occur despite driver updates, head-cleaning cycles, and media checks, consider escalation to service or manufacturer support, especially for business-critical printing tasks. Print Setup Pro recommends maintaining a short log of your test-page runs, settings used, and observed results so you can quickly compare future sessions and track progress over time.
width7602000
Tools & Materials
- Printer manual(Keep handy for model-specific instructions)
- Test page template(Download a template or design your own with color blocks, grayscale, lines, and text samples)
- A4 or Letter paper(Use clean, unwrinkled sheets (compatible with your printer))
- Quality ink or toner(Ensure cartridges are within shelf life and clean heads if needed)
- Computer or mobile device(To generate, edit, and view the test page and templates)
- Updated printer drivers(Check the manufacturer site for the latest version)
Steps
Estimated time: 25-40 minutes
- 1
Prepare your test file
Create or locate a test-page template that includes color blocks, grayscale ramps, lines, and text. Ensure it matches your printer’s page size and language settings. This step sets the foundation for accurate results.
Tip: Use a high-contrast template to reveal subtle issues. - 2
Load appropriate media and settings
Place fresh paper of the correct type in the main tray and set the printer properties to match the media. Mismatched media often causes feed issues that masquerade as other problems on the test page.
Tip: Avoid reusing wrinkled or old paper to prevent skew. - 3
Run alignment/calibration first
If your printer supports alignment, start there to ensure that color channels line up before evaluating color blocks. Alignment issues can look like misregistration in subsequent sections.
Tip: Run alignment before color tests to rule out mechanical misfeeds. - 4
Print color and grayscale sections
Send the color blocks, color bars, and grayscale ramps to the printer. Use consistent print quality settings so your results aren’t influenced by the print mode.
Tip: Compare to reference swatches on a calibrated monitor. - 5
Evaluate results and adjust settings
Look for color drift, banding, or step-like transitions in grayscale. Tweak color management, brightness, contrast, and printer profile as needed. Make one change at a time.
Tip: Reprint after each change to confirm impact. - 6
Print a final composite test page
Reprint a final page to verify fixes across sections. Document the settings used and the observed outcome for future troubleshooting.
Tip: Keep a running log of tests and results.
People Also Ask
What is a test page for printer and why use it?
A test page is a designed document that reveals how your printer handles color, alignment, and feed. Using it helps diagnose common issues before printing important projects.
A test page shows how your printer handles color, alignment, and feeding, helping you diagnose issues before you print important stuff.
How often should I run a test page?
Run a test page after major changes like new ink, media, or driver updates, or when print quality changes. Regular checks keep output predictable.
Run a test page after changes or when print quality shifts to catch problems early.
What’s the difference between an alignment page and a color test page?
An alignment page checks how well colors line up across printheads; a color test page evaluates hue accuracy and tonal range.
Alignment tests color alignment between inks; color tests check hues and tones.
I see banding in the test page. What should I do?
Update or reinstall drivers, run a cleaning cycle if available, and adjust the printer’s color settings. If banding persists, seek service.
If you see banding, update drivers, clean heads, and adjust color settings; seek service if it continues.
Can I automate test pages?
Yes. Many printers offer scheduled maintenance and batch test jobs through software, which can streamline checks.
You can automate tests using printer software and scheduled maintenance tasks.
Watch Video
Quick Summary
- Test pages identify root causes before work
- Include color, grayscale, and alignment tests
- Document results for ongoing maintenance
- Keep drivers and media in sync with print tasks