How to Replace Printer Toner: A Complete How-To
Learn how to replace printer toner safely and effectively. This guide covers compatibility checks, tools, the replacement steps, and post-change calibration for home offices, students, and DIY enthusiasts.

Learn how to replace printer toner quickly and safely. This guide covers cartridge compatibility, required tools, proper handling to avoid spills, the replacement steps, and a test print to verify quality. It also explains when to replace toner, how to handle waste, and how to maintain your printer to prevent future issues.
What does replacing printer toner achieve and when should you do it?
Printer toner is the fine powder that forms text and images on paper in laser and LED printers. Replacing toner ensures consistent, high-quality output and prevents issues like streaks, faded text, or ghosting. Signs you need to replace toner include obvious fading, specks or smudges, frequent background shading, or a toner-low indicator. The Print Setup Pro approach emphasizes alignment with your printer’s cartridge family, avoiding unnecessary replacements when a refresh isn’t needed. Keeping toner fresh helps minimize reprints, waste, and downtime.
Replacing toner vs. refilling or remanufactured cartridges: pros and cons
There are multiple options for maintaining print quality. Replacing a cartridge with a new, OEM or compatible unit offers predictable performance and fewer warranty concerns. Refilling or remanufacturing cartridges can save money but may introduce variability in print quality and longevity. In mixed environments (home office or small business), weigh cost per page, reliability, and environmental impact. Print Setup Pro recommends testing a small batch of prints after replacement to confirm consistent color and density before resuming large jobs.
Cartridge types and compatibility: OEM, compatible, and remanufactured
Product choice matters. OEM cartridges are produced by the printer’s manufacturer and typically guarantee reliability and warranty compatibility, but at a higher price. Compatible cartridges are third-party options designed to fit your model; they can offer cost savings with comparable performance if selected carefully. Remanufactured cartridges are refurbished used cartridges. While budget-friendly, they may vary in consistency. Always verify your printer model and cartridge family (e.g., HP 80A/Canon 052 or similar) before purchase, and consult your printer manual for exact compatibility notes. The right type minimizes risk of poor print quality and leakage.
Safety and preparation before replacement
Before you begin, power the printer down and unplug it to prevent electrical shock or feed mechanism movement. Work in a well-ventilated area and wear gloves to reduce toner exposure; toner powder can be messy. Have a clean, lint-free surface to catch any powder spills. Empty the waste bin or bag to prevent cross-contamination, and keep a damp cloth nearby to wipe the exterior if toner dust accumulates. If your printer has an internal cleaning routine, plan to run it after installation.
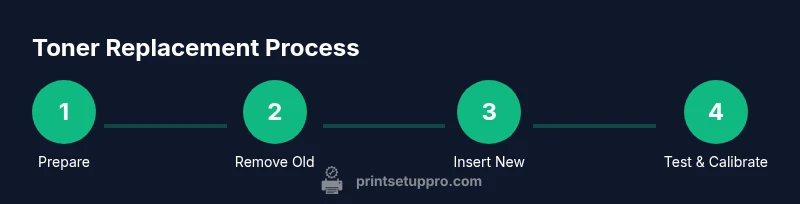
Step-by-step overview before you start
Gather your materials, confirm cartridge compatibility, and review the steps in this guide. Identify the access panel and ensure you have sufficient space to place the printer. If your model uses a separate drum unit, follow the model-specific instructions, as some models require you to replace both toner and drum at the same time. Having a plan reduces downtime and ensures a smooth replacement.
Common mistakes and how to avoid them
Common missteps include touching the toner drum or rollers with bare hands, shaking the cartridge too aggressively, or failing to reset the printer’s counter after replacement. Avoid spills by keeping the cartridge upright and sealed during transfer. Don’t force a cartridge into place; if it resists, check alignment and the cartridge family. Finally, always run a test print to verify alignment and density before continuing with full print jobs.
Aftercare: test prints and routine maintenance
After installation, run a few test pages to check density, color balance, and sharpness. If color looks off, run a calibration or alignment utility in the printer’s software. Keep the area clean and free of toner dust; use a microfiber cloth to wipe the exterior. Consider scheduling routine maintenance checks every few months to ensure feeding mechanisms, fuser, and rollers stay in good condition. Proper handling and timely replacements extend print quality and device longevity.
Tools & Materials
- Replacement toner cartridge (check model number and cartridge family)(Ensure compatibility with your printer model and series.)
- Lint-free cloth or paper towels(For wiping spills and the outside of the printer.)
- Latex or nitrile gloves(Protect hands from toner dust.)
- Small flathead screwdriver (optional)(Useful for removing covers or panels that resist by hand.)
- Tissue or microfiber cloth for surfaces(Extra protection for delicate internals during replacement.)
- Waste container or sealable bag(Contain used cartridge and any spills.)
- Isopropyl alcohol 70% (optional)(For stubborn toner residue on surfaces.)
Steps
Estimated time: Estimated total time: 15-25 minutes
- 1
Power down and unplug the printer
Shut off the printer, wait 30 seconds, then unplug the power cord and any USB connections. This prevents accidental movement of internal gears and reduces the risk of shock. Keep the printer open only after you are sure it is safe.
Tip: Handle the power cord with care and avoid pulling the plug by the cord. - 2
Open access panel and locate the toner cartridge
Carefully open the side or front panel as directed by your manual and locate the toner cartridge. Identify its orientation and note how it sits in the carrier to ensure you install the new cartridge the same way.
Tip: Refer to your printer manual for the exact access steps; some models have a button-release mechanism. - 3
Remove the old cartridge
Gently pull the cartridge straight out using a firm, even grip. If you hear friction, pause and recheck alignment to avoid damaging internal components. Place the used cartridge in a bag or container to prevent toner dust from escaping.
Tip: Do not touch the toner opening or drum surface to protect print quality. - 4
Prepare the new cartridge
Unpack the new cartridge and remove any tape or packaging. If instructed, gently shake the cartridge side to side 5-6 times to distribute toner inside. Remove protective covers only when ready to install.
Tip: Shake with a loose wrist to avoid toner leakage; keep the cartridge level during movement. - 5
Install the new cartridge
Insert the new cartridge firmly into the carrier until it latches. Ensure it sits evenly and is aligned with any guides or tabs. Close the access panel slowly to avoid pinching cables.
Tip: Do not force the cartridge; if it doesn’t slide in, verify orientation and alignment. - 6
Power up and run a test print
Plug the printer back in and power it on. Run a printer alignment or calibration if your device offers it, then print a test page to verify density and alignment. If issues persist, repeat the alignment process or consult the manual.
Tip: Print a few pages to confirm consistent results across different content types.
People Also Ask
Do I really need to replace toner before printing again?
If print quality is diminishing, with faded text or streaks, or the printer reports a toner issue, replace the cartridge. Verify that the toner level indicator corresponds to toner usage and alignment errors before proceeding.
If your prints look faded or streaky, or you see a toner warning, replace the cartridge after checking alignment and history of usage.
Can I reuse or refill a toner cartridge?
Refilling or remanufacturing can save money but may affect reliability and warranty coverage. Always check your printer’s warranty terms and choose reputable sources. If in doubt, a new cartridge provides predictable results.
Refilling cartridges can be cheaper, but it can affect reliability. Check your warranty and consider a new cartridge for the safest route.
What if the printer won’t recognize a new cartridge?
Ensure the cartridge is properly seated, the correct model is installed, and any protective seals are removed. Run the printer’s alignment or cleaning utility. If the issue persists, consult the manual or replace with a known good cartridge.
Make sure it’s seated correctly and that seals are removed. Run alignment; if it still fails, verify compatibility.
Is toner replacement toner-specific to models?
Yes. Toner cartridges are designed for specific printer models and cartridge families. Using an incompatible cartridge can cause poor quality or damage. Always verify the model number and consult the manual.
Toner is model-specific. Verify compatibility to ensure good prints and avoid damage.
What safety precautions should I take?
Work in a clean, ventilated space; wear gloves; avoid inhaling toner dust. Keep toner away from children and pets and dispose of used cartridges according to local recycling guidelines.
Wear gloves, work in a ventilated area, and dispose of cartridges responsibly.
Where can I recycle used toner cartridges?
Most manufacturers offer take-back programs or local recycling options. Check with your printer brand’s site or local electronics recycling facilities for disposal guidance.
Check manufacturer take-back programs or local e-waste recyclers for cartridge disposal.
Watch Video
Quick Summary
- Verify compatibility before purchasing a cartridge.
- Handle toner carefully to minimize spills and exposure.
- Test print and calibrate after installation for optimal results.