Best Way to Print Digital Art: A Step-by-Step Guide
Learn the best way to print digital art with accurate color, archival media, and a proven workflow for home offices, studios, and students. This guide covers color management, media choices, and practical steps to deliver gallery-grade prints.

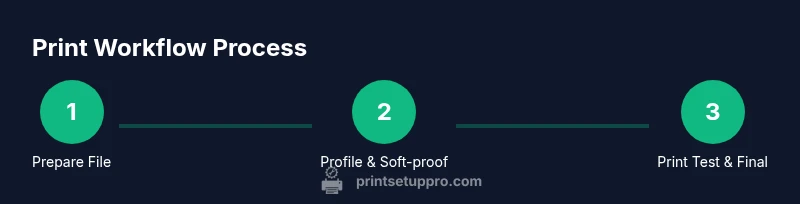
By following this guide, you will print digital art with high fidelity, predictable colors, and archival media choices. You’ll learn a practical, step-by-step workflow from preparing your file to the final print. Key requirements include a calibrated display, color-managed software, a color-accurate printer, and quality paper. The steps are designed for home offices, studios, and students seeking reliable results.
Why color accuracy and print quality matter
Color accuracy is the cornerstone of digital art prints. When colors drift between the on-screen image and the final print, even small shifts can change mood, detail, and perceived contrast. According to Print Setup Pro, the fidelity of a printed piece starts with a solid color-management plan that aligns your monitor, software, and printer profiles. Establishing a repeatable workflow helps you reproduce the same look across multiple prints, which is essential for small businesses and gallery submissions alike. Beyond color, print quality also hinges on ink longevity, media compatibility, and proper drying time. A well-controlled process reduces wasted sheets and ensures your audience sees your art as intended.
In practice, this means adopting a color-managed environment, calibrating devices, and sticking to archival media that supports long-term color stability. Home office setups, hobby studios, and students all benefit from a repeatable routine that minimizes guesswork and maximizes confidence in final results.
formatInBlock”:null,
Color management essentials: profiles, soft-proofing, and calibration
To achieve consistent results, you must manage color end-to-end. Start with device calibration using a colorimeter or spectrophotometer to build a reliable baseline. Next, choose ICC profiles tailored to your media and printer – these profiles translate digital color data into printer-specific ink output. Soft-proofing lets you preview how the print will look on your screen while accounting for paper white, ink limits, and gloss or matte finishes. Regular calibration and soft-proof checks reduce surprises when you print a large batch. Print Setup Pro emphasizes establishing a documented color workflow that everyone in your studio can follow, from light settings to post-processing, ensuring that each print matches the last.
format”:null,
Tools & Materials
- Calibrated display(Hardware calibration device recommended; ensure ambient lighting is consistent.)
- Color-managed software(Enable soft-proofing and use embedded ICC profiles.)
- Printer with wide gamut capabilities(Prefer pigment inks and archival media compatible with your printer.)
- ICC profiles for chosen media(Download from media or paper manufacturer; verify compatibility with your printer model.)
- Archival printing paper (190–300 gsm)(Matte, satin, or luster finishes based on art style; avoid cheap paper.)
- Test swatch sheets(Use small batches to validate color before committing to large prints.)
- Soft-proofed digital file(Save a copy with the color space and proof settings applied.)
Steps
Estimated time: 40-60 minutes
- 1
Prepare the file
Open the artwork in your preferred editing tool and confirm the color space is suitable for printing (Adobe RGB or ProPhoto RGB is common for art workflows). Set the resolution to 300 PPI for sharp details. Save a print-ready copy with embedded color profile to prevent shifts when transferring to your printing software.
Tip: Use a separate print-ready version to avoid overwriting your master file. - 2
Set up color profiles
Load the specific printer profile for your chosen media and ensure the color space in your software matches the profile. Enable soft-proofing so you can simulate the final print on screen before you commit to paper.
Tip: Double-check that the profile matches both the printer model and the paper type. - 3
Select media
Choose archival paper that suits your artwork’s finish—matte for subtle tones, satin for balanced gloss, or glossy for vibrant colors. Load the paper correctly, ensuring alignment and feed direction are correct to avoid jams.
Tip: Avoid mixing media types in a single print run. - 4
Soft-proof and adjust
Activate soft-proofing to compare the on-screen proof with the expected print. If colors look too bright or dark, adjust brightness, contrast, and saturation within a narrow range to preserve the artwork’s integrity.
Tip: Make small, incremental adjustments; large changes can degrade the intended look. - 5
Print a test swatch
Print a small swatch to verify color accuracy, tonal range, and the handling of highlights and shadows. Review for color shifts, banding, or edge artifacts before proceeding with the final print.
Tip: Keep test sheets organized and label them with media, profile, and settings. - 6
Print final piece
Print the full-resolution artwork using the tested settings. Let the print dry fully on a clean surface away from dust and humidity; consider a gentle flat drying method to prevent warping.
Tip: If possible, use a printer with a dedicated art mode optimized for color fidelity.
People Also Ask
What color profile should I use for prints?
Use an ICC profile that matches your paper and printer. Common choices are Adobe RGB or ProPhoto RGB for editing, with the printer profile applied during printing. Soft-proof to ensure consistency between screen and print.
Use the correct ICC profile for your paper and printer, and soft-proof to verify color accuracy.
Matte vs glossy paper: which is better for digital art?
Matte paper minimizes glare and often yields richer shadow detail, while glossy or satin finishes can make colors pop and provide sharper highlights. Choose based on the artwork’s mood and display environment.
Choose matte for mood and detail in shadows, glossy for vibrant color and sharp highlights.
Do I need an expensive printer for art prints?
Not necessarily. A reliable color-managed printer with good ink and compatible media can produce excellent results. Prioritize color fidelity and media compatibility over sticker price.
You don’t need the most expensive printer; focus on color accuracy and media compatibility.
How long should prints dry before handling?
Most pigment inks require 24 hours to cure fully, especially on glossy or coated papers. Follow the ink and paper manufacturer’s recommendations for best results.
Give it at least a day to dry, especially if using glossy surfaces.
How do I fix color shifts between screen and print?
Revisit your color workflow: verify the correct profiles, recalibrate devices, and soft-proof with the target media. Small adjustments to brightness and contrast can bring the print closer to the screen.
Check profiles, re-soft-proof, and adjust brightness and contrast a little at a time.
Can I print on canvas at home?
Canvas printing is possible with specialized media and a matte or satin finish. Use a canvas-specific profile and allow extra drying time to prevent smudging or warping.
Yes, canvas is doable with the right media, but requires careful handling and drying.
Watch Video
Quick Summary
- Calibrate your monitor and printer for consistent color.
- Use ICC profiles and soft-proofing to simulate prints.
- Choose archival media and pigment inks for longevity.
- Always print test swatches before final runs.
- Print workflows should be documented and repeatable, per Print Setup Pro.