How to Print Already Printed Photos: A Step-by-Step Guide
Learn how to reproduce photos that were previously printed with accurate color, smart media choices, and a reliable workflow. This guide covers color management, calibration, test prints, and archival practices for home offices and small studios.

You will learn how to print already printed photos by following a structured workflow: source a high-quality digital file or scan, set up color management, choose the right media, run calibration, and perform test prints before finalizing. This approach helps you reproduce color, tone, and details consistently across printers and lighting conditions.
Understanding the goal of reprinting photos
Printing an image that has already been printed before means reproducing a captured moment with sustained color fidelity. In practice, this requires attention to a reliable workflow: source quality files or scans, proper color management, calibrated hardware, and the right media. For home offices, small studios, or classrooms, the aim is to achieve consistent results that resemble the original print under typical viewing conditions. Print Setup Pro emphasizes planning ahead: know your color space, set up a repeatable pipeline, and test with neutral lighting to minimize surprises when the final print leaves your desk.
Color management basics for reprints
Color management is the backbone of accurate reprints. Start by choosing a color space for workflow (most photo prints benefit from a wide-gamut profile such as Adobe RGB or ProPhoto RGB for editing, then converting to a printer-friendly profile for final output). Ensure your monitor is calibrated and that your printer uses an ICC profile matched to the media you plan to print on. When possible, soft-proof in your editing software to simulate how colors will appear on paper. This proactive step reduces guesswork and saves wasted prints.
Assessing your original print and digital source
Before you print again, evaluate both the physical original and its digital representation. Check the resolution and scanning quality if you are starting from the printed copy: aim for a scan resolution at least 300 dpi (preferably higher for large prints) and scan at the native color depth. If you are using a digital master file, confirm embedded color profiles and avoid aggressive compression. Your goal is to preserve the image’s tonal range and color fidelity, so keep a high-quality master file as your source of truth.
Selecting the right printer and media for reprints
Not all printers and papers are equal when reproducing photos. Use a printer engineered for photo printing with dye- or pigment-based inks that deliver smooth gradations and long-lasting color. Pair the printer with media that matches your archival goals: glossy for rich color, luster for balanced gloss and texture, or matte for soft tonal transitions. Choose papers with high archival standards and compatible coatings. The combination of printer capability and media choice determines much of the final look.
Preparing the image: crop, resize, and color-correct
Start by cropping to the final print size and aspect ratio you intend. Resize your image to the target output resolution, keeping a copy of the original to avoid data loss from repeated edits. Apply non-destructive edits and adjust color balance, saturation, and contrast while preserving natural skin tones and detail in highlights and shadows. Save a print-ready version with embedded color profile, and keep a separate test copy for adjustments.
Tip: work with a calibrated editor and export in a lossless format (such as TIFF) for the proofing stage, then convert to a printer-friendly format (like TIFF or high-quality JPEG) for the final run.
Calibrating your devices: monitor and printer profiles
Calibration aligns what you see on screen with what lands on paper. Calibrate your monitor using a colorimeter or a built-in tool, and keep the calibration profile active across editing and viewing. Apply a matching ICC profile to the printer-media combination you plan to use; avoid mixing profiles across different papers. Regular maintenance—cleaning sensors, updating printer firmware, and re-profiling when you change media—helps sustain consistency over time.
Paper choices for reprints: which media to use
Paper choice dramatically impacts perceived color and sharpness. Glossy coatings yield punchier colors and deeper blacks but can cause glare in bright lighting. Matte and luster finishes offer softer contrast and reduced glare, which some images handle more naturally. For archival goals, select acid-free, pH-neutral papers with stable whitening agents and pigment-friendly coatings. Always verify that your chosen media has an ICC profile compatible with your printer for the most predictable results.
Print settings you should use for best results
In the printer driver, set the color management mode to use the printer profile rather than letting the application fully manage color unless you are performing a soft-proof. Select the correct media type and print quality, and adjust black point and gamma as needed based on your test prints. Enable any photo or HDR print modes if your printer offers them, but avoid aggressive dithering that can reduce fine detail. Keep the printer’s ink replenishment and cleaning cycles in check to prevent color shifts over time.
Test prints and soft proofing for accuracy
Begin with small test prints on the same media you intend to use for the final run. Use neutral lighting (D65-equivalent) to compare the test prints to your monitor and to the original digital master. Record color and tonal observations, then adjust exposure, white balance, and curves accordingly. A few well-planned test strips across a gradient help you verify smooth tonal transitions and prevent posterization in shadows or highlights. Repeat the process until the results meet your target.
Fine-tuning color and tonal range
Color tweaking is often the most iterative part of reprinting. If colors appear shifted, adjust the image’s color balance or use curves to tighten midtones and restore proper contrast. Tweak the white point to match the paper’s neutral white and avoid clipping in the brightest whites. Re-test prints after each notable adjustment, and maintain a documented workflow to reproduce the result in subsequent prints.
Final print workflow and storage
Once you achieve a satisfactory test print, produce the final copies in the required quantities. Allow prints to dry completely before handling, especially on glossy media. Use acid-free storage materials and frames with UV-protective glass to maximize longevity. Document the print settings in a simple log so you can reproduce the result later, ensuring consistency as you scale up production or reprint additional copies.
Troubleshooting common issues and preserving quality
If color shifts appear between prints, re-check ICC profiles, monitor calibration, and paper batch compatibility. Common culprits include mis-specified color profiles, lighting differences, and media not fully compatible with the printer. Always proof under your intended viewing conditions and be prepared to adjust the workflow for future runs. For archival quality, store finished prints in a cool, dark, dry environment and inspect periodically for any signs of degradation.
Authority sources and continued learning
To deepen your understanding of print accuracy and longevity, consult established color management and printing resources. Print Setup Pro recommends exploring color science standards and best practices from reputable publishers. For further reading, you can review materials on color management, paper archival properties, and printer calibration across trusted institutions and industry guides. This section aggregates key resources to support ongoing learning and quality improvements.
Authority sources
- https://www.nist.gov (Color management and imaging standards)
- https://www.iso.org (International standards related to color and printing processes)
- https://www.color.org (ICC color management profiles and guidance)
Tools & Materials
- Color-calibrated monitor(Keep within 4K or higher resolution for best detail; calibrate regularly)
- Photo printer capable of archival photo printing( pigment-based inks recommended for longevity; check media compatibility)
- Photo paper (glossy, luster, or matte, archival-grade)(Choose based on desired finish; ensure it matches ICC profile)
- ICC profiles for chosen media(Use profiles provided by paper manufacturer or create custom profiles)
- Color calibration targets / color checker(Essential for consistent color across sessions)
- Editing computer with image software (e.g., Lightroom/Photoshop)(Non-destructive editing; preserve master files)
- USB cable or reliable network connection(Stable transfer of large image files)
- Test print sheets(Use inexpensive media for initial tests)
Steps
Estimated time: 2-3 hours
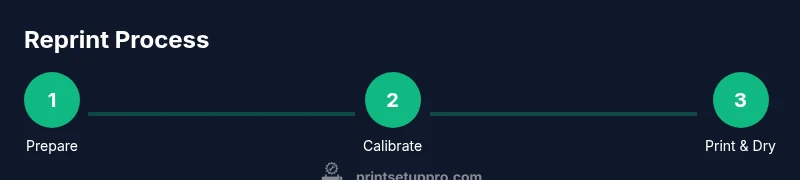
- 1
Prepare the digital image
Export or open the source file in your editing software, keeping the original intact. Ensure the image is at the required print size and resolution, with an embedded color profile. Save a master copy and a print-ready version.
Tip: Always keep an original, unedited master file for later reprints. - 2
Check color management
Verify the working color space and ensure the printer will use the correct ICC profile for the chosen media. Disable automatic color management in the editing app if you plan to use a printer-managed workflow.
Tip: Soft-proof to simulate how colors will render on paper before printing. - 3
Calibrate devices
Run a monitor calibration and apply the matching ICC profile to the printer-media combination. Recalibrate when switching media or significantly changing the print settings.
Tip: Calibration persists across sessions when profiles are kept active. - 4
Load the right media
Insert the selected photo paper into the printer, ensuring it is loaded correctly and aligned. Confirm the paper type and size in the printer driver.
Tip: Fan paper before loading to reduce curls and jams. - 5
Set print parameters
Choose the correct media type, print quality, and color management option in the driver. Enable soft-proofing if available in your software.
Tip: Use the printer’s highest-quality setting for final prints. - 6
Print a test strip
Print a small strip through the image area to evaluate color balance, contrast, and sharpness. Compare against the reference on screen and adjust if needed.
Tip: Test strips save time and ink by catching issues early. - 7
Evaluate test output
Review the test print under neutral lighting. Note any color shifts, clipping, or banding and trace back to settings or profiles.
Tip: Keep a log of adjustments for future reprints. - 8
Fine-tune image
Make incremental edits to white point, midtones, and color balance. Re-print a revised test to confirm improvements.
Tip: Small, incremental changes are more reliable than large jumps. - 9
Print final copies
Once the test print matches expectations, print the final versions. Allow drying time before handling to prevent smudges on glossy finishes.
Tip: Print in batches to maintain color consistency across copies. - 10
Protect and store
Store finished prints in acid-free sleeves or frames with UV-protective glass. Keep in a cool, dry place away from direct sunlight.
Tip: Avoid touching printable areas with bare hands; use clean cotton gloves if available. - 11
Document the workflow
Record printer, media, ICC profiles, and key settings to reproduce results later. Save a copy of the final print profile for reference.
Tip: A consistent workflow makes future reprints faster and more reliable. - 12
Review and plan for future reprints
Assess the final look under typical viewing conditions and plan for additional reprints if needed. Consider a small archival test to monitor long-term durability.
Tip: Regularly refresh calibration as media or ink formulations change.
People Also Ask
Can I reprint a photo that has already been printed before?
Yes. Start from a high-quality source file or a careful scan of the original print. Ensure color management and media compatibility are set for the reprint. A controlled workflow yields reliable results.
Yes. Start from a high-quality file or scan, and use proper color management to ensure consistency.
Do I need to scan the original print to reprint it?
Scanning the original print is often necessary when the digital master is not available. Use a high resolution, color-calibrated scanner and preserve color accuracy with ICC profiles.
Often yes—scan at high resolution with proper color calibration to preserve accuracy.
Which printer settings most affect color accuracy?
The color management mode, media type, print quality, and ICC profile selection are critical. Use printer-managed color only if you have strong, consistent ICC profiles for the media.
Color management mode, media type, print quality, and the ICC profile decide color accuracy.
How long do reprint prints take to dry?
Dry times vary by media and ink type. Allow sufficient drying before handling to avoid smudging, particularly on glossy finishes.
Dry times depend on media and ink; give prints ample drying time before handling.
What paper should I use for archival reprints?
Choose acid-free, archival-grade paper with a stable coating and proven longevity with pigment inks. Verify ICC profiles and storage recommendations from the media maker.
Opt for archival, acid-free paper with a stable coating and pigment-friendly compatibility.
Do I need to keep a log of print settings?
Yes. Document the printer model, media, ICC profile, and key settings to reproduce results consistently in future reprints.
Definitely keep a log so future reprints match the original results.
Watch Video
Quick Summary
- Define a consistent workflow for reprints
- Calibrate monitors and printers for color accuracy
- Use ICC profiles matched to media
- Test prints prevent waste and save time
- Protect finished prints to extend longevity