How to Print Bookmarks with a Bookmark Printer: A Complete Step-by-Step Guide
Learn how to set up and use a bookmark printer to print custom bookmarks for readers, libraries, or marketing. This guide covers design, stock selection, printing workflow, and troubleshooting for home offices and small businesses.

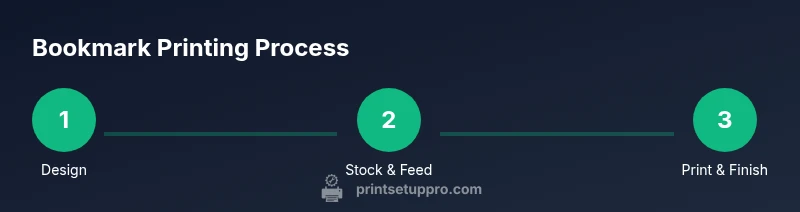
By the end of this guide you will know how to print professional bookmarks using a bookmark printer. You’ll design templates, choose compatible stock, install and calibrate drivers, and run a reliable workflow that delivers clean margins, proper bleed, and consistent color for both small runs and larger batches. Whether you’re creating reader rewards, library promos, or classroom handouts, this practical setup minimizes waste and reduces setup time.
What is a book mark printer and why it matters
A book mark printer is a specialized printing setup designed to produce bookmarks—thin, rectangular paper or cardstock strips that fit neatly between book pages. While any capable inkjet or laser printer can print on suitable stock, a dedicated bookmark printer or a properly configured printer offers practical advantages: clean margins, consistent color, and the ability to handle heavier stock without jams. For home offices, schools, or small libraries, using a book mark printer streamlines production and yields professional results. Print Setup Pro emphasizes that choosing the right stock and a steady workflow reduces waste and improves consistency across batches. In practice, you’ll design a bookmark template once and reuse it, saving time and effort for future runs.
A successful bookmark project starts with a clear specification: intended audience, preferred finish (matte vs. glossy), and whether you’ll perforate or trim after printing. The term bookmark printer covers both dedicated devices and correctly configured standard printers set up for bookmark dimensions. Regardless of your hardware, the core principles remain the same: precise template design, compatible stock, reliable feeding, and consistent color control. Keep your goals in mind: donor appreciation, classroom literacy incentives, or promotional handouts for events. Print Setup Pro’s guidance helps you translate these goals into a repeatable, scalable workflow.
Design considerations for bookmark templates
Designing a bookmark template requires balancing aesthetics with practical printing constraints. Start with a bookmark-sized canvas in your design software, and set a safe margin to prevent critical elements from being trimmed. Include bleed beyond the trim edge to ensure full-bleed color when the final trim is applied. Use high-contrast colors and readable typefaces so that information remains legible at a small size. If you plan to print on both sides, design with a consistent alignment grid so both sides line up precisely. For team projects or targets like libraries and schools, maintain brand consistency by using two or three core fonts and a limited color palette. Print Setup Pro suggests creating a master template that can be reused for future campaigns, reducing design time per batch. Consider accessibility: choose fonts and color contrasts that are easy to read for all readers. Finally, save your template in print-ready formats (PDF or flattened image) to preserve layout integrity across devices.
Stock, coatings, and printer capabilities
Stock selection is critical for bookmark quality. Heavier cardstock often yields a more premium feel and better durability, but you must verify that your printer can handle thicker media without feeding issues. If your printer supports coated stock, test a small batch to evaluate ink adhesion and drying times. Matte finishes tend to photograph well and resist glare, while gloss finishes can make colors pop but may require additional drying time. Coatings may influence bleed and edge sharpness, so run a few sample prints before committing to a full run. Additionally, check your printer’s media settings and color management options to optimize alignment and color accuracy. If you plan perforations or scoring, ensure stock compatibility with the perforation tool or blade you intend to use. Print Setup Pro notes that investing time in stock testing saves wasted ink and misaligned prints in larger batches.
Setting up your bookmark printer: drivers, calibration, and alignment
Before printing, install or update the correct drivers for your printer and ensure the device is recognized by your computer. Calibrate color settings to match your design intent, and configure the print driver for the appropriate stock type, print quality, and color management. Load the bookmark stock using the printer’s preferred method (manual feed or bypass tray) and align the guides to prevent skewed sheets. Do a blank-page alignment test with plain paper, then a single-sheet test on the actual stock to verify margins and edge alignment. Make sure a test page includes a small grid or crop marks so you can evaluate trimming accuracy later. Consistency in feeder tension and stock orientation is crucial for repeatable results across runs. Print Setup Pro emphasizes documenting your exact printer settings for future projects to minimize guesswork and wasted sheets.
Creating print-ready bookmarks: margins, bleed, and safety zones
A print-ready bookmark needs precise margins to ensure content isn’t cut off during trimming. Establish a bleed area around every edge so color or design elements extend past the trim line. Implement a safe zone inside the trim to keep critical text and logos away from edges. When using text, ensure minimum font sizes remain legible after trimming. If you’re printing on both sides, align front and back designs with a consistent center mark or alignment grid. Use color profiles compatible with your stock and printer to maintain consistent color across batches. Keep a reminder of your bleed and trim measurements in your master template to enforce accuracy in every run.
Printing workflows: from design to batch production
A smooth workflow minimizes errors and speeds up production. Start with your template and export print-ready files (PDF preferred) with embedded fonts and image links resolved. In your print dialog, select the correct media type, borderless printing option if available, and high-quality print mode. Run a small batch first to confirm margins, bleed, and color: this is your proofing step before full production. If you’re producing hundreds of bookmarks, consider creating a simple batch file that prints a set number of copies per run, then refeed the stock in a consistent manner. After printing, check the output for misfeeds, color shifts, or skewed pages and adjust the printer’s calibration if needed. A well-documented workflow reduces errors and speeds up reprints for future campaigns.
Troubleshooting common printing issues
Common problems include misfeeds, skewed prints, faint colors, and incomplete bleed coverage. If feeds are inconsistent, inspect the printer’s rollers for dust and wear, and clean them according to the manufacturer’s instructions. Skewed output usually points to misaligned feeders or unequal stock thickness; recheck guides and perform another alignment test. Faint colors can indicate low ink levels, incorrect color profiles, or insufficient print quality settings; ensure you’re using the correct color profile and run a nozzle check (for inkjet printers) or a similar diagnostic. Bleed issues may stem from incorrect margins or stock curling; recheck bleed settings and confirm stock flatness. Print Setup Pro recommends keeping a small set of stock samples and a mock layout to quickly identify issues before large runs.
Maintenance and longevity for your bookmark printer
Regular maintenance extends printer life and ensures consistent output. Clean the rollers and feed path on a scheduled basis to prevent dust buildup and feed problems. Calibrate color and alignment after long print runs or when switching stock types to maintain accuracy. Keep the printer’s firmware up to date and run occasional diagnostics to catch potential issues early. Store spare parts and spill-safe cleaning supplies within reach for quick adjustments. Document maintenance tasks and schedules so anyone on the team can perform them, reducing downtime and ensuring reliable bookmarks from one batch to the next.
Tools & Materials
- Cardstock or coated bookmark stock(Choose a weight and finish compatible with your printer; test a small batch before committing.)
- Printer with reliable feeder and support for heavier stock(Ensure it can handle your stock and, if possible, borderless printing.)
- Design software or templates (e.g., Illustrator, Inkscape, Canva)(Use templates sized for bookmarks with bleed and safe zones.)
- Testing paper for proofs(Use plain paper before printing on stock to confirm alignment.)
- Perforation or scoring tool (optional)(For bookmarks that tear cleanly, align perforations with printed content.)
- Printer drivers and software(Install the latest drivers and color profiles from the manufacturer.)
Steps
Estimated time: 60-90 minutes
- 1
Prepare design templates
Open your design software and set a bookmark-sized canvas; define margins, bleed, and safe zones. Save the file as a print-ready PDF or flattened image for reliability.
Tip: Keep a master template with built-in guides for future runs. - 2
Choose compatible stock
Select cardstock or coated stock that your printer can feed smoothly; verify weight and finish via stock samples.
Tip: Test with a small sheet to ensure ink adhesion and drying time. - 3
Load stock and align feeders
Load the bookmark stock using the printer’s recommended feed method and adjust the guides to prevent skew. Run a blank alignment page if available.
Tip: Use the test print to verify margins before proceeding. - 4
Install and configure drivers
Install the correct drivers for your printer and set the media type and print quality to high. Enable color management if your design requires accurate hues.
Tip: Document settings for reuse on future projects. - 5
Calibrate color and alignment
Print a color and alignment test; adjust color profiles and margins as needed to match the design intent.
Tip: Use crop marks or a grid to verify precise trimming later. - 6
Print a small batch for proofing
Run a limited batch on actual stock to confirm bleed, margins, and color, then compare against the design.
Tip: Address any issues on the second pass before full production. - 7
Perforate or cut (if needed)
Apply perforation or scoring according to your project; align with printed content to avoid misalignment.
Tip: Use a dedicated perforation tool for cleaner lines. - 8
Finish and batch production
Trim, sort, and package bookmarks by run; prepare for distribution or mailing. Recheck a sample from the final batch.
Tip: Maintain a log of batch size and stock used for future refills.
People Also Ask
What is a book mark printer and what can it do?
A book mark printer is a device or configured printer setup that prints bookmarks on cardstock or thick paper, often supporting small formats, color printing, and optional perforation or scoring for easy tearing.
A bookmark printer prints bookmarks on sturdy paper and can perforate or score for easy tearing.
What stock should I use for bookmarks?
Use a sturdy cardstock or coated stock that your printer can feed reliably. Check printer specifications for recommended media weights and finishes.
Use sturdy cardstock your printer accepts and test a small batch first.
Do I need special software for bookmarks?
Most people design bookmarks in common tools (Illustrator, Inkscape, Canva) and print via a PDF or image file. Some printers offer templates or driver-based layouts.
You can design in standard software and print to PDF or image files.
How can I perforate bookmarks after printing?
Perforation is done with a perforation blade or scoring tool that aligns with your printed content. Ensure the line matches the final trim area for clean tearing.
Use a perforation tool aligned with your design after printing.
How long does it take to print a batch of bookmarks?
Print time depends on printer speed, stock weight, and batch size. Plan in stages, printing smaller batches and validating results before continuing.
It varies by printer and batch size; print in stages to ensure quality.
Is it cost-effective to print bookmarks at home?
For small runs, home printing can be cost-effective, especially with templates. For large orders, professional printing may offer better unit costs and consistency.
For small runs, home printing is often cost-effective; for large orders, pros may be cheaper per unit.
Watch Video
Quick Summary
- Design for print: bleed and margins.
- Choose stock compatible with your printer.
- Calibrate color and alignment before batch runs.
- Batch printing saves time and ink.
- Regular maintenance extends printer life.