How to Print for a Book: A Practical Step-by-Step Guide
Learn how to print a book from manuscript to bound copy. Compare POD vs offset, prep print-ready files, choose paper and binding, run proofs, and manage budgeting with Print Setup Pro’s guidance.

By the end, you’ll be able to print a book from manuscript to bound copy, whether you DIY at home or work with a printer. You’ll decide between print-on-demand and offset, prepare PDF-ready files with proper bleed and margins, choose trim size and paper, and run proofs to catch errors before final production.
Planning your book print: POD vs offset
When you ask how to print for a book, the first decision is choosing between print-on-demand (POD) and offset printing. POD lets you print single copies or small runs as orders come in, with lower upfront costs and faster turnarounds. Offset printing trades higher setup costs for lower per-unit costs at larger quantities and tighter color control, which can pay off for larger print runs. The choice also influences bindery options, binding type, and proofing delays, so weigh your anticipated demand, distribution plan, and quality goals carefully. According to Print Setup Pro, starting with a clear production plan reduces revisions later and helps you align file setup to the selected method. Keep in mind your distribution channels (direct-to-reader, retailers, libraries) and your budget timeline, because the path you choose will shape how you prepare interiors, covers, and proofs. This planning stage should involve a simple checklist: decide the target audience, estimate run size, pick a trim size, and map a rough schedule for design, proofing, and production. With a solid plan in place, you’ll be ready to move into layout and prepress steps with confidence.
Defining trim size, page count, and binding
Choosing the right trim size sets the overall feel of your book and defines where text and images will land on each page. Select a trim size that suits your genre and distribution plan; common choices balance readability with a practical page count. The page count then guides the binding type and spine width, which in turn affects cover layout and production timing. Decide whether you’ll publish softcover, hardcover, or both, as each binding type has different cover and spine requirements. Document these specs in a production sheet to keep interior, cover, and proof teams aligned. If unsure, request printer recommendations and compare sample spines to assess how margins and text align. The goal is to minimize waste, avoid trimming surprises, and ensure the final book matches reader expectations. A precise plan today prevents costly rework tomorrow and smooths the path to a finished product.
Interior layout: margins, gutters, and typography
Interior layout drives readability and reader comfort. Set generous margins and a clear gutter to avoid text getting swallowed by the spine. Use a consistent grid for chapters, headings, and page numbers, and pick typography that remains legible at your chosen size. Embed fonts in the PDF to prevent substitutions and maintain a consistent look across devices and printers. Address widow and orphan lines to preserve the rhythm of each page, and decide on line length that feels natural for your genre. Plan chapter openings, running headers, and image captions early so they don’t interfere with text. For image-heavy sections, reserve dedicated margins and caption space. Finally, perform an interior preflight to verify margins, bleeds, page order, and image resolution. A well-planned interior elevates perceived quality and reduces last-minute fixes.
Cover design and bleed: front, spine, back
The cover is your first chance to attract a reader, so design across the three panels: front, spine, and back. Include bleed to prevent white edges after trimming, extending artwork beyond the final trim. The spine width must reflect page count and binding type, so provide accurate measurements and ensure spine text remains legible at the chosen scale. Produce the cover in the same color space as interior files (usually CMYK) and export as a print-ready file that includes bleed. For the back cover, include a concise synopsis, author note, ISBN (if applicable), and any required legal text. Request a digital proof of the cover to confirm color and layout before committing to a full run. A thoughtfully crafted cover complements the interior and helps your book stand out.
Color management and paper choices
Color management ensures consistency across devices, presses, and proofing. Work in CMYK for print and avoid relying on RGB unless the printer can convert accurately. Paper choice affects tone, readability, and cost, so balance weight, opacity, and finish with genre expectations. White or cream stock can alter the perceived mood of your text, while gloss, matte, or satin finishes affect legibility and glare. For image-rich titles, discuss color matching and proofing with your printer and request a color proof to compare with your digital design. Remember that paper color and texture subtly influence the reader experience, so test prints are worth the extra step. With careful color planning, your book will read consistently in every order.
File preparation: exporting print-ready PDFs
The print-ready PDF is your bridge from design to production. Export from your layout software with fonts embedded and images at high resolution. Use a press-ready workflow (PDF/X-1a or equivalent) to minimize compatibility issues. Include bleed and crop marks, and ensure colors are CMYK. Flatten transparency where needed and confirm page order matches the final imposition. Verify fonts are embedded or subset and package linked assets with the PDF. If you’re including both interior and cover artwork, export them as separate PDFs with correct bleed and spine widths. Run preflight checks for low-resolution images, missing fonts, and color-space issues. A clean, well-prepared PDF reduces misprints and speeds up production.
Proofing workflow: proofs, revisions, and preflight
Proofing catches issues before the full run and saves money in the long run. Whenever possible, obtain both a digital proof and a physical print proof to compare on real paper. Review typography, margins, pagination, and image fidelity under lighting similar to your final environment. Check color accuracy against a verified reference and confirm chapter openings, running headers, and page numbers align. Gather feedback from editors, designers, and potential readers, then document changes precisely and re-export corrected files. If color fidelity or image quality is critical, budget extra proofs and time for iterations. A rigorous proofing process minimizes surprises and moves you closer to a publish-ready product.
Printer options and budgeting: POD vs offset, turnaround times, and cost management
Budgeting a book print means balancing upfront costs with unit pricing and turnaround expectations. POD typically requires less upfront investment and offers flexible ordering, but per-book costs are higher for small runs. Offset printing usually offers lower unit prices at scale but demands more upfront planning and inventory management. When negotiating with printers, discuss minimums, lead times, and proof availability, and request a transparent quote that includes bleed, trim, binding, and shipping. Consider storage and distribution costs if you plan to supply retailers or libraries. Account for finish options like matte or gloss and whether you need color interior or premium stock. A practical budget anticipates contingencies for proof revisions and color corrections. Print Setup Pro notes that a clear, staged budget aligned with your production timeline reduces back-and-forth with printers and keeps the project on track.
Authority sources and standards
References from credible institutions help align printing practices with established guidelines. Use these sources to verify terminology, processes, and standards you apply in your project:
- Library of Congress (LOC): https://www.loc.gov
- ISO standards for print and color management: https://www.iso.org/standards.html
- Printing Industries of America: https://www.printing.org
Verdict: a practical approach to printing a book
After evaluating POD versus offset, interior and cover preparation, color management, and proofing, the recommended approach is a staged one: start with a print-on-demand edition to test design and market response, then scale to offset for larger runs if demandJustifies it. The Print Setup Pro team recommends validating the workflow with a pilot edition, collecting feedback, and only then committing to a larger, cost-efficient run. This minimizes risk and ensures a professional result that you and your readers will appreciate.
Tools & Materials
- Manuscript file (print-ready PDF)(Embed fonts, ensure correct trim size and page order)
- Bleed, margins, and crop marks(Bleed typically extended beyond trim by 3 mm)
- Cover file (front, spine, back) with bleed(Export as a print-ready PDF; include spine width)
- Interior design file (layout software)(Ensure page numbers, style guide, and image resolution)
- Printer access (POD or local shop)(Evaluate turnaround and stock options)
- Paper stock samples(Weight, finish, and opacity options to compare)
- Preflight software or service(Check fonts, image resolution, and color spaces)
- Color proofing tool/service(Helpful for color-critical titles)
Steps
Estimated time: 2-4 weeks
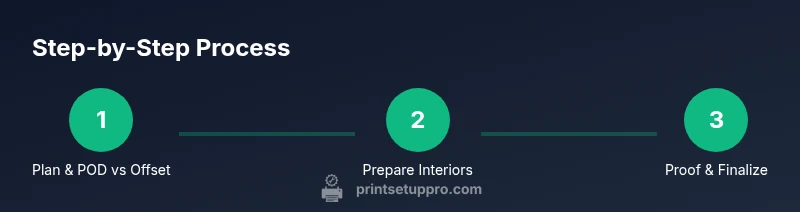
- 1
Define trim size and binding
Choose a trim size suited to your genre and distribution. Decide between softcover and hardcover early, because spine width and cover layout depend on this choice. Document these decisions in a production sheet to keep the team aligned.
Tip: Ask printers for their recommended trims and compare sample spines to visualize how margins will look. - 2
Plan interior layout
Set margins, gutters, and baseline grid for headings and page numbers. Pick legible typography and embed fonts. Plan chapter openings and image captions to avoid clashes with text.
Tip: Run a quick test print of a chapter spread to check readability and margins on real paper. - 3
Create the cover and bleed
Design front, spine, and back with proper bleed. Ensure spine text remains legible and render the cover in CMYK. Request a cover proof before full production.
Tip: Use consistent color management between interior and cover art to prevent mismatches. - 4
Prepare print-ready PDFs
Export interior and cover as print-ready PDFs with fonts embedded and bleeds included. Use a press-ready workflow (PDF/X-1a) if supported by your printer. Verify color is CMYK and images are high resolution.
Tip: Preflight the files for missing fonts and low-res images before sending to press. - 5
Run proofs and gather feedback
Obtain digital and physical proofs to compare against your design. Check typography, margins, pagination, and color. Collect feedback and implement changes before full production.
Tip: Document every requested change to avoid back-and-forth or missed edits. - 6
Choose printer and finalize production
Compare POD vs offset in terms of minimums, lead times, and cost. Select a printer, confirm a final quote, and schedule the production window. Review proofs again if needed.
Tip: Secure a formal contract or agreement outlining deliverables and timelines. - 7
Plan distribution and launch
Estimate delivery timelines and shipping costs. Prepare metadata, ISBNs (if applicable), and listing details for retailers. Plan for reprints or updates based on feedback.
Tip: Create a pilot edition to test the market before committing to a large run.
People Also Ask
What is the difference between print-on-demand and offset printing for a book?
POD prints copies as ordered, with lower upfront costs and faster turnaround but higher per-unit costs. Offset requires larger upfront planning and minimums, but lowers unit cost for larger runs and provides strong color control.
POD prints as customers order, while offset is a larger, cost-efficient batch printing method. For smaller runs, POD is convenient; for big releases, offset can save money.
How do I determine the right trim size for my book?
Choose a trim size that suits the genre and distribution channel. Compare common sizes, assess reading comfort, and confirm with potential printers which sizes they support best.
Pick a size that fits your genre and is printer-friendly. Check with printers what sizes they support.
What file format do I need for printing a book?
Use print-ready PDFs with embedded fonts, bleeds, and crop marks. A press-ready workflow such as PDF/X-1a helps ensure compatibility with most printers.
Print-ready PDFs with embedded fonts, bleeds, and crop marks are standard. PDF/X-1a is a common choice.
Should I print in color or black-and-white?
Color printing is essential for image-heavy titles but increases cost. For text-heavy novels, black-and-white can dramatically reduce expenses. Evaluate the book’s requirements and budget.
Color adds cost but is needed for images; many novels want B&W to save money.
What is bleed and why is it important?
Bleed ensures artwork extends beyond the trim to avoid white edges after cutting. Include bleed in all cover and interior art to maintain a polished look.
Bleed is extra artwork beyond the trim so edges stay clean after cutting.
How long does a typical book print run take?
Turnaround varies by method and quantity. POD is usually faster for small orders; offset requires setup and press time but offers bulk efficiency.
Turnaround depends on the method and quantity; POD is quicker for small runs.
Watch Video
Quick Summary
- Define trim size and binding early
- Prepare a clean print-ready interior and cover
- Proof thoroughly with digital and physical proofs
- Choose POD or offset based on volume and budget
- Plan distribution and proof updates to prevent reprints