Borderless Printing Guide: Edge-to-Edge Results at Home
Explore how borderless printing works, which printers and media support it, and a clear, step-by-step workflow to achieve edge-to-edge prints for photos, documents, and presentations at home or in a small office.

Borderless printing is the capability to print with no margins around the page, maximizing the printable area. To achieve it, enable borderless mode in printer settings, use compatible media, and adjust your document size and printer driver. This guide explains step-by-step how to enable borderless printing across common printers. Whether you're printing photos or edge-to-edge documents, borderless output saves paper and improves presentation.
What is borderless printing and when to use it?
Borderless printing removes most printers' default margins, enabling edge-to-edge output. This capability is especially valuable for photos, marketing materials, posters, and presentations where image bleed or full-bleed effects matter. The decision to print borderless depends on your printer, media, and software support. According to Print Setup Pro, borderless printing is a versatile option for photos and marketing materials. Use it when your project benefits from maximum print area and a professional look, and when you have media and printer settings that can support edge-to-edge output. If your printer lacks true borderless support or uses special media, you may see faint white borders or misalignment. Always test before large runs.
Printer capabilities and limitations
Most consumer and prosumer printers claim borderless capability, but the printable area is governed by hardware design. Many printers support true borderless printing on standard photo papers up to certain sizes (A4, letter, etc.), while others offer only near-borderless with tiny non-printable edges. The limitation is not just the printer; the software driver, print dialog, and media type determine whether edge-to-edge output is possible. In practice, you may gain edge-to-edge results on glossy media but lose accuracy on matte stocks due to ink absorption and paper curl. Always consult the printer manual to confirm supported media, margins, and required border settings. Print quality can vary with ink type, media coating, and rotation orientation.
Media selection for borderless output
For best results, choose media designed for edge-to-edge printing. Glossy or satin photo papers typically yield the most accurate colors and crisp edges, while matte stocks can suffer slight edge distortion if the ink bleeds irregularly. Use media that matches the printer’s recommended borderless specifications and weight. Heavier stocks may require adjustments to print speed and ink density to avoid smudging or curl. ICC profiles or manufacturer-supplied color settings help ensure colors stay consistent when you switch media types.
Layout, page size, and scaling for borderless output
Set the document size to the actual print size and select the printer’s borderless option. Avoid auto-scaling, which can reintroduce margins or crop edges differently. In the software print dialog, confirm the page size, orientation, and fit-to-page options align with your media. When margins appear in previews, review the printer driver settings: some drivers add a tiny non-printable margin, while others provide a true borderless mode. If edge trimming occurs, adjust the scaling to 98-100% and re-check preview alignment.
Color management and calibration for edge-to-edge prints
Borderless printing is sensitive to color management, especially with photo or marketing media. Use the printer’s color profiles or ICC profiles provided by the media manufacturer to improve accuracy between on-screen proofs and physical prints. Calibrate your monitor for color accuracy before printing, and consider a color target print to verify the match. A consistent workflow reduces shifts between different media and printers, which is essential when producing multiple borderless pieces.
Troubleshooting common borderless print issues
If you see light edges, color shifts, or unexpected cropping, start by verifying media type, size, and borderless support in the driver. Some printers require a firmware update to unlock true borderless capabilities, while others need a media setting change. Curling and banding can stem from media moisture, high humidity, or incompatible inks. Always run a test print on plain paper first, then adjust ink density and print speed if needed. Record the exact settings used for future jobs to maintain consistency.
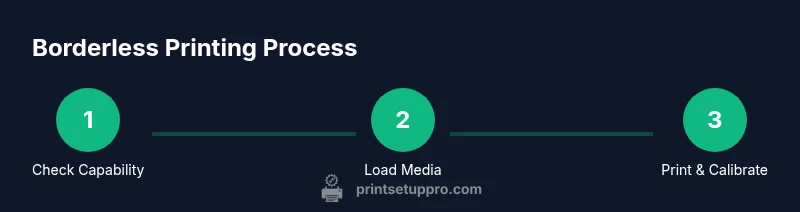
Step-by-step: enabling borderless printing across common printers (narrative)
Begin by powering on your printer and loading borderless-capable media. Open the software's Print dialog, select the correct printer, and switch the layout to borderless. Choose the exact page size that matches your media and disable any scaling. Preview the print to ensure edge alignment, then print a test page. If borders appear, consult the driver for a true borderless mode or adjust media type and density. Finish by saving a preset for future borderless projects.
Best practices for different media types
Glossy photo paper benefits most from borderless printing, delivering vibrant colors and sharp edges. Matte stock often tolerates borderless better with slight reductions in saturation, so you may need to adjust color settings. For heavier media, verify the printer’s feed path, weight limits, and capping mechanism to avoid jams. Keep media clean and flat, and store it in a cool, dry place to prevent curl that interferes with edge-to-edge accuracy.
Quick-start checklist and verification tests
Before you begin, confirm your printer and media support borderless printing and update the firmware. Run a small borderless test on plain paper, review edge alignment, and then move to the actual media. Document which settings work best for each media type, and save those as presets. Periodically re-check alignment after media changes and printer maintenance. Print an on-paper proof to compare with your on-screen proof and adjust as needed.
Tools & Materials
- Printer with borderless printing capability(Consult manufacturer manual to confirm supported sizes and edge behavior)
- Borderless-capable printing media (photo paper or borderless media)(Use media recommended by the printer manufacturer)
- Updated printer driver and firmware(Download from the manufacturer’s official site)
- Computer or device for configuring print settings(Windows, macOS, or Linux with compatible software)
- Color calibration tool or ICC profiles(Helpful for color accuracy across media)
- Ruler or caliper for margin checks(Useful when validating edge alignment)
- Lint-free microfiber cloth(For cleaning print head or media surface)
Steps
Estimated time: Estimated total time: 25-40 minutes
- 1
Power on and load borderless media
Power on the printer and verify borderless capability. Load borderless-capable media into the input tray, ensuring the media lies flat and is properly aligned. Confirm the media type matches the printer’s recommended borderless options to minimize edge cropping.
Tip: Use media that lies flat and avoid curled sheets; correct loading prevents feed misalignment. - 2
Open the print dialog and choose borderless option
In your application’s Print dialog, select the target printer and enable the borderless or edge-to-edge option. If the driver shows multiple borderless choices, pick the one that matches your media size and type. Avoid using custom scaling that might override borderless settings.
Tip: If you don’t see a borderless option, update the driver or check the printer’s firmware for unlocks. - 3
Set page size and scaling to match media
Choose the exact media size in the dialog and disable automatic scaling. Set scale to 100% or 98% if the preview shows edge cropping. Ensure orientation (portrait/landscape) aligns with your content.
Tip: Always preview at 100% scale to confirm edge alignment before printing. - 4
Preview for edge alignment and safe margins
Use the print preview to verify that edges align with the media edges. Note any white borders and adjust the page size or margins accordingly. Some software overlays show the printable area—use it to guide layout decisions.
Tip: If the preview looks off, revert to a test print on plain paper to confirm settings. - 5
Print a test page and inspect margins
Print a small test page on plain media first. Inspect the edges for any unintended borders or misalignment. If necessary, adjust ink density or media type and re-test with the same settings.
Tip: Keep a log of successful combinations for future borderless tasks. - 6
Calibrate color and save a preset
After achieving acceptable edge quality, calibrate color using the media profile and save the settings as a Print Preset. This ensures consistency on subsequent borderless prints with the same media.
Tip: Document the profile used and its source (manufacturer or ICC) for future reference. - 7
Validate across media and save variations
Repeat the process with each media type you plan to use, noting any required adjustments. Save each successful combination as its own preset to speed up future borderless jobs.
Tip: Consistency across media reduces surprises when printing important materials.
People Also Ask
What exactly is borderless printing and when should I use it?
Borderless printing means printing with no visible margins, maximizing the print area. It’s ideal for photos, posters, and edge-to-edge marketing materials where full bleed looks most professional. Use it when your printer and media support true borderless output and you don’t need white margins for design purposes.
Borderless printing prints with no margins, great for photos and posters. Use it when your printer supports true borderless output and the media is compatible.
Does my printer support borderless printing?
Many modern inkjet printers offer borderless printing on select sizes and media. Check the printer manual or manufacturer’s website for the exact borderless sizes, media compatibility, and any required firmware updates. If in doubt, run a small test print to verify edge-to-edge results.
Most modern printers support borderless printing on certain sizes. Check the manual and run a test print to confirm edge-to-edge output.
Will borderless printing crop text or images?
Yes, if content is placed too close to the edge or if the printer cannot render edge-to-edge. Always keep critical text and important image details inside a safe margin and use the edge-to-edge option only for content that benefits from edge-to-edge presentation.
Content near the edge can get cropped; keep important content inside a safe margin.
What papers work best for borderless prints?
Glossy or satin photo papers usually yield the best edge-to-edge results, with accurate color and sharp edges. Matte media can work but may show slight edge differences due to ink absorption; consult media manufacturer profiles for best results.
Glossy photo papers give the best edge-to-edge look; matte can work with proper profiling.
Why do borderless prints sometimes have color shifts?
Color shifts typically come from using mismatched color profiles or media-specific ICCs. Calibrate your monitor, use the correct ICC profile for the media, and print proofs to verify. Consistency across sessions improves when presets include the media profile.
Color shifts happen when profiles don’t match media; calibrate and use the right ICC profile.
How can I fix misalignment in a borderless print?
Re-check media loading, ensure the correct borderless option is selected, and verify that no scaling is applied. If alignment persists, try another tray or load method, and update the driver. Printing a test page helps identify which parameter is off.
Check loading, borderless option, and scaling. Update the driver if needed and test again.
Watch Video
Quick Summary
- Know your printer's borderless limits and media compatibility.
- Use precise page sizes and disable scaling for edge-to-edge output.
- Calibrate color profiles to maintain accuracy across media.
- Test with plain paper before committing to expensive media.
- Save presets for quick borderless printing in the future.