Can You 3D Print Overnight Safely? A Step-By-Step Guide
Learn how to safely run a 3D print overnight with enclosure, power protection, monitoring, and fail-safes. This guide helps home makers print while you sleep.

Yes—it's possible to start a 3D print and let it run while you sleep, but it requires safety checks and reliable equipment. Ensure your printer is in a well-ventilated, clear area, use a robust enclosure, a stable power source, and a timer or smart plug to pause/stop if needed. Plan for print failures and monitor via cameras or alerts.
Can you 3d print while sleeping: Overnight printing realities
The idea of leaving a 3D printer running while you sleep is popular among hobbyists, students, and small makers. The question "can you 3d print while sleeping" is not a simple yes or no; it hinges on the printer setup, environment, and safety measures. With careful planning, many projects can complete overnight while you rest, but the risk of fire, jams, and failed prints remains if you ignore best practices. According to Print Setup Pro, overnight printing can be safer when you implement a documented safety checklist. A well-prepared night run starts with a clear plan, a verified file, and a reliable power and ventilation setup. This article breaks down the steps, safeguards, and monitoring methods that make sleep-friendly printing feasible.
Safety foundations for overnight printing: why it matters
Overnight printing amplifies the consequences of a single error. In a best-case scenario, you wake up to a completed part; in a worst-case scenario, a small flame or melted filament can lead to significant damage. Proper enclosures, smoke detection, and a turn-off plan are essential to mitigate these risks. Print Setup Pro recommends you treat overnight runs as you would any extended electrical activity at home. Establish a written safety routine, verify the enclosure seal, and confirm that your exit route is unobstructed in case you must respond quickly.
Hardware, enclosure, and environmental controls
A well-sealed, heat-tolerant enclosure reduces draft exposure and improves first-layer adhesion and safety. Use a stable, non-flammable surface and a bed that’s properly leveled. Adequate ventilation, away-from-curtains placement, and a smoke alarm nearby add layers of safety. Consider a printer with an enclosed frame or a third-party enclosure designed for silent overnight operation. Ambient room temperature should be stable to minimize material expansion or contraction that could lead to warping and jams.
Monitoring, alerts, and fail-safes you can rely on
Overnight monitoring can bring peace of mind. Use a combination of real-time camera monitoring, a smart plug with energy monitoring, and alert thresholds for temperature or filament jams. Some users pair IP cameras with mobile notifications to get alerts if a print stalls or a temperature spike occurs. Safety is a system, not a single device. Pair your monitoring with a practiced response plan so you can react calmly if something goes wrong.
Step-by-step: how to prepare and run an overnight print
In this section, you’ll find a practical walkthrough tailored for overnight prints, including file checks, slicer settings, and post-run checks. The key is to balance reliability with safety so you can safely answer the question "can you 3d print while sleeping" with confidence.
Tools & Materials
- Enclosure or printer housing(Solid, non-flammable material; seals to reduce drafts)
- Smart plug with energy monitoring(Set to pause/stop if power anomalies occur)
- External camera or IP camera(For remote monitoring via smartphone)
- Smoke/CO alarm(Place within sight of printer)
- Extra filament spool & tools(In same material as print and tools for quick fixes)
- Calibration tools(Calipers, level, scraper for quick bed tweaks)
Steps
Estimated time: 8-12 hours
- 1
Prepare the print file and bed
Open the project, verify model integrity, and slice with reliable settings. Confirm bed adhesion and first-layer calibration before starting the overnight run.
Tip: Run a pre-check print or a small test burn-in of the start area to ensure nozzle clearance. - 2
Set up a safe enclosure
Install or verify the enclosure is sealed and non-flammable. Ensure there is space for airflow and that all cables are managed to avoid tangling.
Tip: Keep doors/windows slightly ajar if the enclosure feels too warm; do not fully seal without ventilation. - 3
Choose overnight-friendly filament and adhesion
Select materials with steady performance across temperature variations. Use appropriate bed adhesion methods suited to the filament to minimize warping and failed prints.
Tip: Brim or raft can improve adhesion on flaky surfaces; test with a 1-2 layer brim for reliability. - 4
Tune slicer settings for reliability
Reduce print speed slightly and ensure cooling is balanced to prevent heat creep. Enable prints with brim, retraction, and safe restart capability if the printer stops.
Tip: Disable overly aggressive cooling on hot trends; ensure retractions are modest to avoid jams. - 5
Configure power and connections
Plug the printer into a surge-protected smart outlet. Set up mobile alerts for power loss, temperature, or stall events.
Tip: Test the alert system at least once before the overnight run. - 6
Start the print and set monitoring routines
Begin the print and verify that the first layer adheres well. Establish a monitoring cadence (e.g., check after 15–30 minutes) and ensure the camera/app is functioning.
Tip: Place camera where it captures the bed and spool area. - 7
Post-run checks and emergency plan
If a stall or abnormal temperature occurs, pause or stop the print using the smart plug or printer control. Have a plan to intervene safely if you wake to alarms.
Tip: Know how to safely power down the printer from the outlet if needed. - 8
Review the print and adjust for next time
Inspect the failed segments, log temperature trends, and tweak slicer or enclosure setup accordingly for future overnight runs.
Tip: Keep a small notebook or app log of overnight experiments.
People Also Ask
Is overnight 3D printing really safe for a beginner?
Overnight printing can be safe with the right safety measures: enclosure, smoke alarm, and a monitored power source. Beginners should start with short, test runs and gradually increase duration.
Overnight printing can be safe if you set up proper safeguards and start with short tests.
What are the top risks when printing overnight?
The main risks are fire, printer jams, temperature spikes, and failed prints. Mitigate by enclosure, smoke detection, and an interruption plan.
The biggest risks are fire, jams, and temperature spikes; use safeguards to reduce them.
Do I need to monitor overnight printing constantly?
Constant monitoring is ideal but not always necessary. Use smart plugs, cameras, and alerts to stay informed while you sleep.
You don't have to watch it every second, but set up alerts and a monitoring system.
Which filaments are best for overnight printing?
PLA and PETG are common for overnight runs due to stable performance, but always follow the printer's material guidelines and bed adhesion recommendations.
PLA and PETG are common choices for overnight prints.
What should I do if a print fails overnight?
If a failure occurs, stop the print safely using the smart outlet or printer controls, and inspect the print and situation before trying again.
If it fails, stop it safely, inspect it, and adjust before your next overnight run.
Watch Video
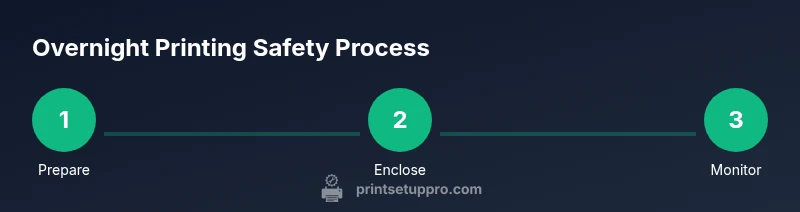
Quick Summary
- Prepare a safe overnight plan
- Enclose and monitor the print reliably
- Use smart power and alerts
- Choose reliable materials and settings
- Inspect prints and iterate for safer future runs