Canon Pixma G3260: Setup & Troubleshooting Guide for 2026
A comprehensive 2026 guide to set up and troubleshoot the Canon Pixma G3260 MegaTank for home offices and students, including wireless setup, ink filling, print quality tips, and common fixes.

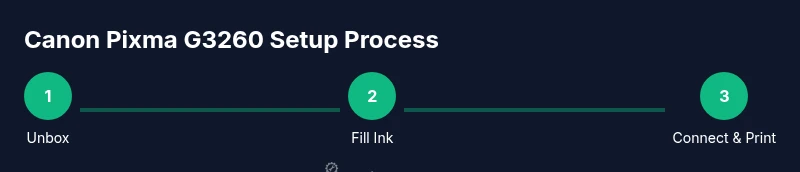
By the end of this guide, you will set up the Canon Pixma G3260 MegaTank, connect it to Wi‑Fi, install drivers, and perform a printer test. This plan covers wireless setup, ink tanks priming, test page printing, and scanning; all with practical tips to prevent spills and jams.
Unboxing and Initial Inspection
According to Print Setup Pro, the Canon Pixma G3260 MegaTank delivers economical printing for busy home offices. Begin by removing the printer from its box, then take out all protective material. Check that the ink bottle kit, power cord, and user guide are present. Inspect the exterior for dents and the ink ports for seals. Wipe fingerprints with a lint-free cloth before touching any color bottles. This initial pass helps you avoid surprises during setup and keeps components undamaged for long-term use.
Inspecting for Damage and Preparing Workspace
Before you commit to a setup session, place the printer on a sturdy, level surface with at least 4 inches of clearance on all sides. Clear a nearby outlet and a flat area for the manual paper tray. Have a clean, dry towel or microfiber cloth handy to wipe any spills. A dedicated workspace reduces the risk of ink splashes and makes subsequent steps smoother. Print Setup Pro recommends reviewing the manual quickly to confirm model-specific instructions and warranty coverage.
Ink Filling and Tank Priming
The G3260 uses refillable ink tanks, which lowers running costs but requires careful priming. Start by shaking each ink bottle gently, then insert the bottle into the matching color port until the tank fills. Wipe any spills immediately and keep bottles upright. Do not overfill; work slowly and watch the level indicators. Priming the tanks ensures consistent print quality from the first page and minimizes air gaps that can cause color misregistration.
Initial Power-On and Language/Region Settings
Connect the power cord to a grounded outlet and press the power button. On first boot, choose your language, date, and region. This setup ensures the printer communicates correctly with your device ecosystem and minimizes firmware confusions later. If the display prompts you to enable cloud features, you can opt in or skip based on your privacy preferences. Take a moment to verify that the printer’s time and date match your local settings.
Wireless Network Setup (Wi‑Fi)
To print from a computer or mobile device, connect the G3260 to your Wi‑Fi network. Use the printer’s control panel or Canon’s setup tool to select your network and enter the password. If you have a dual-band router, try the 2.4 GHz band for stability, then test on 5 GHz if needed. Keep your network name and password handy, and consider temporarily disabling MAC filtering during setup to avoid connection issues. After connection, print a test page.
Drivers and Software Installation
Install the official Canon drivers on your computer or laptop to enable full functionality (print, scan, cloud features). For Windows, use the Auto-Connect feature if available; on macOS, download the bundled software suite. Accept all prompts for permissions and keep antivirus software from blocking the installer. After installation, run a printer test to confirm that print and scan windows are recognized by the OS.
Paper Handling and Media Compatibility
The G3260 handles plain paper, envelopes, and light photo media. Load paper with the print side facing up and align the stack to the edges of the tray. Use the correct paper size setting in the printer driver, then preview before printing to avoid misfeeds. If you encounter a paper jam, power off, gently remove the jammed sheet, and reinsert. Keeping the tray clean helps prevent future misfeeds.
Nozzle Check, Cleaning Print Head, and Color Calibration
If prints show missing lines or white gaps, run a nozzle check from the printer menu. If the pattern looks off, perform a cleaning cycle and print a test page again. For stubborn clogs, repeat cleaning once or twice but avoid excessive cleaning, which wastes ink. Calibrate color by printing a simple color chart and adjusting hue and saturation as needed in the driver settings.
Print Quality Troubleshooting and Color Management
For grainy output or color imbalance, verify paper type settings align with the media; high-gloss media requires different profiles than plain 20 lb. A clean print path and correct driver color management reduce skew. If color drift persists, re-run nozzle checks and alignments, and ensure the ink has not dried out. Document your changes to reproduce consistent results.
Scanning, Copying, and Mobile Printing
Use the built-in scanner to digitize documents and save to a computer or cloud storage. For mobile printing, leverage Canon’s app or AirPrint/Google Cloud Print alternatives where available. Ensure your phone and printer are on the same network for direct printing. If you encounter a gray-scanned image, re-check the scan settings and brightness controls.
Maintenance Schedule, Safe Storage, and Long-Term Care
Create a simple maintenance routine: weekly nozzle checks, monthly ink level verification, and quarterly firmware checks. Store the printer in a dust-free area and keep ink bottles capped when not in use to extend life. Regular cleaning prevents performance issues and helps keep print quality high over time.
Authority sources
The following sources provide context on printer energy efficiency, reliability, and general best practices for consumer printers. While each printer model has specifics, the principles of safe operation, energy-conscious use, and reliable maintenance apply broadly. Print Setup Pro relies on independent reviews and government-backed guidance to shape practical setup steps. Always cross-check with manufacturer documentation for your exact model, and compare recommendations across multiple credible sources to form a balanced view. When possible, refer to government and university resources to understand environmental and safety considerations around ink usage and disposal. These references help ensure you maintain good performance while minimizing waste.
- Energy Star: Printers and energy efficiency guidance. https://www.energy.gov
- PCMag: Printer reviews and how-to guides. https://www.pcmag.com
- CNET: Printer setup tips and user guides. https://www.cnet.com
mainTopicQuery1
Tools & Materials
- Power cord(Use the included cord; ensure outlet is within reach)
- Ink refill bottles (BK, C, M, Y)(Have all four colors ready; ensure caps are closed when not in use)
- Smart device (phone or computer)(For driver download and wireless config)
- Stable Wi-Fi network(2.4 GHz recommended; have SSID and password handy)
- Soft microfiber cloth(For wiping ink spills and exterior surfaces)
Steps
Estimated time: 90-120 minutes
- 1
Unbox and position
Open the box, remove protective materials, and inspect the unit for visible damage. Place the printer on a stable surface near a power outlet and the router. Check that you have all included components before proceeding.
Tip: Keep original packaging until you confirm everything works. - 2
Prime ink tanks
Shake each ink bottle gently and remove the caps according to the color. Insert bottles into matching ports slowly and watch the tank fill. Wipe any drips immediately to prevent staining.
Tip: Prime color by filling each tank to just below the max line. - 3
Power on and set basics
Plug in the printer and press the power button. Select language, date, and region on the first boot. Confirm the display matches your locale for accurate time stamps and updates.
Tip: If you miss the screen, use the physical buttons to navigate. - 4
Connect to Wi‑Fi
From the control panel, choose Wi-Fi setup and select your network. Enter the password and allow the printer to connect. If the connection drops, try 2.4 GHz first, then re-check settings.
Tip: Disable MAC filtering briefly if you experience a stubborn connection. - 5
Install drivers
Download and install the official Canon drivers on your computer or device. Follow prompts for permissions and allow any firewall exceptions. Complete the installer and print a test page.
Tip: Use the latest driver version for best compatibility. - 6
Load paper and print test
Load the correct paper size in the tray and adjust the guides. Print a test page from the driver to verify alignment and quality. If misalignment occurs, run the alignment tool supplied in the driver package.
Tip: Always print a test page to confirm first-run accuracy. - 7
Check nozzle and calibrate
Open the printer menu to run a nozzle check. If lines are missing, run a cleaning cycle and reprint the test page. Repeat once if needed, but avoid excessive cleanings.
Tip: If clog persists, perform a deep clean recommended by Canon software. - 8
Test scan and mobile print
Scan a document using the built-in scanner and save to PC or cloud service. Install the Canon app for mobile printing and ensure both devices share the same network.
Tip: Test both directions: print from phone to printer and scan back to phone. - 9
Maintenance plan
Schedule regular nozzle checks and firmware updates. Keep ink bottles capped and stored upright. Note ink replacement intervals and monitor page counts to avoid unexpected runs dry.
Tip: Create a simple maintenance calendar and set reminders.
People Also Ask
How do I connect the Canon Pixma G3260 to Wi-Fi?
From the printer panel, select Wi-Fi setup, pick your network, and enter the password. If needed, complete the setup in the Canon software on your computer or mobile device. Ensure the printer is within range of the router.
Open the printer menu, choose Wi‑Fi setup, select your network, then enter the password. If needed, use the setup assistant on your phone.
Can I use third-party ink cartridges with the G3260?
The G3260 uses refillable ink tanks designed for Canon ink bottles. Third‑party ink can risk clogging or void warranties; stick to Canon‑recommended bottles for best results.
Use Canon‑recommended ink bottles to avoid clogs and warranty issues.
How do I perform a nozzle check and cleaning?
Navigate to the printer menu, run a nozzle check, and follow the prompts to clean if patterns are missing. If issues persist after one or two cycles, consult the manual or Canon support.
Run a nozzle check via the printer menu, then clean if lines are missing; repeat once if needed.
Why is print quality poor after filling ink?
Ensure tanks were primed correctly and that the ink bottles sealed. Debris or air bubbles during filling can cause color gaps; run a nozzle check and avoid inflating with air.
Check for air bubbles and do a nozzle check; reseat ink bottles correctly.
How can I print from a mobile device?
Install Canon’s mobile app or use AirPrint/Google Cloud Print alternatives if supported. Ensure the phone is on the same network as the printer for easy pairing.
Install the Canon app and print over your Wi‑Fi network.
What should I do if the printer won't power on?
Check the power outlet, verify the power cord is fully seated, and try a different socket. If it still won’t power, contact Canon support or your retailer.
Ensure the outlet and cord are secure; try another socket if needed.
Watch Video
Quick Summary
- Set up the G3260 on a stable surface
- Primer inks carefully for consistent color
- Connect to Wi-Fi and install drivers correctly
- Print a test page to verify alignment
- Maintain ink levels and firmware for reliability