Cricket Printer Setup: Step-by-Step Troubleshooting Guide
Learn how to set up and troubleshoot a cricket printer for crafting projects, including connections, drivers, media, and maintenance. A Print Setup Pro guide.

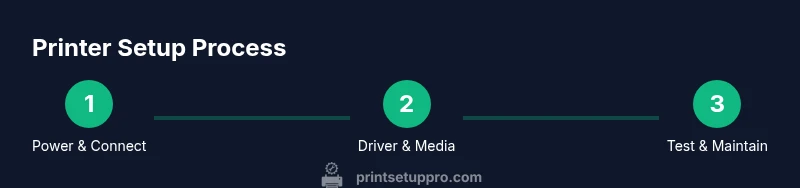
If you want to get a cricket printer up and running for craft tasks, this guide walks you through power, connectivity, driver installation, media selection, and routine maintenance. Start with a clean workspace, organize cables, and run a test print to verify alignment. Print Setup Pro recommends verifying basics before tackling advanced features.
What is a cricket printer? Understanding the concept and scope
In everyday craft workflows, the phrase cricket printer often refers to a consumer printer used in conjunction with cutting machines like Cricut for craft projects. It’s important to distinguish: Cricut is primarily a cutting device, while a cricket printer would be a standard inkjet or laser printer used to produce printable designs that feed into cutting workflows. Print Setup Pro emphasizes clarity in terminology to reduce setup mistakes. When you approach a project, define whether you’ll print first and cut later, or if a printer with integrated color management is needed for accurate design replication. This distinction matters because it determines the kind of drivers, media, and calibration you’ll require. In practice, you’ll be managing three core elements: hardware readiness, software compatibility, and media selection. By aligning these before you begin, you set a reliable foundation for any craft project that involves color, texture, and layered media.
From the home office to a small workshop, users should treat the cricket printer as a tool that complements cutting machines. The Print Setup Pro team notes that most home printers can handle craft tasks when paired with appropriate media and careful calibration. Expect to adjust print quality in small increments and maintain a simple color workflow to avoid unnecessary retries.
Compatibility and connectivity basics for cricket printers
Whether you’re printing labels, stickers, or transfer sheets, the connectivity path determines how smooth your workflow will be. A cricket printer commonly supports USB direct connection and Wi-Fi networking. If you’re using a networked printer, verify that your computer, tablet, or phone can reach the device on the same LAN. Operating system support matters: Windows, macOS, iOS, and Android have different driver and app expectations, and some devices rely on printer-native settings instead of vendor software. Print Setup Pro emphasizes starting with a wired USB connection to simplify debugging, then migrating to wireless once reliability is verified. Always ensure you have the latest driver from the manufacturer, and keep firmware up to date to maximize compatibility with your cutting workflow. When you switch to wireless, consider assigning a static IP address to the printer to prevent roaming conflicts, especially in busy home offices.
In practice, you will want to balance speed, color accuracy, and media compatibility. For many crafters, wireless printing is convenient but may introduce small latency or occasional dropouts; by first mastering a clean USB setup, you gain a stable baseline before introducing wireless reliability tests. Print Setup Pro analysis, 2026 indicates that stable driver installations and verified network configurations lead to dramatically fewer troubleshooting sessions later in the project cycle.
Preparing your workspace and media for cricket printer projects
Craft projects require organization and predictable media handling. Start by choosing a dedicated, well-lit workspace with at least a 1200–1500 lux lighting level to accurately assess color output. Keep the printer on a sturdy, vibration-free surface and place anti-static mats under media where applicable. For media, select coated photo paper, printable vinyl, or iron-on transfer sheets that are compatible with your cricket printer. Pre-measured media helps avoid misfeeds or misalignment. Have a few test sheets on hand to check feed accuracy, print alignment, and margin settings. If your workspace is near heat or moisture, consider a climate-controlled area to minimize curl and print head stress. Label cords and categorize media by type and size so you can quickly swap in the right stock without reconfiguring settings.
A predictable media workflow reduces rework and saves material costs. The Print Setup Pro team recommends keeping a small bin of commonly used media with the printer and documenting the recommended printer settings for each stock so you don’t have to guess every time you switch materials.
Driver installation and software configuration basics
Installing the correct drivers and software is foundational to success with a cricket printer. Begin by visiting the manufacturer’s official download page and selecting the appropriate driver package for your operating system. Avoid third-party driver sources, which can introduce malware or incompatible profiles. After installation, run the driver utility and set up your preferred print defaults: media type, print quality, color management, and page size. If your printer supports color profiles, install ICC profiles for the media you intend to use to achieve more predictable color output. For cutting workflows, ensure the printer driver integrates with your design software or any companion apps that feed print results to your cutting machine. Keep documentation of your driver version and any custom profiles for future reference. If you encounter a failure at this stage, reinstall the driver, restart the computer, and re-run the driver setup with administrative privileges to clear permission-related issues.
Effective driver setup reduces misprints and ensures that what you design in software translates accurately onto media.
Common issues and diagnostic steps you’ll likely encounter
Even well-prepared setups encounter hiccups. Common issues include misaligned prints, banding or color shifts, paper jams, and connectivity drops. Start with a visual inspection: confirm media is loaded correctly, and the printer is feeding paper from the correct tray. If prints are misaligned, run a printer alignment or calibration page and compare the result with the reference guide. Banding can indicate clogged nozzles or low ink; perform a print head cleaning cycle and, if necessary, run multiple passes with the appropriate density settings. If the printer won’t connect, verify the network credentials or USB connection and ensure the printer is selected as the default device in the OS. Firmware updates can resolve many glitches; apply any available updates from the manufacturer’s site. Finally, check media compatibility: some crafts require specific coatings or finishes that interact differently with certain inks or toners. Print Setup Pro advises keeping a troubleshooting log to identify patterns over time and to avoid repeating the same checks across projects.
By following a disciplined diagnostic routine, you’ll reduce downtime and keep your craft projects on track.
Maintenance routines to extend printer life and reliability
Regular maintenance is the quiet hero of long-term reliability. Create a simple weekly or bi-weekly routine that includes cleaning the exterior surfaces, dust removal from vents, and a quick check of cable strain relief. Monthly tasks should include a deeper clean of the print path and feed rollers, as well as a nozzle check and alignment test if you notice subtle shifts in print quality. If your cricket printer supports automatic maintenance reminders, enable them to stay on pace. Replace consumables according to the manufacturer’s specifications, and keep spare ink or toner on hand so you’re not caught mid-project. Store media in closed containers away from direct sunlight to prevent warping. By building a predictable maintenance cadence, you minimize downtime and extend the useful life of your printer and accessories.
Print Setup Pro emphasizes documentation of maintenance dates and performance notes to detect trends and plan proactive replacements rather than reactive fixes.
Advanced topics: integrating with cutting tools and craft workflows
Many crafter workflows involve a two-step process: print the design, then cut or embellish it with a cutting machine like Cricut. To optimize this integration, design documents with a clear margin and bleed specifications compatible with your cutter’s tolerances. Save color-rich designs in printer-friendly formats, and test the entire chain on low-cost media before committing to premium stock. If you’re using printable transfer sheets, double-check heat-setting times and temperature thresholds to avoid scorching the design. In some setups, you may need to export a print-ready file from your design software and feed it into a companion app that coordinates print and cut actions. Print Setup Pro highlights the importance of consistent color workflows across both devices to ensure the final product matches your digital prototype.
The goal is a repeatable, reliable pipeline from digital design to finished project, with predictable outcomes across different materials and media.
Safety, ethics, and environmental considerations for crafting with cricket printers
Always follow the manufacturer’s safety guidelines for electrical and heat-related components. Keep liquids away from the printer and avoid stacking heavy objects on top of the device. When cutting or transferring materials, wear appropriate safety gear for hot surfaces or sharp tools, and store used blades securely. For sustainability, select media with recyclable or lower-impact coatings where possible, and reuse scrap pieces for testing instead of discarding them. Dispose of empty consumables in accordance with local regulations. Consider recycling options for old printers through manufacturer trade-in programs if available. By integrating safety, ethics, and environmental awareness into your workflow, you protect yourself, your workspace, and the planet while keeping your cricket printer productive over the long term.
Color management, calibration, and print quality checks for consistent results
Color management starts with correct color profiles for each media type and printer setting. Calibrate your printer using built-in tools or third-party color-management software to minimize color drift between print sessions. Run a color test page and compare against a reference swatch with controlled lighting to ensure accuracy. If you notice subtle shifts between screens and prints, create or adjust your ICC profiles to align on your most commonly used media. Document the steps you took for calibration, including lighting conditions and display settings, so you can reproduce the results later. By establishing a robust color workflow, you improve consistency across craft projects and reduce the need for reprints across batches.
Putting it all together: how to verify success and next steps
After completing setup, run a final test page using a simple, repeatable design that includes text and imagery. Confirm alignment, color accuracy, and media handling before moving to a full project. Maintain a log of settings for each media type, so future projects start with a quick reference. As you gain experience, you’ll build a library of profiles tailored to common stock and finishes. If you encounter persistent issues, revisit the driver and firmware versions, media compatibility, and the printer’s alignment status. With a systematic approach, you’ll consistently deliver craft projects that meet expectations and minimize frustration. The Print Setup Pro team recommends iterating on the setup with small test runs before committing to large batches, ensuring reliability across all steps.
Tools & Materials
- Cricket printer(Main device used for printing in craft workflows)
- Power supply(AC power cable compatible with device)
- USB cable(For direct connection to computer when needed)
- Computer or mobile device(Windows/macOS/iOS/Android with required apps)
- Wi-Fi network(Stable home or small-office network)
- Printer driver software(Official driver package from the manufacturer)
- Printable media(Coated paper, printable vinyl, iron-on sheets, etc.)
- Cleaning kit(Lint-free swabs and isopropyl alcohol)
- Test pages/media(Standard 4x6 or A4 sheets for calibration)
- Spare consumables(Extra cartridges or ink for your printer)
Steps
Estimated time: 30-60 minutes
- 1
Connect power and turn on the device
Plug the printer into a reliable outlet and switch it on. Confirm that the power indicator lights up and there are no error messages on the display. If there is a startup beep or screen flicker, reset the device following the user manual.
Tip: Check the outlet and power strip; avoid daisy-chaining through other devices to prevent brownouts. - 2
Install drivers and software
Download the official driver package for your operating system and run the installer with administrative privileges. Follow on-screen prompts to complete the setup and restart if prompted. Open the driver utility to configure basic defaults like page size and media type.
Tip: Always download from the manufacturer’s site to avoid malware. - 3
Link to your computer or mobile device
Choose USB for a stable initial setup, or connect over Wi‑Fi once you know your network is reliable. Add the printer to your device's list of printers, and set it as the default if you plan to print frequently.
Tip: If using wireless, ensure the printer and device are on the same network segment and avoid guest networks. - 4
Load the correct media and adjust settings
Insert the media per the tray or feeder instructions. In the driver, select the appropriate media type, print quality, and margins. Preview the alignment and ensure the media isn’t curling or wrinkling during feed.
Tip: Verify directional arrows on the media align with the printer guides to prevent skew. - 5
Print a test page and calibrate alignment
Print a simple test page or alignment sheet. If misalignment is detected, run the alignment function in the driver and again print the test page. Adjust margins and orientation as needed based on the test results.
Tip: Use a basic design for testing; complex images can mask alignment issues. - 6
Perform basic maintenance schedule
Set up a routine to clean the print path, check feed rollers, and run nozzle checks if your device supports them. Replace consumables as needed and log maintenance dates to spot patterns.
Tip: Create a monthly reminder to perform these tasks so problems stay rare.
People Also Ask
What is a cricket printer and how is it used in crafting?
In this guide, cricket printer refers to a standard home printer used for crafting workflows. Cricut is a cutting device, not a printer. Use this guide to set up printers compatible with Cricut-like workflows and combine printed designs with cutting or embellishing steps.
A cricket printer is a regular home printer used for crafts; Cricut is for cutting, not printing, so this guide helps you set up printers for craft projects.
Do I need special software to operate the cricket printer?
Yes. Install the official printer drivers and any companion apps required by your device. Some media types may require color management profiles to achieve consistent results across projects.
Yes. Install the official drivers and any apps needed for your device, plus color profiles for consistent results.
What are common signs of print quality problems and how can I fix them?
Common signs include misalignment, banding, or color shifts. Run nozzle checks, calibrate alignment, and verify media compatibility. Update drivers and firmware if issues persist.
Common signs are misalignment or color shifts; run calibration and checks, update software, and test with different media.
Is it safe to use third-party ink or media with a cricket printer?
Using third-party inks or non-approved media can affect print quality and may void warranties. Stick to manufacturer-approved supplies for reliability and safety.
Third-party inks may reduce quality and could affect warranty; use manufacturer-approved supplies.
How often should I clean the print head and perform maintenance?
Perform a light cleaning weekly if you print often; a deeper wipe-down and nozzle check monthly helps maintain print quality and prolongs the printer’s life.
Clean lightly every week if you print a lot, and do a deeper maintenance once a month.
What should I do if the printer won’t connect to Wi-Fi?
Check network credentials, restart the router and printer, and ensure the printer is on the same network. If needed, reset network settings on the printer and reconfigure the wireless connection.
Restart devices, verify credentials, and reconfigure the wireless connection if needed.
Watch Video
Quick Summary
- Set up in a clean workspace and verify connections.
- Install official drivers and test with a simple page.
- Choose media correctly and adjust print settings.
- Run calibration and routine maintenance on schedule.
- Document settings for repeatable results.