Crio Printer Setup & Troubleshooting: The Complete Guide
A practical, step-by-step guide to setting up, calibrating, and troubleshooting your crio printer. Includes safety checks, driver tips, calibration steps, and common print-quality fixes from Print Setup Pro.

In this guide, you will learn how to set up, calibrate, and troubleshoot a crio printer. You will verify power and data connections, install drivers, run calibration tests, load media correctly, and fix common print-quality issues. This tutorial is designed for home offices, students, and small businesses, and includes safety checks, practical examples, and quick-reference workflows from Print Setup Pro.
What is the crio printer and why it matters
The crio printer is a compact, user-friendly device designed for home offices, students, and small studios. It offers a balance of affordability and dependable performance for everyday tasks—documents, photos, and light label work. According to Print Setup Pro, the most reliable setups begin with a tidy workspace, stable power, and properly connected data cables before drivers are installed or media loaded. When you choose a crio printer, you gain a versatile tool that can adapt to evolving projects, provided you follow a clear setup sequence and commit to routine maintenance.
In this section, we’ll explore how the crio printer fits into typical everyday workflows, why it’s a strong fit for small teams, and how to approach setup with confidence. Understanding its strengths and limits helps you plan practical use cases, from homework sheets to client-ready proofs, while keeping print quality consistent across tasks.
Typical use cases for crio printer
A crio printer shines for mixed workloads in compact spaces. Home offices often rely on crisp text documents, drafts for classes, and occasional photo proofs. Small businesses use it for client handouts, greeting cards, or basic product labels. Students appreciate the ability to print course materials, study guides, and project reports without leaving their desk. The crio printer’s versatility becomes more valuable when you tailor media handling to each task—standard office paper for documents, premium photo stock for proofs, and durable label sheets for inventory and organization.
For many users, the crio printer bridges the gap between a consumer-grade device and a more expensive workstation printer. While it may not replace a large-format or professional-grade printer, it delivers reliable performance for most daily tasks when driven by consistent setup practices and routine cleaning. Print Setup Pro emphasizes planning your week’s tasks and selecting appropriate media ahead of time to minimize reprints and wasted supplies.
Core features and compatibility considerations
Key capabilities of the crio printer include reliable text printing, decent color rendering for basic graphics, and straightforward media handling for common office stocks. Connectivity typically covers USB and wireless options, with straightforward driver support for major operating systems. When planning integration, consider compatibility with your computer ecosystem (Windows, macOS, or Linux) and whether you require mobile printing as part of your workflow. Ensure your firmware is current to benefit from stability improvements and bug fixes.
Practical compatibility notes: verify that your chosen media type is supported by the crio printer and that any label sheets or photo papers are within the printer’s weight and size specifications. If you share the device among multiple users, create standardized profiles to maintain consistent output. A well-chosen driver configuration reduces color drift and alignment issues, especially when print jobs include mixed media. As you scale usage, you’ll appreciate a repeatable setup that minimizes surprises during final proofs.
Planning your setup: prerequisites and workspace
Preparation saves time and prevents avoidable errors. Start with a clean, dry workspace free of liquids or clutter, and place the crio printer away from direct sunlight or heat sources. Use a surge-protected outlet to protect against power fluctuations. Gather required items before you begin: the crio printer, its power supply, data cables, appropriate driver software, and a few test sheets. Have spare ink or toner refills on hand to avoid mid-task interruptions. Ensure you have a stable internet connection for driver updates and online manuals.
Create a simple calibration checklist: confirm the printer is on a supported network, install the latest driver version, verify the device appears in your computer’s printer list, and run a basic alignment test. If you use a shared workspace, label cables and designate a dedicated space for media storage—this reduces misfeeds and media jams. A well-organized setup pays off when you’re pressed for time and need reliable results from your crio printer.
Driver installation and initial setup
Driver installation is the gateway to reliable printing with the crio printer. Start by downloading the official driver package from the manufacturer’s site and verifying the download against the checksum if provided. Connect the printer to your computer via USB or install it on your wireless network, following the on-screen prompts. When the driver is installed, set the crio printer as the default device to ensure consistent results across applications. If prompted for firmware updates, accept them to keep the printer current.
Post-install steps: print a test page, verify alignment patterns, and compare output against expectations. If the test page shows color drift or misalignment, revisit driver settings, paper type selection, and page layout. Keep your system’s operating system updated to minimise compatibility issues that could affect printing with the crio printer.
Tip: keep a small notepad of any observed quirks during setup (e.g., color shifts or feathering). Having a record makes troubleshooting faster later, especially when you’re dealing with multiple configurations for different media types.
Calibration and print quality adjustments
Calibration ensures the crio printer produces sharp text and accurate color for your chosen media. Begin with a standard calibration page and compare against a reference. If you notice horizontal banding, color bleed, or faint text, adjust the printer’s color profile, print density, and paper type settings. Use high-quality test sheets and avoid reuse that could contaminate results. Many printers benefit from a nozzle check and, if needed, a conservative head-cleaning routine.
Record calibration outcomes: media type, print quality rating, and any adjustments made. Re-run tests after changes to confirm improvements. For graphics and photos, consider enabling ICC profiles or color management if supported by your crio printer. Maintaining a consistent calibration routine minimizes drift between jobs and saves time on reprints.
Pro tip: perform calibration in a well-lit area and at consistent room temperature to prevent environmental factors from skewing results. Small changes in humidity and temperature can subtly affect ink flow and drying times, impacting final output.
Troubleshooting common issues and workflows
Even the best crio printer can encounter hiccups. Common issues include paper jams, misfeeds, ghosting, or color shifts. Start with a quick baseline: confirm media type matches the selected profile, check for paper left in the tray, and verify there are no obstructed feed paths. If you see streaks or banding, inspect the print head, run a cleaning cycle, and reprint a test page. For wireless problems, re-establish the network connection and ensure the device is on the same network as your computer.
Adopt a simple workflow: isolate variables by reprinting with standard media after each change, and only adjust one setting at a time. When problems persist, consult the driver’s diagnostic tools and compare results across different applications. If issues occur consistently with a specific media type, consider switching to a compatible alternative or updating the media profile in the driver settings.
Tip: document all changes and test results. A concise log helps you reproduce successful configurations and saves time when troubleshooting future jobs. If you encounter persistent issues, reach out to official support channels with your calibration and test page results for faster resolution.
Maintenance, cleaning, and consumables
Regular maintenance extends the life of the crio printer and preserves print quality. Schedule monthly cleans of exterior surfaces and the print path, and perform a nozzle check when print quality starts to degrade. Use manufacturer-approved cleaning solutions and lint-free cloths to wipe down ink ports and feed rollers, avoiding moisture buildup in any electronic components. Replace consumables like ink or toner according to their recommended lifespans, but avoid waiting until you’re completely out to prevent workflow interruptions.
Keep spare consumables in a cool, dry place and record stock levels to anticipate replacements. Store blank media in a dedicated container to avoid dust exposure that can affect feed reliability. If your crio printer supports maintenance routines in its software, run them on a scheduled basis to automate the process and catch potential issues early.
Finally, keep firmware and drivers up to date. Manufacturer updates often include performance tweaks and bug fixes that improve reliability over time. A proactive maintenance routine reduces downtime and preserves output quality across projects.
Safety, energy considerations, and best practices
Follow basic electrical safety when working with the crio printer. Unplug the device before performing internal cleaning or replacing parts, and avoid liquids near the printer. Use a stable, surge-protected power source to prevent damage from spikes. When not in use for extended periods, power down the device to save energy and extend its lifespan. Many modern printers include sleep modes—enable these features to reduce energy consumption without sacrificing readiness.
Adopt responsible media handling: store papers and labels upright to prevent curling or moisture exposure. For workplaces or study spaces with shared devices, establish a simple usage policy to minimize damage from improper loading or misfeeds. If you’re aspiring to greener printing, compare energy usage across different print modes and media types to choose efficient combinations for your common tasks.
As you work with the crio printer, always balance convenience with safety. Avoid forcing media through when it resistance; check for obstructions and use the correct media type for each job. A careful, safety-forward approach keeps your workspace productive and reduces the risk of accidents or printer damage.
Authority sources and further reading
For safety and technical guidance beyond this guide, consult reputable sources:
- https://www.osha.gov
- https://www.energy.gov
- https://www.nist.gov
mainTopicQuery for Wikidata lookup
Tools & Materials
- Crio printer(The unit you own; powered off before setup.)
- Power cable(Ensure it is the original or equivalent supply.)
- USB cable or network cable(Used for initial setup or local control.)
- Computer or mobile device(With internet access to download drivers.)
- Printer driver software(Download from the manufacturer site; verify compatibility with OS.)
- Replacement ink/toner(Keep on hand for quick replacements.)
- Distilled water and lint-free cloth(For gentle cleaning of ports and nozzles.)
- Paper/media stock(Use media within supported weight and size.)
Steps
Estimated time: 30-45 minutes
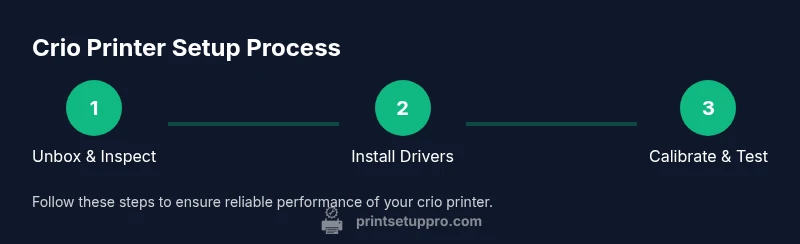
- 1
Prepare your workspace
Clear the desk, remove clutter, and position the crio printer on a stable surface near a power outlet. Gather all tools and media ahead of time. This minimizes interruptions and reduces the chance of misfeeds during setup.
Tip: Keep a dedicated tray of test media nearby for quick calibration runs. - 2
Power up and connect
Plug the printer into a surge-protected outlet and connect to your computer or network. Turn on the device and wait for the startup sequence to complete before proceeding.
Tip: If the device doesn’t power on, check the power cable and outlet with a known-good device first. - 3
Install drivers and software
Download the latest crio printer drivers from the official site and install them on your computer. Follow the on-screen prompts to connect the printer and complete any firmware updates.
Tip: Restart the computer after installation to ensure the driver loads cleanly. - 4
Load media and align
Load media in the input tray according to the media type and weight. Run an alignment test from the printer software to ensure the media feeds correctly and the print path is unobstructed.
Tip: Use media that matches the driver profile to prevent misfeeds. - 5
Run a calibration check
Execute the calibration workflow to align print heads and color channels. Review the calibration chart and note any color deviations or alignment issues.
Tip: If issues appear, revert to a basic profile and rerun the calibration before making advanced adjustments. - 6
Print a test page
Print a simple test page to verify text sharpness, color accuracy, and alignment. Compare against a reference and adjust settings as needed.
Tip: Document the test results to guide future adjustments. - 7
Adjust print settings for quality
Tweak density, color balance, and media type in the driver settings. Re-print test pages after each change to confirm improvements.
Tip: Avoid over-saturating media; small adjustments often yield better results. - 8
Finalize and maintain
Create a basic maintenance schedule, including periodic cleaning and firmware checks. Save current profiles and note any changes for future use.
Tip: Establish a routine to prevent drift in print quality over time.
People Also Ask
What is a crio printer and who should use it?
A crio printer is a compact, user-friendly device suited for home offices, students, and small studios. It delivers dependable text and basic color printing for everyday tasks. This guide explains setup and troubleshooting to maximize its reliability.
A crio printer is a small, easy-to-use device for home and small business printing. This guide shows how to set it up and fix common issues.
Do I need special ink or media for the crio printer?
Always use manufacturer-recommended cartridges and media compatible with the crio printer. Using unsuitable inks or media can affect print quality and may damage the print head.
Use the recommended cartridges and media to keep prints sharp and protect the printer.
How often should I clean the print head or perform maintenance?
Clean the print head when you notice streaks, fades, or color gaps. Establish a regular maintenance routine (e.g., monthly) to prevent buildup and ensure consistent output.
Clean the print head when you see issues, and keep a simple monthly maintenance routine.
Why is my crio printer appearing offline, and how can I fix it?
Check that the printer is connected to power and the correct network. Reinstall the driver if needed and verify the printer shows online in your OS printer list.
Make sure the printer is powered and connected to the same network, then reinstall or re-verify the driver.
Can I print from a mobile device with the crio printer?
Yes, if the crio printer supports mobile printing. Use the official app or built-in system print options to connect.
You can print from a phone or tablet if the printer supports mobile printing.
Where can I find the official manuals and support for the crio printer?
Check the manufacturer’s website for manuals and driver updates. Print Setup Pro also provides practical troubleshooting guidance and setup workflows.
Look on the manufacturer site for manuals and updates, plus Print Setup Pro for extra guidance.
Watch Video
Quick Summary
- Verify power and data connections before driver install
- Use correct media profiles to prevent misfeeds
- Run calibration and test prints to ensure alignment
- Establish a simple maintenance routine to sustain quality
- Keep logs of settings for future tasks