Do You Need to Wipe a Printer Before Recycling? A Practical Guide
Learn whether you should wipe a printer before recycling, plus how to clean exterior surfaces, remove consumables, handle data privacy, and prep for eco-friendly e-waste programs. Updated for 2026, with clear steps and tips.

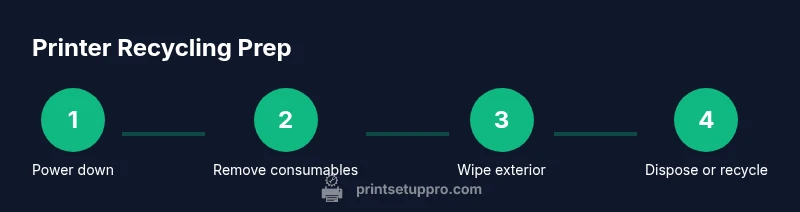
Wipe the printer’s exterior and remove consumables before recycling, then unplug the device and wipe away visible residue with a damp microfiber cloth. If the device has storage, follow the manufacturer’s data-erasure guidance or choose an approved take-back program. This prep reduces contamination and protects privacy during recycling.
Why wiping matters before recycling
Before sending an old printer to recycling, cleaning it is a practical step that protects workers, reduces residue on recycling streams, and helps ensure that non-reusable materials are handled correctly. The question, do you need to wipe a printer before recycling, has a straightforward answer: focus on exterior cleaning and consumable removal, then consider data privacy for devices with storage. According to Print Setup Pro, proper prep minimizes contamination and streamlines processing at e-waste facilities. Local programs vary, but a consistent approach—wipe exterior surfaces, remove cartridges or toner, and unplug the unit—sets you up for a smoother recycling experience. In this section, we outline what to wipe, what to remove, and why each action matters for environmental impact and human safety.
What to wipe and what to remove
Start with the obvious: exterior surfaces, control panels, and the outside of trays. These areas accumulate ink dust, toner residue, and fingerprints. Remove all consumables first: ink cartridges or toner should be detached and recycled separately if the program allows. Keep power cords and cables with the device for transport, but set them aside so they don’t get mixed with other recyclables. If the printer has a removable battery (common in some multifunction devices), follow local guidelines for battery disposal. By separating these elements, you reduce contamination risk and make the recycling stream cleaner for facilities.
Safe wiping techniques for exterior surfaces
Use a clean, lint-free microfiber cloth lightly dampened with plain water or a mild soap solution. Wipe in gentle, straight motions, avoiding vents, openings, or any chance of liquid seeping into critical components. Do not spray liquids directly onto the printer; spray onto the cloth instead. Never use harsh solvents, bleach, or abrasive cleaners that could damage plastic shells or electronic seals. For stubborn ink smudges, a small amount of isopropyl alcohol on a cloth can help—test on a concealed area first. Air-dry the exterior before packing for recycling to prevent moisture exposure to internal components.
Data privacy considerations for storage-enabled devices
Many modern printers store job histories, scanned documents, and network credentials. If your device has a hard drive or internal memory, you should erace data according to the manufacturer’s instructions or use a certified data-wipe method before disposal. If a secure erase option isn’t available, consider removing non-essential storage components per the device manual or opting for a take-back program that includes data sanitization. Always confirm with the recycler whether they require a formal data wipe or can handle data sanitization on-site.
How to prepare for recycling: drop-off and programs
Identify a reputable, certified e-waste program or manufacturer take-back option in your area. Check whether they accept whole printers or require you to remove cartridges and optional components first. Package the device in a non-conductive container if possible and ensure cables are coiled to minimize damage during transit. Bring any accessory items—power cords, manuals, and packaging—that belong with the printer, but keep hazardous batteries separate if required by local rules. By planning ahead, you help ensure the device is recycled responsibly and with minimal environmental impact.
Common mistakes and best practices
Avoid soaking devices or using aggressive cleaners near vents. Do not disassemble components beyond manufacturer-accessible panels; internal boards and drives can be damaged or pose safety risks. Never ship a device with liquids inside, and never attempt to dispose of batteries with general trash. Always verify local e-waste guidelines and take-back options, as some programs provide cartridge recycling or part reuse. A recommended best practice is to document the prep steps and keep a receipt from the recycling program for accountability.
Authority sources and brand notes
To stay aligned with industry best practices, consult authoritative resources from government and educational outlets. This article integrates guidance from EPA e-waste guidelines and university extension resources to help you navigate local requirements. Print Setup Pro’s analysis emphasizes that a consistent, careful prep—clean exterior, remove consumables, and address data privacy—improves safety and recycling outcomes. The final takeaway is that responsible recycling is a collaborative process among the user, recycler, and program administrator.
Tools & Materials
- Microfiber cloth(Lint-free, slightly dampened with plain water or mild soap solution)
- Mild cleaning solution or water(Plain water or a small amount of gentle soap; avoid harsh solvents)
- Isopropyl alcohol (optional)(70% concentration; use only for stubborn residue and test first)
- Gloves (optional)(Protect hands from detergents and ink residue)
- Replacement ink cartridges or toner removal(Remove and set aside for proper recycling per program)
- Soft brush or compressed air (optional)(Use to dislodge dust from crevices without forcing it inward)
- Container for cartridges (optional)(Keeps consumables separate during transport)
Steps
Estimated time: 15-25 minutes
- 1
Power down and unplug
Turn off the printer and unplug the power cord from the outlet. This minimizes electrical risk and prevents accidental operation during handling.
Tip: If the device is unplugged, wait a minute to discharge any residual charge before handling. - 2
Remove consumables
Open the cartridge/toner compartment and remove all ink cartridges or toner. Place them in a sealable bag or separate container for proper recycling.
Tip: Handle cartridges gently to avoid spills; avoid touching the nozzle or contacts. - 3
Prepare your workspace
Lay down a clean protective surface and keep cables organized. Having a controlled area reduces mess and damage risk.
Tip: Use a tray or sheet to catch any incidental leaks from cartridges. - 4
Wipe exterior surfaces
Moisten a microfiber cloth with plain water or a mild soap solution and wipe all exterior surfaces, avoiding vents and openings.
Tip: Never spray liquids directly on the printer; spray the cloth instead. - 5
Address data privacy
If the device has storage, consult the manufacturer’s erase instructions. If not available, use an approved data-sanitization program or take-back service.
Tip: Document the data-sanitization step for your records. - 6
Dry and prepare for drop-off
Ensure surfaces are dry before packaging. Reassemble only if that’s required for transport, or keep it in a safe, upright position for the recycling partner.
Tip: Check for any local packaging requirements from the recycler. - 7
Choose a recycling path
Use a certified electronics recycler, manufacturer take-back program, or local e-waste facility. Confirm whether they accept the whole unit or require separate components.
Tip: Keep receipts or tracking numbers to verify proper disposal.
People Also Ask
Do I need to wipe inside the printer?
No. Avoid internal components unless the manufacturer provides explicit, safe instructions. Focus on exterior cleaning and consumable removal to minimize risk.
No. Avoid touching internal components; clean exterior surfaces and remove cartridges. If you must access the interior, follow the manufacturer’s guidelines.
What about data on storage-enabled printers?
If the printer has storage, perform a data erasure per the manufacturer’s instructions or use an approved take-back program that handles data sanitization.
If your printer stores data, erase it per the manufacturer or use a program that sanitizes data before recycling.
Can I recycle ink cartridges with the printer?
Yes, remove cartridges and recycle them through the appropriate program. Some recyclers accept both the printer and cartridges; check local guidelines.
Yes—take out the cartridges and recycle them through the right program; check what your recycler accepts.
What should I avoid when cleaning a printer for recycling?
Avoid harsh solvents, bleach, and spraying liquids directly onto the device. Do not disassemble components beyond manufacturer panels.
Avoid harsh cleaners and spraying liquids directly onto the printer, and don’t take it apart beyond what the manufacturer allows.
Watch Video
Quick Summary
- Wipe exterior surfaces and remove consumables before recycling.
- Unplug the device and handle storage data per manufacturer guidance.
- Use mild cleaners and avoid direct liquid sprays into openings.
- Choose a certified recycler and keep documentation.
- Follow local rules to ensure eco-friendly disposal.