Elegoo 3D Printer Setup and Troubleshooting Guide
A practical, step-by-step guide to setting up, calibrating, and troubleshooting your Elegoo 3D printer. Includes safety tips, common issues, and pro tricks from Print Setup Pro.

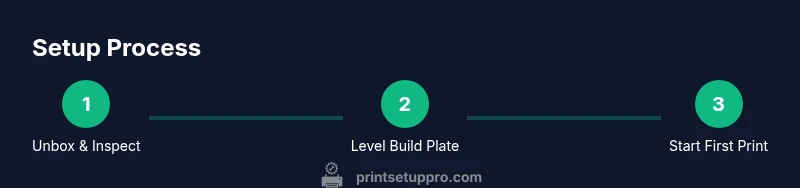
You will learn to set up an Elegoo 3D printer, calibrate the build plate, prepare resin safely, and start a first print. Key requirements include a clean workspace, the resin kit, safety gloves, isopropyl alcohol, and a USB or SD card with a slicer-ready model. Follow printed steps for reliable first results.
Why the Elegoo 3D Printer Is Popular for Home Makers
The Elegoo 3D printer family has become a staple in many home studios thanks to its balance of affordability, print quality, and user-friendly features. Whether you’re prototyping a tiny gadget or crafting detailed miniatures, the Elegoo platform supports resin-based MSLA printing that delivers fine details and smooth surfaces. For home office users, students, and DIY enthusiasts, understanding the basics of how this printer works helps you plan projects, manage resin consumption, and reduce waste. In this guide, we’ll walk through setup, calibration, safety, and practical tips to get you from unboxing to high-quality prints. Print Setup Pro’s approach emphasizes clear steps, sensible safety practices, and repeatable results, so you can save time and avoid common mistakes.
Understanding Resin Printing and Safety
Resin printing, or MSLA (masked stereolithography), relies on liquid resin cured by UV light to form solid layers. This process yields sharp edges and high detail, but it also requires careful handling of liquids, fumes, and curing light. Always work in a well-ventilated area, wear gloves, and avoid skin contact with uncured resin. Set up a dedicated workstation with a spill-proof mat and a small waste station for resin bottles and cups. Dispose of resin waste according to local regulations. Regularly inspect the resin vat for scratches, cracks, and discoloration, as damaged vats can cause print defects and exposure when printing. Print Setup Pro recommends a routine of cleaning, calibration, and safe storage to extend the life of your Elegoo 3D printer.
Unboxing and Inspecting Your Elegoo 3D Printer
Begin by checking the box for completeness: printer, power supply, build plate, resin vat, scraper, tools, and user manual. Look for any signs of transit damage and confirm all components are dry before assembly. If something seems missing or damaged, contact the seller promptly to avoid delays. During inspection, verify the power cable and connectors are intact, and examine the build plate for warping. A clean, dust-free surface helps ensure the first calibration steps proceed smoothly. Keep the manual handy as you proceed, and prepare the resin and safety gear before you start assembly.
Initial Setup: Assembly and Workspace Preparation
Place the printer on a stable, level surface away from direct sunlight or heat sources. Assemble the resin vat and secure the build plate according to the manufacturer’s instructions. Create a dedicated workspace with a spill mat, nitrile gloves, and access to cleaning alcohol. Install a light-proof cover or enclosure if you have one to minimize dust and light exposure when handling resin. A tidy, dedicated setup simplifies future projects and reduces cross-contamination between colors.
Calibrating the Build Plate and Z-Offset
Calibration is critical for a successful first print. Begin with a coarse initial leveling by loosening each corner screw and gently adjusting until the build plate is parallel to the resin vat. Use a calibration sheet or a small business card as a thickness gauge to approximate the gap between the plate and the vat as you tighten screws, then verify with a test print. For resin printers, a precise Z-offset ensures the first layer adheres properly; a typical starting offset is slightly positive, then refined after a short test print. Document your final offset for future projects to speed setup next time.
Slicing and Preparing Your First Model
Choose a simple calibration model or a tiny test object to avoid wasting resin. Import the model into your slicer, set the layer height to a standard trial value (e.g., 0.05–0.1 mm for resin printers), and generate supports that are appropriate for the model’s geometry. Slice the model and transfer the file to the printer via SD card or USB. Verify that the supports and raft (if used) will not interfere with critical features. This step translates your digital design into a printable, resin-friendly instruction set.
Resin Handling, Cleaning, and Post-Processing
Uncured resin is hazardous; always wear gloves and work in a ventilated area. After printing, rinse the model in isopropyl alcohol to remove uncured resin, then let it dry before curing. Cure the print in a UV chamber or under direct sunlight for the recommended duration to reach full hardness. Use disposable cups and lint-free towels to minimize spills, and pour resin back into its bottle through a funnel to avoid air bubbles. Keep the resin bottle sealed to maintain consistency and shelf life.
Common Print Issues and Troubleshooting Techniques
First-layer adhesion problems often stem from an incorrect Z-offset or dirty optics. If a print sticks to the fEP (fused epoxy polyester) window, pause the job and re-level the plate. If layers separate or appear milky, consider adjusting exposure times or layer height. Clogged resin vats or scratched screens cause defects; clean the vat gently with isopropyl alcohol and inspect for scratches before continuing. Keep a log of settings that work well for certain resin colors or model types to accelerate future prints.
Maintenance and Routine Care for Longevity
Develop a simple maintenance routine: clean the vat and build plate after every few prints, replace resin filters if present, and inspect seals for wear. Periodically check the printer’s fans and air paths for dust, and ensure cables are securely connected. Keep software firmware up to date to access improved features and bug fixes. A routine, documented maintenance schedule helps minimize downtime and sustains print quality over months of use.
Best Practices and Quick Diagnostics to Save Time
Label resin bottles to avoid cross-contamination and store them in a cool, dark place. Maintain a small inventory of commonly used colors and resins to prevent last-minute scrambles. When a print fails, review the slicer settings, re-slice with adjusted supports, and perform a small test print. Quick diagnostics include checking the vat for scratches, examining the build plate for parallelism, and confirming the printer’s exposure settings align with the resin’s published recommendations. These habits dramatically reduce wasted prints and post-processing time.
Upgrading Accessories and Safe Disposal Considerations
Consider accessories like a dedicated resin heat mat, a post-processing station, and an enclosure to reduce fumes and light exposure. If your model uses multiple resins, store them in clearly labeled, sealed containers away from sunlight. For disposal, never pour resin down the drain; use a dedicated container for cured waste. Recycle or dispose of resin containers according to local guidelines to minimize environmental impact. Regularly review safety data sheets for all materials you use and adjust your setup to stay compliant.
Common Myths vs Reality for Elegoo 3D Printers
Myth: Resin prints always look perfect out of the box. Reality: Light exposure, resin concentration, and post-processing all affect final quality. Myth: Calibration is a one-time task. Reality: Calibration should become a routine, especially when changing resin colors or printing a new material. Myth: Enclosures are unnecessary. Reality: Enclosures reduce dust and temperature fluctuations, improving consistency. Myth: Any resin works in every printer. Reality: Use resin recommended by the manufacturer to achieve the best results and durability.
Tools & Materials
- Nitrile gloves (powder-free)(Use when handling resin.)
- Isopropyl alcohol (90-99%)(For rinsing prints and cleaning the vat.)
- Elegoo resin (bottled resin)(Store away from sunlight; mix colors only when necessary.)
- Face shield or safety goggles(Protect eyes from splashes.)
- Slicer software (e.g., ChiTuBox)(To generate supports and slicing parameters.)
- Build plate scraper(Helpful for removing finished prints.)
- Lint-free cloth or paper towels(For spills and surface cleaning.)
- Measuring cup and stir stick(For resin mixing and color adjustments.)
Steps
Estimated time: 90-120 minutes
- 1
Unbox and inspect contents
Carefully open the package and verify all components are present and undamaged. Take note of any scratches on the resin vat or build plate. Report any issues before proceeding to avoid printing with compromised parts.
Tip: Document any missing items immediately for faster service. - 2
Prepare workspace and safety gear
Set up a clean, well-ventilated area with a spill mat. Put on nitrile gloves and goggles to protect yourself from uncured resin and fumes. Have isopropyl alcohol ready for quick cleaning between steps.
Tip: Use a dedicated resin work area to minimize cross-contamination. - 3
Install resin tray and build plate
Attach the resin vat and secure the build plate per the manual. Ensure all screws are snug but not overtight. A loose plate can cause Z-offset drift and failed first layers.
Tip: Check for any debris under the build plate before seating it. - 4
Level the build plate and set Z-offset
Use a calibration sheet or card to gauge the gap between the plate and vat. Fine-tune screws to achieve a small, uniform gap across corners. Record the final offset value for future prints.
Tip: If your first layer is too thick or too thin, adjust by small increments. - 5
Load resin and prepare the vat
Pour resin into the vat slowly to minimize air bubbles. Avoid overfilling. Close the vat lid to protect resin from dust and light. Wipe spills immediately with a lint-free cloth.
Tip: Keep resin away from direct sunlight and heat sources. - 6
Slice and transfer the model
Import a simple calibration model into your slicer and enable supports. Slice with a conservative exposure setting for the first test. Move the file to the printer via SD card or USB.
Tip: Choose a small, easy geometry for the first test. - 7
Run the first test print
Start the print and monitor the initial layers for proper adhesion. If you see warping or detachment, pause and recheck Z-offset and exposure settings.
Tip: Do not leave a resin print unattended for long periods during initial trials. - 8
Post-process the print
Rinse the print in IPA to remove uncured resin, then cure in a UV chamber or sunlight for the recommended duration. Wipe the model dry before handling.
Tip: Cure times vary by resin and light source; follow the resin manufacturer's guidelines. - 9
Clean up and store materials
Clean the vat and build plate with IPA, dry thoroughly, and reinstall any protective covers. Return resin to sealed containers and label color to prevent mixing.
Tip: Store resin in a cool, dark place. - 10
Document and refine settings
Log your successful parameters (layer height, exposure, peel distance) for future prints. Compare results across different resins and adjust accordingly.
Tip: Create a small notebook or digital note for quick reference.
People Also Ask
How do I level the build plate on an Elegoo printer?
Begin with a loose setup and gradually tighten the leveling screws while checking the gap with a thin piece of paper. The goal is a uniform small gap across all four corners. Re-test with a short calibration print and adjust as needed.
To level the build plate, loosen the screws, set a tiny gap with paper between the plate and resin vat, then tighten and re-test with a calibration print.
What resin is compatible with Elegoo printers?
Elegoo printers work with standard UV-curable resins designed for MSLA systems. Use resin from reputable brands and follow the manufacturer’s guidelines for exposure and curing times. Color and viscosity can affect print quality.
Use standard MSLA resins from reputable brands and follow exposure and curing times recommended by the resin maker.
Why is my first layer not curing properly?
This usually stems from an incorrect Z-offset or insufficient exposure for the first layer. Re-level the build plate, adjust the offset slightly, and test with a small calibration print. Ensure the resin vat and optics are clean and free of debris.
It’s typically a Z-offset or exposure issue; re-level, adjust the offset slightly, and run a quick calibration print.
How should I clean the resin vat safely?
Rinse the vat with isopropyl alcohol after use and inspect for scratches. Do not scrub aggressively; use a soft cloth. If you see damage, replace the vat to avoid defects and potential exposure.
Rinse with isopropyl alcohol and inspect for scratches; replace if damaged to avoid prints failing.
How can I optimize print quality and reduce failures?
Start with a simple calibration model to tune layer height and exposure. Keep a log of settings for different resins and monitor prints in the first 20-30 minutes for early failures. Use supports and adequate post-processing to improve surface finish.
Tune layer height and exposure with a calibration model, log your settings, and monitor early in the print.
Watch Video
Quick Summary
- Prepare a clean, dedicated workspace before starting.
- Calibrate build plate and Z-offset for reliable first layers.
- Handle resin safely and follow proper post-processing steps.
- Document settings to accelerate future prints.
- Maintain equipment and practice environmentally responsible disposal.