How to Connect to a Printer: A Step-by-Step Guide
Learn step-by-step how to connect to a printer via USB, Wi‑Fi, or Bluetooth. This guide covers driver setup, network basics, and common troubleshooting for home offices, students, and DIY setups.

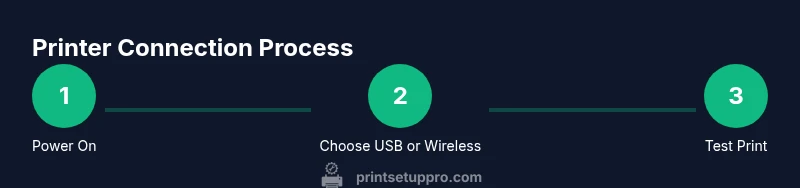
According to Print Setup Pro, you can connect to a printer using USB, Wi‑Fi, or Bluetooth, then verify the link with a test print. This guide covers setup on Windows, macOS, Android, and iOS, plus common issues and quick fixes. Key requirements include the printer powered on, drivers installed, the same network for wireless connections, and the correct cable or pairing method.
Why a Reliable Connection Matters
A reliable printer connection is the backbone of any productive printing setup. When a link drops, you waste paper, lose work, and create frustration for yourself or teammates. Print Setup Pro notes that stable connections reduce wasted time and support smoother workflows in home offices, dorm rooms, or small businesses.
USB, Wi‑Fi, and Bluetooth each have places in a modern printing environment. USB offers straightforward, direct printing with minimal configuration, ideal for single-user desks. Wi‑Fi enables flexible placement and shared printing across devices, which is essential in a small office. Bluetooth suits nearby devices like tablets or phones when you need quick print jobs without routing through a network.
In this section we cover how to assess your space, choose the right method, and prepare for a successful setup. You’ll learn how to avoid interference, select the right network band, and apply best practices so printers stay reachable across devices and operating systems.
USB vs Wireless: Pros and Cons
Direct USB connection provides fast, reliable printing with minimal configuration. It is ideal for a single user who prints frequently from one computer and wants a clutter-free setup. The downside is that only the connected device can print, which limits shared use on a desk.
Wireless printing (Wi‑Fi or Bluetooth) offers flexibility and multi-device access. It is perfect for households or small offices where multiple laptops, phones, or tablets need to print from various locations. The trade-offs include potential network interference, initial setup complexity, and occasional driver or compatibility hiccups.
When evaluating USB vs wireless, consider your environment:
- If you print mainly from one device, USB is usually simplest.
- If you share the printer across several devices, wireless is more practical.
- Bluetooth is handy for nearby devices but not ideal for large or shared print jobs.
Many modern printers support AirPrint, Google Cloud Print (legacy), or vendor apps that can simplify connections. If your devices support it, enabling these features can reduce setup steps and improve reliability.
What You Need Before You Start
Before you connect, gather the essentials and verify compatibility. Ensure the printer firmware is up to date and that your computer, tablet, or phone is on a supported OS version. If you plan to print wirelessly, confirm you have access to the correct Wi‑Fi network and password. If you’re using USB, have a reliable USB cable of adequate length. For wireless setups, know the printer’s IP address or SSID to place it on the network.
Helpful checks:
- Reboot printer and computer to clear stale connections.
- Confirm the printer appears in your device’s list of available printers.
- Determine whether your printer requires a dedicated driver or will use built‑in OS functionality.
Having these items ready reduces back-and-forth steps and speeds up the setup process.
Step-by-Step: USB Connection Basics
USB connections are straightforward and rely on a direct link between the printer and a single computer. Start by plugging the printer’s USB cable into a free USB port on your computer and power cycling the printer. On Windows, open Settings > Devices > Printers & scanners and select Add a printer. On macOS, open System Preferences > Printers & Scanners and click the plus button to add. Install any prompted drivers.
If the computer doesn’t discover the printer, try a different USB port or another USB cable. Avoid hubs that may introduce signal degradation. Check Device Manager (Windows) or System Information (Mac) to confirm the device shows up as an installed printer. After installation, print a test page from the printer’s properties and confirm correct page output.
Step-by-Step: Wireless Connection Basics
Connecting over Wi‑Fi requires the printer to join your local network. Use the printer’s control panel to select the wireless setup option and connect to your 2.4 GHz network (many printers handle 5 GHz poorly with some devices). If your router supports WPS, you can use the push-button approach for a quick setup. Once the printer is on the network, add it to your devices: Windows Settings > Printers & Scanners > Add a printer, or macOS System Preferences > Printers & Scanners > Add. Enter the password if prompted and complete the driver installation if required.
For mobile devices, ensure the printer appears in the same network list or enable AirPrint/ Mopria compatibility as applicable. A successful wireless setup enables printing from laptops, tablets, and phones without direct cables.
Step-by-Step: Driver Installation and Setup
Driver installation ensures your computer can communicate with the printer accurately. Visit the printer manufacturer’s official site to download the latest drivers for your OS, or rely on built‑in OS drivers if supported. Run the installer and follow on-screen prompts, restarting if requested. After installation, print a configuration page or test page to confirm the printer is ready for use.
If you encounter driver conflicts with Windows or macOS, try removing older printer entries first, then reinstall. In some cases, enabling the printer as the default printer helps streamline daily tasks. Keep a copy of your driver version in case you need to reinstall after a system update.
Testing and Validation: Print a Test Page
With the printer connected, perform a test print from the computer. Open a document or a dedicated test page from the printer’s properties, and examine alignment, color accuracy, and text clarity. If the test page prints correctly, your connection is working. If not, recheck the connection type (USB vs wireless), confirm drivers are up to date, and verify that the correct printer is selected in the print dialog.
For wireless setups, confirm the device is on the same network and that firewall settings are not blocking communication. If a mobile device prints but a computer does not, compare driver versions and OS settings between devices. A successful test page confirms end-to-end connectivity and paves the way for regular printing.
Troubleshooting: Common Connectivity Issues
Despite best efforts, connectivity hiccups happen. Start with the simplest checks: verify the printer is powered on, connected to the correct network (or USB port), and not in an error state like an out‑of‑paper message. If the printer is not discoverable, reboot the printer and the host device, re‑run the device discovery, and re‑install drivers if needed. Check for firmware updates on the printer and OS updates on the host device.
If printing fails over Wi‑Fi, ensure the network is not blocking printer traffic, and that the printer has a valid IP address. For Bluetooth, ensure pairing is accepted and that the device is within range. When in doubt, reset the printer’s network settings and re‑connect from scratch.
Final Checks and Best Practices
Once everything is configured, keep a few practices in place to maintain reliability. Use a single, stable network for all wireless printers in the home or office to avoid IP conflicts. Periodically check for firmware updates and reinstall drivers after major OS updates. Maintain a simple labeling system for printers if you have multiple devices, and document the steps you followed for future reference.
Tools & Materials
- Printer(Powered on and ready)
- Computer or mobile device(Windows, macOS, Android, or iOS)
- USB cable(Standard Type‑A to B or USB‑C depending on ports)
- Printer power cable(Ensure power stability)
- Wi‑Fi network access(Same network for wireless setup)
- Router or access point(Supports 2.4 GHz for compatibility)
- Printer drivers/software(From official site or OS integration)
- Printer name or IP address(Needed for wireless setup)
- Ethernet cable (optional)(Alternative if Wi‑Fi is unstable)
- Notepad or reference sheet(Record steps and settings for future use)
Steps
Estimated time: 45-60 minutes
- 1
Power on and prepare the printer
Plug in the printer and turn it on. Wait until the status light indicates ready. Confirm there are no error messages on the printer's display.
Tip: If the printer shows an error, consult the manual or reset the printer to defaults. - 2
Decide connection type
Choose USB for a direct, single‑device print or Wireless (Wi‑Fi/Bluetooth) for multi‑device printing. Gather the necessary cable or network credentials before proceeding.
Tip: If you’re unsure, start with USB for a quick test of basic functionality. - 3
Install or update drivers
Download the latest drivers from the manufacturer’s site or use OS built‑in drivers if compatible. Run the installer and follow prompts; restart if asked.
Tip: Use official drivers to avoid compatibility quirks and ensure full feature support. - 4
Add the printer to your device
On Windows, go to Settings > Devices > Printers & scanners > Add a printer. On macOS, open System Preferences > Printers & Scanners > Add. Complete any on‑screen prompts.
Tip: Set the printer as default if you frequently print from one device. - 5
Connect via USB
Connect the USB cable from the printer to the computer. If not detected, try another USB port or different cable. Confirm visibility in the OS printer list.
Tip: Avoid USB hubs; they can cause intermittent connectivity. - 6
Connect via Wi‑Fi
Use the printer’s control panel to connect to your Wi‑Fi network or use WPS if supported. Add the printer in your OS as a networked device.
Tip: Stick to a 2.4 GHz network if you have older equipment for better range and compatibility. - 7
Print a test page
From the OS print dialog, select the printer and print a test page or configuration page to verify operation and alignment.
Tip: If the test page fails, recheck network credentials, IP address, and driver status. - 8
Validate on mobile and other devices
Try printing from a smartphone or tablet using AirPrint, Mopria, or the vendor app to confirm cross‑device accessibility.
Tip: Ensure all devices share the same network or pairing method for reliable printing.
People Also Ask
What if my printer isn’t showing up in the list of available printers?
First, verify the printer is powered and on the same network for wireless setups, or connected via USB for direct printing. Check that drivers are installed and up to date. Restart the printer and host device, then re‑attempt discovery.
If your printer doesn’t appear, ensure it’s powered, on the same network, and that drivers are installed. Restart devices and try again.
Can I connect without a router or network?
Yes. A USB direct connection is the simplest option for a single device. Some printers also support Bluetooth pairing with nearby devices, but this is not suitable for shared printing or large documents.
Yes, you can use USB for a direct connection, or Bluetooth for nearby devices. Bluetooth isn’t ideal for sharing across many devices.
Do I need administrator rights to install printer drivers?
In most cases, yes. Installing drivers typically requires admin rights on Windows or macOS. Some OS‑built-in drivers can install without admin rights, but full features may require official drivers.
Usually you’ll need admin rights to install drivers, but some built‑in options may work without them.
How do I share a USB printer across multiple devices?
USB sharing usually requires a host computer to stay on and share the printer over the network via OS settings or a print server. For easier sharing, connect via Wi‑Fi if the printer supports it.
Sharing a USB printer means the host computer must stay on and share the printer over the network, or use Wi‑Fi if available.
What should I do if printing is slow or paper jams occur frequently?
Slow prints and jams are often unrelated to connectivity. Check paper type and tray settings, ensure rollers are clean, use the correct drivers, and verify print quality settings. If needed, update firmware and reconfigure the connection.
If printing is slow or jams happen, check media, rollers, and driver settings; update firmware if needed.
Watch Video
Quick Summary
- Choose USB for direct, reliable printing from one device.
- Use Wi‑Fi for shared access across multiple devices.
- Install official drivers and keep firmware up to date.
- Test thoroughly with a real print job and a mobile device.
- If issues arise, restart everything and re‑install drivers.