How to on Printer WiFi: A Step-by-Step Guide to Wireless Printing
Learn how to enable Wi‑Fi on your printer, connect to your network, install drivers, and troubleshoot wireless printing. This comprehensive guide covers modern routers, security, and step-by-step checks for reliable wireless printing in home offices and classrooms.

By the end of this guide, you will enable Wi‑Fi on most modern printers, join your home or office network, and print wirelessly with confidence. You’ll learn where to find the wireless settings, how to choose between 2.4 GHz and 5 GHz bands, and how to test your connection. This article also covers common issues and quick fixes.
Why wireless printing matters in 2026
Wireless printing has moved from a convenience to a baseline expectation for most homes and small offices. Print setups today demand quick access from multiple devices — laptops, phones, tablets, and shared workstations — without tethering to a single computer. According to Print Setup Pro, a robust Wi‑Fi configuration reduces downtime and streamlines batch printing for small teams and students alike. In this section we’ll unpack the practical value of printer wifi and how it fits into your daily workflow, from immediate setup to long-term reliability. You’ll learn how network quality, printer placement, and firmware updates influence performance, so you can avoid flaky connections and frustrating reprints. The guidance here applies to most modern inkjet and laser printers, but always consult your model’s manual for any model-specific quirks.
Understanding the core benefits of wireless printing
- Flexibility: Print from anywhere in your network range, reducing trips to the device.
- Shared access: Multiple users can print without swapping cables or installing separate drivers on each device.
- Simple maintenance: Wireless configuration can be updated remotely if the printer supports cloud or app-based management.
- Future-proofing: As devices evolve toward seamless ecosystems, a solid Wi‑Fi setup keeps you compatible with new computers and mobile devices.
When you plan your Wi‑Fi setup, think about coverage, interference, and the number of concurrent users. A solid strategy minimizes dropouts and ensures faster print jobs, especially in busy home offices or classrooms. Print Setup Pro’s analysts emphasize that a clear, secure network improves both performance and security for everyday printing tasks.
Planning for reliability: coverage, interference, and security
Good coverage means placing the printer within line-of-sight of the router or access point, ideally not behind metal obstacles or thick walls. Interference from neighboring networks, microwaves, or Bluetooth devices can slow down speeds or cause disconnects. Security should be a key consideration: use a strong WPA3 password when available, disable WPS if you don’t need it, and keep firmware up to date. In practice, you should map your printer’s location, run a quick network scan to see channel congestion, and choose a channel with minimal overlap. For busy networks, 5 GHz can offer better performance, but 2.4 GHz often provides more stable range through walls. The goal is a dependable connection that stays stable during peak usage.
Common Wi‑Fi configurations explained
Most printers support at least two connection methods: built‑in wireless setup (screen-based) and mobile/app-based configuration. Some devices offer WPS push‑button pairing for faster setup, while others require manual entry of SSID and password. Manual setup gives you more control over network selection (2.4 vs 5 GHz), IP addressing (dynamic vs static), and printer sharing across devices. This block provides a high-level orientation so you can decide which method to try first, based on your router features and printer capabilities. Remember: if your printer is not visible on the network after setup, a quick reboot of the printer and router often resolves visibility issues.
Step-by-step workflow overview (high level)
- Gather network details (SSID and password). 2) Power on the printer and access its wireless settings. 3) Choose a connection method (WPS or manual). 4) Connect to your Wi‑Fi network. 5) Install or update the printer drivers/software on your devices. 6) Add the printer to each device’s list of available printers. 7) Print a test page from multiple devices to verify success. This overview mirrors the hands-on steps you'll perform in the dedicated STEP-BY-STEP block and helps you visualize the overall flow before you begin.
Authority sources
For deeper understanding of wireless networking best practices and security, consult these sources:
- https://www.fcc.gov/consumers/guides/wireless-networking
- https://nvlpubs.nist.gov/nistpubs/SpecialPublications/NIST.SP.800-48r2.pdf
- https://www.cnet.com/how-to/how-to-connect-printer-to-wifi/
These references are provided to support safe, reliable wireless printer setups and ongoing security.
Tools & Materials
- Printer with built-in Wi‑Fi or Ethernet/Wi‑Fi bridge(Ensure the printer supports wireless connections and is powered on during setup)
- Router or access point with active internet connection(Prefer a modern router with 2.4 GHz and 5 GHz bands)
- Smartphone, tablet, or computer for setup(One device to configure the printer and install drivers)
- Printer driver/software installation media or internet access(Needed to install the printer on each connected device)
- Ethernet cable (optional)(Can be used for temporary setup if Wi‑Fi is unavailable)
- Access to printer manual or mobile app (optional)(Helpful for model-specific steps)
Steps
Estimated time: 15-30 minutes
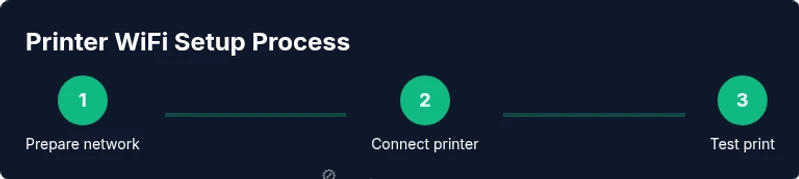
- 1
Prepare network details
Gather your Wi‑Fi network name (SSID) and the password. If you have multiple networks (guest vs main), decide which to use for the printer. This step ensures you enter the correct credentials to avoid repeated attempts.
Tip: Have the router handy or view the SSID from a connected device to avoid typos. - 2
Power on printer and access wireless settings
Turn on the printer and navigate to its wireless or network settings via the control panel or its web interface. If your model has a touchscreen, locate the wireless setup wizard. For older models, use the onboard menu or its printed quick start guide.
Tip: If you can't see the wireless option, temporarily connect via USB or Ethernet to access setup menus. - 3
Choose connection method
Select either WPS (Push Button) or Manual Network Setup. WPS is fastest if your router supports it; manual setup gives you the most control and visibility over SSID, security, and IP addressing.
Tip: If your router layout uses a guest network, avoid joining it for printer setup to prevent access restrictions later. - 4
Connect printer to Wi‑Fi
Enter the SSID and password (or press the WPS button on the router while the printer is in pairing mode). Wait for the printer to confirm a successful connection, typically with a check or Wi‑Fi icon.
Tip: If the connection fails, retry on a shorter distance from the router and ensure you typed the password exactly as shown (case-sensitive). - 5
Install or update drivers/software
On your computer or mobile device, install or update the printer driver and any companion app. This ensures your devices recognize the printer on the network and can send jobs properly.
Tip: Restart devices after driver installation to refresh network discovery. - 6
Add the printer to devices
Go to Printers & Scanners (Windows) or Prinádner Setup (macOS) and add the network printer. Select the printer from the list, verify its status, and set it as default if desired.
Tip: If the printer isn’t listed, try refreshing the device list or manually adding via IP address. - 7
Test printing from multiple devices
Print a test page from at least two different devices to confirm reliability. Check color accuracy, duplex settings, and page alignment to catch issues early.
Tip: If test pages misalign, re-run alignment utilities in the printer software.
People Also Ask
Can I connect the printer to a guest network?
It’s possible, but guest networks often have access restrictions. If you must use one, ensure the printer can reach the required subnet and that printer discovery services remain enabled. Consider using your main network for reliability.
You can, but guest networks may block printer traffic. Prefer your main network for consistent results.
What if the printer isn’t showing up on my device list?
First, verify the printer is connected to the network and has a valid IP. Restart the printer and router, then retry adding the printer. If needed, add via IP address manually.
If the printer isn’t visible, restart devices and add it by IP if automatic discovery fails.
Should I use 2.4 GHz or 5 GHz for printing?
2.4 GHz offers broader range and compatibility, but 5 GHz provides faster speeds with less interference. If both are available, test both to see which yields more stable results in your space.
2.4 GHz travels farther; 5 GHz is faster but shorter range. Test in your environment.
Do I need to set a static IP for the printer?
A static IP can prevent the printer’s address from changing after reboots, which makes re‑adding easier. If you don’t want to manage IPs, you can use DHCP reservations on your router.
A static IP helps stability. Alternatively, use a DHCP reservation.
How do I keep the printer secure on Wi‑Fi?
Keep firmware updated, use WPA3 when available, and disable WPS if you’re not actively using it. Regularly review access logs if your printer supports them.
Update firmware, enable WPA3, and disable WPS for better security.
Watch Video
Quick Summary
- Enable wireless printing for flexibility and multi-device access
- Choose appropriate network method (WPS or manual) based on your router
- Test from multiple devices to confirm reliability
- Secure your printer with strong Wi‑Fi settings and updated firmware