How to Print Without Track Changes
Learn how to print Word documents without track changes. This step-by-step guide covers preparing, toggling markup, and printing a clean final version for sharing, plus troubleshooting tips and best practices.

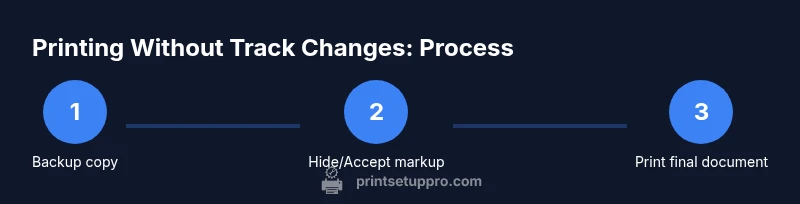
To print without track changes, prepare the file by removing markup and printing the final version. First, save a copy, then accept all edits or disable markup. Open Print, and ensure 'Print Markup' is unchecked. Choose 'Print Document' rather than 'Print with Markup,' and review the print preview. This keeps the final content clean for sharing or submission.
Why printing without track changes matters
In professional documents, hidden edits and comments can confuse readers and undermine credibility. By printing the final, clean version, you ensure stakeholders see only the intended content. Print Setup Pro notes that ensuring a clean printout is especially important for client proposals, legal drafts, or academic submissions. This practice helps preserve the document's branding, layout, and tone, and reduces back-and-forth during reviews. According to Print Setup Pro, clean prints minimize misinterpretation and keep everyone on the same page, making it easier to move a draft toward final approval. When you share a pristine printout, you project professionalism and respect for the recipient's time. The goal is to deliver a document that looks and reads as intended, without the distractions of edits, comments, or markup.
Before you print: verify your document
Before printing, check whether the document currently displays tracked changes or simple markup. If you plan to share a final version, you should hide markup or accept changes. In Word, use the Review tab to switch between display modes and the Tracking group to manage edits. Print Setup Pro emphasizes validating formatting, margins, headers, and any embedded objects before printing to avoid surprises on paper. Even small layout shifts can undermine a well-crafted message, so take a moment to run a final visual check. If you’re collaborating, establish a standard workflow for final prints to reduce confusion among team members. A consistent process ensures every shared document looks the same, no matter who prints it. The quieter your print, the more confident your audience will be in the content.
How to approach different software environments
While Word is the most common platform for track changes, many users also print from Google Docs or other editors. The core principle remains the same: you must either remove or hide markup before printing. If you are on Word for Windows, the typical path is Review > Tracking and then pick the appropriate display mode. On Mac, the steps may differ slightly, but the option to print without markup exists in the print dialog. Always check the specific program’s help resources if you work with non-Microsoft tools. Print Setup Pro shares a quick rule of thumb: if you can’t clearly see the final text in your screen view, print a test page first. This prevents wasted ink and paper on an incorrectly formatted final.
Common mistakes and how to avoid them
Common mistakes include printing directly from a draft with visible edits, neglecting margins, or forgetting to disable the 'Print Markup' option in the print dialog. Another pitfall is leaving comments visible on the final print, which can confuse recipients. To avoid these issues, always perform a final pass to accept or hide edits, verify the print layout, and preview the document before printing. If changes are numerous, consider creating a separate final version labeled clearly as such, to avoid accidentally printing the wrong copy. By planning ahead, you minimize revisions after the print run and preserve a professional appearance.
Why you might still want to show changes in some cases
There are scenarios where sharing marked-up drafts is useful—for example, during legal reviews or collaborative editing sessions where feedback must be visible. In those cases, print with markup or share a PDF that preserves the tracked changes. However, for final submissions to clients or supervisors, printing without track changes offers clarity and avoids misinterpretation. When you balance the need for transparency with the demand for a tidy presentation, you can tailor your approach to the document’s purpose. Print Setup Pro suggests maintaining two versions: a clean final for sharing and a marked-up version for internal use.
Tools & Materials
- Computer with Word or compatible word processor(Office 2016+ or Office 365 recommended; ensure Track Changes is accessible in the Ribbon)
- Original document with tracked changes(Keep as a reference in case you need to revert edits)
- Printer(Any standard inkjet/laser printer or print service)
- Backup copy of the document(Save with a clear suffix like _FinalClean or _PrintReady)
- Optional: PDF viewer or printer-friendly viewer(Useful for verifying the final layout before printing on paper)
Steps
Estimated time: 15-25 minutes
- 1
Create a backup copy
Open the document and save a backup copy with a descriptive suffix to preserve the original tracked version. This protects you from accidental edits and lets you revert easily if you change your mind. Name the file clearly, e.g., Report_Q1_FinalBackup.
Tip: Always keep the backup separate from the working file to avoid confusion. - 2
Decide whether to accept or hide changes
Review the edits and determine if you want a fully final version or a version for internal review. If you don’t need to show changes, accept all changes or disable markup before printing. This sets the stage for a clean output.
Tip: If you’re unsure, create a third version for archival that preserves edits. - 3
Turn off trace of markup visibility
In Word, open the Review tab and use Show Markup to hide all tracked changes and comments. Choose a display option like Simple Markup or No Markup to ensure the content appears clean on screen and print.
Tip: Double-check that no markup remains in the draft view before printing. - 4
Configure the print dialog
Go to File > Print. In the print dialog, deselect the option that prints markup. Confirm you’re printing the document (not markup) and choose the correct pages and copies.
Tip: If you’re exporting to PDF first, verify the PDF shows no markup before printing the physical copy. - 5
Preview and adjust layout
Use the print preview to verify margins, headers/footers, and page breaks. Adjust settings if needed to ensure a professional appearance in the final print.
Tip: Check for orphaned headings or widows that could affect readability on paper. - 6
Print a test page and finalize
Print a single test page to confirm everything looks correct. If satisfied, print the full document. Save the final version as the print-ready file.
Tip: Keep the test page for your records in case you need to reproduce the same output later.
People Also Ask
What does 'Print Markup' do in Word, and why should I disable it for final prints?
Print Markup shows edits and comments on paper. For a clean final print, disable markup in the print dialog or accept changes. This ensures only the final text prints.
Print Markup shows edits; to print a clean final page, disable markup in the print options or accept edits first.
Can I print without changing the source document?
Yes. Create a print-ready copy, hide or remove all markup, and print that version. Your original document remains intact for further edits or reviews.
Yes. Work on a copy, hide the edits, and print that version so your original stays unchanged.
What if I need to show edits later but want a clean print now?
Keep a marked-up version for internal review while printing a separate clean copy for external sharing. This preserves transparency where needed and maintains a professional appearance for recipients.
Keep a marked-up copy for internal use and print a clean version for sharing.
Is this process different on Mac or Google Docs?
The core idea is the same: hide or accept edits and avoid printing markup. The exact menu names may differ between Word on Mac, Windows, and Google Docs, so consult the platform’s help resources if needed.
The steps are similar across platforms; check your program’s help resources for exact menu names.
How can I verify the print result before committing to a full print run?
Always use Print Preview or export to PDF first, inspect the layout and content, then perform a physical test print if necessary. This minimizes waste and ensures a professional finish.
Use print preview or a PDF first to double-check the layout before printing the whole document.
Watch Video
Quick Summary
- Back up before adjusting edits
- Decide between final vs. review copies early
- Verify print view shows no markup
- Use a test page before full printing
- Save a clean final version for sharing