How to Print Without Comments in Word: A Practical Guide
Learn how to print Word documents without comments, tracked changes, or balloons. Clear, actionable steps for Windows and Mac, plus tips, FAQs, and troubleshooting to ensure clean prints every time.

To print without comments in Word, turn off markup before printing. In the Print dialog, uncheck Print Markup (Windows) or disable Print with Markup (Mac). If you don’t see it, go to Review > Show Markup and uncheck Comments and Balloons, then print. For consistent results, set Word Options to hide markup by default when printing.
Why printing without comments in Word matters
In many office workflows, a clean printed copy is essential for reviews, meetings, and sharing drafts with stakeholders. If you frequently produce reports in Word, you know how easy it is for comments, balloons, and tracked changes to sneak into the printed pages. Knowing how to print without comments in Word saves time, reduces confusion, and presents a professional document. According to Print Setup Pro, simplifying print layouts starts with understanding Word's markup system and how printers interpret it. This guide focuses on removing on-paper distractions while preserving the final content. We’ll cover Windows and Mac variations, common pitfalls, and practical tips to ensure every printout matches the intended final version. More importantly, you’ll learn a reliable, repeatable process you can apply to reports, class notes, or client deliverables. By building a small set of steps and checks, you’ll avoid rework and keep your workflow efficient. If you frequently share drafts with colleagues, this approach also helps maintain consistency across teams. So, let’s dive into the mechanics of printing Word documents without markup for a polished result.
Understanding Word's print options and markup
Microsoft Word uses a concept called markup to display comments, balloons, insertions, and tracked changes on the screen. Markup is helpful during edits, but it often contaminates printed copies. The two primary controls you’ll use are the Print Markup option in the Print dialog (Windows and newer Word versions) and the Show Markup controls on the Review tab. When Print Markup is turned off, Word renders the document as a clean entity, eliminating visible comments and tracked changes from the printout. Show Markup lets you selectively view or hide specific elements (Comments, Balloons, Ink Notes, and more) while you edit or review. Understanding these options gives you precise control over what leaves the printer. In short, you’re not removing data; you’re choosing what to show on paper. For best results, establish a simple rule: any item you do not want printed should be turned off in the markup controls before sending the document to print.
Quick checks before printing
First, confirm the correct document view: switch to Print Layout and disable any views that might display markup. Then open File > Print and check the Settings panel. Look for a setting labeled Print Markup (Windows) or Print with Markup (Mac) and ensure it is off. If you don’t see the option, use Review > Show Markup to turn off Comments and Balloons. A quick test is to print a single page or a sample page to verify that the comments do not appear. Remember that headers, footers, or text boxes may still contain tracked changes if they’re anchored there; review those sections specifically. If your printer has a separate print driver UI, verify there too that no additional markup options are enabled. Finally, save a quick printing preset with these options to speed up future jobs.
Windows vs Mac: quick differences in printing without markup
Windows and Mac versions of Word share the same core concept—printing without markup—but the UI labels differ slightly. On Windows, you’ll typically find the option as Print Markup in the Settings area of the Print dialog. On Mac, the toggle is often labeled Print with Markup, sometimes nested under a dropdown like Copies & Pages. The underlying principle is the same: disable markup before sending the document to print. For users who switch devices, a short, two-minute check will prevent accidental prints with comments leaking into the paper copy.
Alternative approach: exporting a clean PDF before printing
If you frequently share or print from Word, exporting to PDF with markup disabled can be a reliable workaround. In Word, choose File > Save As and select PDF, then ensure the Print Markup option is unchecked. Printing the resulting PDF ensures the comments and balloons are omitted. This method is especially helpful when you need to distribute a clean version to recipients who don’t use Word, or when your printer’s native dialog clusters multiple options that are easy to misconfigure. It also creates a portable, uneditable copy suitable for archiving. Keep in mind that any edits after export will require a new PDF export to reflect changes.
Common pitfalls and how to avoid them
Even with the markup controls disabled, some documents might still show comments in headers, footers, or text boxes where reviewers marked changes. Always review these sections explicitly and consider temporarily accepting all changes if finalizing a version for printing. Some corporate templates embed comments in custom styles or in watermarks; search for equivalent placeholders in the header/footer region. If you’re printing multiple copies, perform a single-page test print to catch any remaining markup before mass printing. Finally, remember that printers themselves can add overlays like date stamps or watermarks; check the printer driver for any extra print options that could reintroduce markup.
Best practices for teams and students
Create a simple, repeatable workflow that your team can adopt: (1) open the document, (2) verify Show Markup for required elements, (3) disable Print Markup in Print Settings, (4) preview with Print Preview, (5) print a test page, (6) save a printing preset. This reduces confusion and ensures everyone prints clean copies. For educational materials, save a template with the markup-defaults set to hidden so students always print clean pages. Regularly document any Word version differences your team encounters to prevent misprints when devices and software update.
Conclusion and practical next steps
If you’re wondering how to print without comments in Word in real-world scenarios, start by mastering the two primary controls: Print Markup and Show Markup. Practice with a short document to confirm you see exactly what you expect on paper. The key is consistency: develop and share a short checklist that your team can follow. The Print Setup Pro team recommends establishing a default, print-ready profile that hides markup by default and only toggles it when collaboration requires review on paper. With a little practice, you’ll produce clean, professional prints every time.
Tools & Materials
- Microsoft Word (Windows or Mac)(Word 2016/2019 or Word for Microsoft 365; ensure updates are current)
- Computer or device(With access to the Word document and printer (or PDF export option))
- Printer(Connected and with media loaded (paper type as required))
- Printer paper(Appropriate size (letter/A4) and weight for your document)
- Internet access(Optional for updates or online help)
Steps
Estimated time: 15-25 minutes
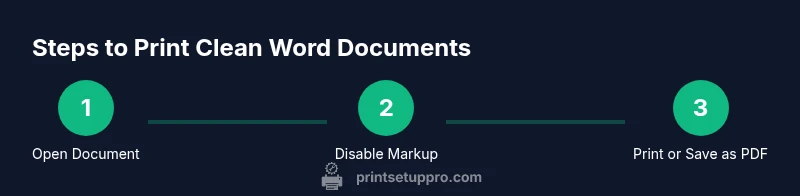
- 1
Open the Word document
Launch Word and open the document you intend to print. Quick review helps you confirm there are no unexpected markup elements visible in the document layout before adjusting print settings.
Tip: Use the Find feature to quickly locate comments if you’re unsure where they appear. - 2
Open the Print dialog
Go to File > Print to access the print settings. This dialog aggregates all options you’ll need to prevent comments from appearing on paper.
Tip: Keep this dialog open while you adjust settings so you don’t miss a toggle. - 3
Disable markup in settings
In Settings, uncheck Print Markup (Windows) or disable Print with Markup (Mac). This is the core step to remove comments, balloons, and tracked changes from printouts.
Tip: If you don’t see the label, look under a dropdown like 'Settings' or 'More Settings' depending on your Word version. - 4
Review headers/footers and text boxes
Check that headers, footers, and any text boxes don’t contain markup elements that will print. Sometimes tracked changes live in these regions even when body text is clean.
Tip: Use Print Preview to verify how headers/footers render on paper. - 5
Preview and select pages
Use the preview pane to confirm which pages will print. If you only need a portion, specify page ranges to avoid unnecessary pages.
Tip: Printing fewer pages saves ink and time while ensuring the version you need is printed cleanly. - 6
Print a test page
Always print a single page test before running a full batch. This confirms the markup is truly hidden on paper.
Tip: If the test prints with markup, revisit the Print Markup setting and any document-wide elements. - 7
Save a printing preset
If you’re doing this regularly, save a preset in Word or your printer driver with markup disabled. This speeds up future prints and reduces errors.
Tip: Name the preset something memorable like 'No Markup Print'.
People Also Ask
How do I print without comments in Word on Windows?
Open the Print dialog, uncheck Print Markup, and verify Comments and Balloons are hidden in Review > Show Markup. Print a test page to confirm the result.
Open Print, turn off markup, verify in Review, and print a test page.
Can I print without comments on Mac?
On Mac, disable Print with Markup in the Print dialog or turn off Show Markup under Review before printing. A quick preview helps ensure no comments print.
Turn off Print with Markup in Print settings and preview before printing.
Will hiding markup affect on-screen editing?
Hiding markup for printing does not remove comments or edits from the document. You can re-enable markup for review after printing.
Hiding markup only affects printing, not editing.
Is exporting to PDF a good workaround?
Yes. Save or export as PDF with markup off, then print the clean PDF. This ensures consistent, markup-free results across platforms.
Export to PDF with markup off, then print the PDF for clean copies.
What should I do if comments appear despite turning off markup?
Double-check every section where comments could attach, including headers, footers, and text boxes. Update Word if needed and try a test print again.
Check headers/footers and ensure Word is up to date, then re-test.
Watch Video
Quick Summary
- Disable markup before printing to keep pages clean
- Always preview with Print Preview before printing
- Create a default printing profile for consistency
- Review headers/footers for hidden markup
- The Print Setup Pro verdict: print without comments by turning off markup