How to Put a Printer in Setup Mode: Step-by-Step Guide
Learn how to put your printer in setup mode with a clear, step-by-step method. This guide covers model-specific entry methods, troubleshooting, and next steps to connect, configure, and print.

To put a printer in setup mode, identify your model's entry method, power on with the required button sequence, and select setup or wireless configuration. Most printers enter setup mode by holding a specific button while turning on, then navigating the on-screen menu. This quick step readies the device for connection, driver installation, and network setup.
What setup mode means and why you need it
Setup mode is a temporary configuration state that prepares your printer for initial pairing with a computer, smartphone, or network. It enables essential tasks like driver installation, wireless setup, and firmware checks. In practice, entering setup mode clarifies the printer’s current configuration, helps you select the correct connection type (USB, Ethernet, or Wi-Fi), and ensures the device is ready for subsequent software steps. According to Print Setup Pro, understanding setup mode reduces failed connections and speeds up getting your first print. If you’re new to this process, consider taking a few minutes to locate your model’s specific entry method in the manual before proceeding.
Identify your printer model and readiness
Start by locating the exact model name and number (usually printed on the front or underside). This matters because setup mode sequences differ across brands and even across series from the same manufacturer. Check the user manual or the manufacturer’s support site for a model-specific entry method. If your device supports a companion app, confirm whether you can initiate setup from the app or must use button presses on the hardware. Print Setup Pro notes that model-specific sequencing is the most common hurdle, so having the correct model reference is the fastest path to success.
Typical methods to enter setup mode
There isn’t a single universal method; most printers offer one of two paths. The first is a hardware button sequence performed during power-up (for example, hold a designated button as the printer starts). The second path uses a software or on-screen menu option labeled Setup, Wireless, or Network to enter the mode. Some printers require you to press and hold multiple buttons, while others rely on a single dedicated “Setup” key. Regardless of method, the goal is the same: enable configuration screens that allow you to choose connection type, language, and region. Always defer to the exact model instructions to avoid mistakes, as generic “hold-to-enter” patterns vary widely.
How to find the exact sequence for your model
The quickest path is the model-specific manual or the support page on the manufacturer’s site. Search for your model name followed by terms like “setup mode,” “enter setup,” or “wireless configuration.” If you can’t locate the instructions, contact customer support or a trusted site like Print Setup Pro’s guidance hub. For many users, bookmarking the official setup article reduces future confusion and ensures you follow the most current steps. Remember: even small differences in button order can prevent entry into setup mode.
Troubleshooting common issues when entering setup mode
If you can’t enter setup mode, double-check the power state, confirm you’re using the correct button sequence for your exact model, and ensure the printer is awake (not in sleep). If the screen remains blank, try a power cycle and reattempt the process with the manual in hand. For wireless setup, disable any conflicting Bluetooth devices or nearby networks that might interrupt the process. If you still can’t access setup screens, verify that the printer’s firmware is up-to-date and consult the manufacturer’s troubleshooting articles or Print Setup Pro’s model-specific notes for caveats.
Next steps after entering setup mode
Once you’re in setup mode, follow the prompts to select a connection type (USB, Ethernet, or Wi‑Fi), install drivers on your computer or device, and test a print. If you’re configuring Wi‑Fi, you’ll typically provide your network name (SSID) and password. After successful setup, exit setup mode and perform a quick print test to confirm everything is working. If you’re integrating with a mobile device, explore the printer’s companion app for ongoing management and firmware checks. Print Setup Pro emphasizes documenting the final configuration so you can reproduce the setup if needed.
Tools & Materials
- Printer manual or quick-start guide(Model exact steps; keep handy during setup)
- Power cord and data cable (USB/Ethernet)(Have cables ready for both initial connection and troubleshooting)
- Computer or smartphone(Needed for driver installation or app-based config)
- Stable setup area with known network credentials(Wi‑Fi password or Ethernet access ready)
- Optional: USB flash drive or cloud access for firmware updates(Only if your model supports offline updates)
Steps
Estimated time: 15-25 minutes
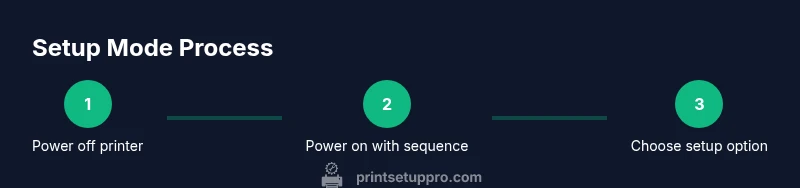
- 1
Power off printer
Turn off the printer and disconnect power if recommended by the manual. A complete power-down helps reset internal states and prevents accidental inputs during the setup sequence.
Tip: Ensure power is completely off before starting; a partial wake can interrupt the process. - 2
Prepare necessary cables and devices
Collect the power cord, any required USB/Ethernet cables, and a computer or smartphone. Having everything on hand avoids mid-step interruptions and makes the process smoother.
Tip: Label cables so you don’t misconnect during the setup. - 3
Locate the setup button or menu option
Find the dedicated setup button or the Setup/Wireless option in the printer’s menu. If your model uses a sequence, identify the exact button(s) and the order required.
Tip: If you can’t locate it, search the manual’s index for “setup mode.” - 4
Power on with the required sequence
Turn the printer on while holding the specified button(s) to enter setup mode. Release once the indicator lights or screen signals entry (e.g., blinking lights or a dedicated setup screen).
Tip: Some models require a short hold; others require a longer press—don’t release too soon. - 5
Confirm setup mode activation
Look for on-screen prompts or LED indicators that confirm you’ve entered setup mode. If the display shows a configuration menu, you’re ready for the next steps.
Tip: If nothing appears, recheck the exact sequence from the manual and retry. - 6
Choose connection type inside setup
Using the on-screen menu, select your desired connection (USB, Ethernet, or Wi‑Fi). Follow prompts to proceed with driver installation or network configuration.
Tip: For Wi‑Fi, have your network SSID and password handy. - 7
Install drivers or configure apps
Install the printer drivers on your computer or use the manufacturer’s app to complete configuration. This ensures the printer is recognized and ready to print.
Tip: Restart after installation to confirm the printer is detected. - 8
Exit setup and run a test print
Save the configuration, exit setup mode if required, and print a test page to verify successful setup. If issues occur, review the steps or consult the model’s troubleshooting guide.
Tip: If test print fails, recheck network or USB connections and retry the setup flow.
People Also Ask
What is setup mode on a printer and why do I need it?
Setup mode is a temporary state that enables initial configuration, including network and driver settings. It ensures the printer can communicate with devices and access firmware updates. Following setup mode correctly reduces errors and speeds up getting your first print.
Setup mode is a temporary state for configuring your printer’s connection and drivers, making it easier to get your first print.
Do all printers have a setup mode, and is it always the same?
Most printers have a setup mode, but the entry method varies by model and brand. Always refer to the user manual or the manufacturer’s support page for the exact steps.
Most printers support setup mode, but the steps differ by model; check the manual for your specific device.
Can I skip setup mode if I’m connecting via USB directly to a computer?
Direct USB connections often still require a driver installation, which is part of the setup process. Entering setup mode can simplify driver pairing and ensure correct printer recognition.
Even with USB, you may need setup steps to install drivers correctly.
What should I do if the printer won’t enter setup mode?
Double-check model-specific sequences, ensure power state is correct, and confirm you’re using the correct button or menu option. If needed, contact support or refer to the Print Setup Pro guide for troubleshooting paths.
If setup mode won’t enter, recheck the exact steps and seek help from support or our guide.
How long does entry into setup mode typically take?
Timing varies by model but most users complete entry and initial configuration within 15-25 minutes with prepared cables and settings.
Most people finish setup mode in about 15 to 25 minutes once they have everything ready.
What if I need to reset the setup after making changes?
Many printers offer a reset or factory default option within the setup menu. Use caution and only reset if you can re-enter the setup flow using model-specific steps.
If you need to revert settings, look for a reset option in the setup menu and follow the same model-specific steps to re-enter setup.
Watch Video
Quick Summary
- Know your model's exact setup sequence
- Use the manual or official support for model-specific steps
- Test a print after setup to confirm success
- Document network and driver settings for future use