How to Put Printer Online on Windows 11
Learn how to put a printer online on Windows 11 with a clear, safe, step-by-step approach. USB and network setups, driver installation, and troubleshooting, so you can print confidently.

Goal: You will learn how to put a printer online on Windows 11, whether connected via USB or over a network. You’ll verify connectivity, install the correct driver, and set the printer as default. This guide covers Windows 11 Settings, printer port configuration, and basic troubleshooting to ensure reliable printing.
Quick Overview of Windows 11 Printer Connectivity
In today’s home offices and small workspaces, printers connect in two primary ways: USB directly to your PC, or over your local network via Wi‑Fi or Ethernet. The process to get the device online on Windows 11 hinges on a few consistent steps: ensure the printer is actually powered and discoverable, install or update the correct driver, and then add the device in Windows Settings so printing becomes seamless. Whether you are working from a laptop, desktop, or a mixed device environment, the essentials stay the same: a healthy link, the right driver, and a properly configured port. If you are troubleshooting, start with the simplest path (USB) to verify the printer hardware works before tackling wireless setup. When you later switch to a networked printer, make sure both the PC and printer are on the same router network to avoid connectivity conflicts. how to put printer online windows 11 remains a practical, repeatable workflow that minimizes frustration.
From the Print Settings screen, you can manage devices, set defaults, and view recent print jobs. Having the printer in the correct status—Ready, Online, and Accessible—helps avoid common errors such as ‘Printer not found’ or ‘Driver missing.’
USB and Wireless: Evaluating Connection Types
Direct USB connections are often the easiest path if your printer sits next to the computer. They tend to be more stable, with fewer interference issues and no need for home network configuration. Wireless printers provide flexibility, especially in shared spaces or when multiple devices print from the same printer. The key is to ensure both the printer and PC can see each other on the same network. If you’ve got a mixed environment (Windows, macOS, or mobile devices), wireless becomes even more valuable because it reduces cable clutter and simplifies sharing. Evaluate your setup: do you rarely move the printer, or do you want the convenience of wireless access from multiple devices? Either choice can work well with Windows 11 if you follow the correct setup steps and keep drivers up to date.
Prepare Your Printer and PC for the Online Transition
Before attempting to make a printer online on Windows 11, gather the basics: power and data connections, the printer manual, and access to the printer’s network settings or USB cable. Ensure your Windows 11 PC has the latest updates installed, as monthly cumulative updates include printer improvements and fixes. If you’re using a network printer, record the printer’s IP address from its onboard screen or the printer’s settings menu. This helps you configure a static IP later if needed, which can stabilize long-term connectivity. If you’re using USB, ensure a reliable USB cable (preferably new) and try a different port if the first port doesn’t recognize the device.
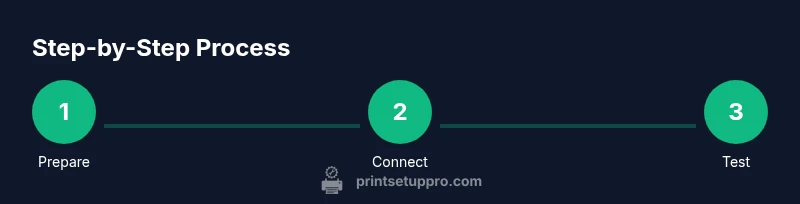
Step-by-Step: Add Printer in Windows 11
- Open Settings > Bluetooth & devices > Printers & scanners.
- Click Add device. Windows will search for available printers.
- Select your printer from the list. If Windows doesn’t find it, choose The printer that I want isn’t listed and try the IP address method or USB connection.
- Follow the on-screen prompts to install the driver. If prompted, allow Windows Update to fetch the latest driver.
- Set the printer as default if needed and print a test page to confirm connectivity.
In many cases, Windows 11 will automatically install the appropriate driver. Manual driver installation should only be necessary if the automatic method fails or you’re using a specialized printer.
Step-by-Step: Install or Update Drivers
Printer drivers bridge the gap between your operating system and the hardware, translating print jobs into a language the printer understands. Start by checking Windows Update for driver packages related to your printer model. If your printer came with a driver CD or you downloaded software from the manufacturer, run the installer and follow the prompts precisely. For network printers, you may need to enter the printer’s IP address during setup. After installation, restart the printer and the PC if you encounter driver conflicts or the printer still shows as Offline.
Pro tip: Always prefer the latest driver from the manufacturer’s official site or Windows Update, rather than third-party sources, to avoid compatibility issues.
Step-by-Step: Verify Connection and Print a Test Page
- Return to Settings > Bluetooth & devices > Printers & scanners.
- Select your printer and click Print test page. If successful, your printer will produce a page confirming connectivity.
- Check the printer queue for stuck jobs, which can block new prints. If a job is stuck, right-click and cancel it before retrying.
- Confirm the printer’s status shows Online and Ready. If not, review network settings, confirm the IP, and re-run the add printer process.
A successful test page confirms a healthy connection. If the test fails, revisit driver installation and verify that the printer is listed under Network or USB connections.
Common Troubleshooting Scenarios and Quick Fixes
If the printer doesn’t appear in Windows, first verify the cable, power, and device compatibility. For network printers, ensure your PC is on the same network and check firewall settings that might block printer discovery. If the device appears but prints slowly or intermittently, update the driver, reset the printer’s network settings, or assign a static IP. When Windows reports a driver error, remove the printer, restart, and re-add it. If you encounter persistent offline status, reboot your router and printer, then re-add via Settings. These steps cover the most common blockers when trying to put a printer online on Windows 11.
Best Practices for Stable Printing on Windows 11
- Keep printer firmware and Windows drivers up to date to minimize compatibility issues.
- Use a dedicated USB port or stable network settings to avoid intermittent connectivity.
- Reserve a static IP for wireless printers to prevent IP changes from breaking connections.
- Regularly print a test page after major updates or changes to confirm continuity.
- Document your printer’s IP, model, and driver version for quick troubleshooting in the future.
Tools & Materials
- Printer(Ensure compatibility with Windows 11 and current firmware)
- Power Cable(Keep the printer powered during setup)
- USB Cable(For direct USB setup (optional if network setup is preferred))
- Windows 11 PC(With latest updates installed)
- Ethernet Cable or Wi‑Fi Network(Needed for network/Wi‑Fi printers)
- Printer Driver/Software(Download from manufacturer site or use Windows Update)
- Access to Internet(For driver updates and printer discovery)
- Documentation/Manual(Useful for model-specific steps)
Steps
Estimated time: 25-40 minutes
- 1
Power on and check connectivity
Power on the printer and verify that it is in a ready/online state. If you use USB, try a different port to rule out a faulty connection. Note the printer’s model name in case you need to search for drivers or network settings.
Tip: A good first check is confirming the printer shows as Online in its onboard display (for wireless models) or a USB connected device is detected by Windows. - 2
Choose USB or network path
Decide whether you will connect via USB for simplicity or use Wi‑Fi/Ethernet for multi-device access. USB is straightforward for a single PC; network printing is best for multiple devices on the same network.
Tip: If unsure, start with USB to confirm basic printing, then switch to network if you need wireless access. - 3
Add the printer in Windows 11 Settings
Go to Settings > Bluetooth & devices > Printers & scanners > Add device. If the printer doesn’t appear, choose the option to add a printer using a TCP/IP address or manual port.
Tip: Ensure the printer is discoverable by Windows by enabling discovery in the printer’s network settings (for wireless models). - 4
Install or update drivers
Windows may install a driver automatically. If not, use the manufacturer’s site or Windows Update to obtain the latest driver. Follow prompts to complete installation.
Tip: Using the latest official driver reduces compatibility problems and improves performance. - 5
Print a test page and verify default status
From Printers & scanners, print a test page to verify everything is working. Set the printer as default if required and ensure it remains Online after system restarts.
Tip: If the test page fails, double-check cable connections or network settings and re-run the add printer flow. - 6
Troubleshoot common issues
If issues occur, run Windows’ built-in troubleshooter, verify IP address stability for network printers, and check firewall settings.
Tip: Document any error codes and search official guides for model-specific steps.
People Also Ask
What should I do if my printer does not show up in Printers & scanners?
First, verify cables and power. If using Wi‑Fi, ensure the printer is on the same network as the PC and that discovery is enabled. Try adding the printer using its IP address. If the issue persists, update or reinstall the driver.
If your printer isn’t showing up, check cables or wireless network, then add the printer by IP or let Windows Update fetch the driver.
Can I set a wireless printer as default in Windows 11?
Yes. After adding the printer in Settings, open Printers & scanners, select the printer, and choose Set as default. This helps ensure every print goes to the correct device without prompts.
Yes—set it as default in the printer settings to avoid selecting the printer manually each time.
Do I always need to install a driver?
Most printers work with built‑in Windows drivers, but some models require the manufacturer driver for full features. If Windows finds a suitable driver, you’re often fine without extra software.
Generally, Windows handles it, but the manufacturer driver can unlock all features.
What if the test page prints blank?
Check ink/toner levels, print head alignment, and ensure the correct paper size is selected. Reinstall the driver if necessary and try another USB port or alternate network path.
If the test page is blank, verify ink/toner, print head, and the correct driver is installed.
How long does it usually take to complete the setup?
Most users complete the core steps in 25–40 minutes, depending on USB vs network setup and driver availability. Expect longer if you troubleshoot network issues.
Most setups take about half an hour, a bit longer if you’re dealing with network issues.
Watch Video
Quick Summary
- Connect via USB to verify basic printing first.
- Update or install the official printer driver.
- Add the printer in Windows 11 settings and test.
- Use a static IP for network printers to minimize drops.
- Keep printer firmware and Windows updates current.