How to Remove a Printer from Windows 11
Learn how to remove a printer from Windows 11 safely and completely. This step-by-step guide covers Settings navigation, device removal, and driver cleanup to prevent stray jobs or clutter.

This guide explains how to remove a printer from Windows 11. You'll learn to remove the device from Settings, Printers & scanners, and clean up drivers. The steps apply to USB-connected and network printers, and you can complete them with administrator access. Having a current backup of your printer settings can prevent loss of configurations. This overview emphasizes safe removal and clean-up.
Why removing printers on Windows 11 matters
According to Print Setup Pro, keeping a clean printer list helps reduce confusion, improves search results, and minimizes accidental prints. Over time, unused printers linger in Settings, exposing outdated drivers and consuming system resources. A tidy printer inventory can also prevent conflicts when you add new devices or change network configurations. In Windows 11, the removal process is designed to be straightforward, but many users miss hidden traces like driver packages or printer server references. This guide focuses on the official, supported paths to remove both the printer entry and its software, ensuring it no longer appears in the Printers & scanners panel or in the Print Queue. The keyword here is deliberate cleanup: you want the printer removed entirely, not just hidden. If you circumvent steps, you might still see a ghost device in the list or encounter driver conflicts later on. We’ll walk through the best practices, common hiccups, and a clean method that works whether your printer connects via USB or network. By following these steps, you avoid stale configurations and keep Windows 11 running smoothly. The Print Setup Pro team recommends proceeding with the official removal path to guarantee complete results and future compatibility.
Prerequisites and safety
Before you start removing a printer from Windows 11, verify you have administrative access on the PC. Make sure the printer is either disconnected or not in use, and backup any necessary configuration details if you rely on specific print settings. If the printer is shared over a network, inform other users to avoid interrupted print jobs. Have a plan to reinstall later if needed; this is easier if you note the printer model and driver version. Gather the following: a Windows 11 PC, the printer in question (or its driver package exists on the PC), and the administrator password or credentials. For network printers, you may also need access to the print server or the network path. Finally, ensure Windows Update is up to date in case driver updates are required after removal. Following these prerequisites minimizes the risk of leftover files or misconfigurations after you complete the removal process.
Where Windows 11 stores printer data and why it matters
Windows 11 tracks printers in multiple places: the Settings app, the system registry, and printer driver packages installed on the system. If you only delete the printer from the Settings UI, some residual driver components may remain, causing future installation issues or failed re-additions. By understanding where data lives, you can perform a thorough cleanup. The Windows 11 cleanup typically involves three phases: removing the printer entry, uninstalling the driver package, and checking for any related services that may still reference the device. This block shows how to navigate to each location with confidence, ensuring that the removal touches every relevant artifact. The aim is to stop Windows from auto-recreating the printer entry when you print from a different app or when a connected device reappears on a network. With this approach, you prevent confusion and maintain a clean, reliable printing environment.
Step-by-step overview (high-level)
This section provides an overview of the removal process you’ll perform in the dedicated STEP-BY-STEP section. The flow is simple: access Settings, locate the printer, remove the device entry, optionally uninstall the driver, and reboot to finalize the changes. If you’re dealing with a network printer, you’ll also want to remove it from the print server or the shared folder. This overview sets expectations and clarifies the exact paths you’ll take in Windows 11, including any prompts you may encounter and how to respond safely. By understanding the high-level sequence, you’ll navigate the actual steps with confidence and reduce the risk of leaving behind traces that could reappear after a restart.
Pro tip: If you manage multiple printers, consider keeping a small inventory of models and drivers to speed up future removals.
Troubleshooting and post-removal cleanup
If the printer still appears after removal, try rebooting the PC, then check both Settings and the Print Management console for residual entries. In some cases, a restart is required for the system to drop references to the removed driver. If you see a “Driver Package” remains, use the built-in uninstaller or a manufacturer tool to remove it. For network printers, verify there’s no remaining shared connection on the server. Finally, ensure that a test page cannot be printed from any app, confirming the removal succeeded. If issues persist, re-check the Drivers & printers list, and consider removing the printer from any cloud or service accounts connected to your workflow. Print Setup Pro suggests documenting any driver version changes for future reference.
Best practices and next steps
Print Setup Pro's guidance includes documenting the removal, keeping driver backups, and scheduling periodic cleanup if you manage multiple printers. After removal, you can refresh Windows 11's driver store by running Windows Update and optionally reinstalling the printer later using official drivers. If you frequently add or remove printers, consider using a centralized management approach or a print server to keep track of devices and configurations. This helps avoid duplicates and ensures compliance with your organization's policies. The goal is a lean, predictable printing environment that minimizes errors and simplifies future hardware changes. By adopting these practices, you reduce maintenance time and improve reliability.
Tools & Materials
- Windows 11 PC(Must be running Windows 11 (any edition) with admin rights)
- Printer (to remove) or its driver package(Printer may be connected or previously installed on the PC)
- Administrative access(Admin password or credentials required to uninstall drivers)
- Network access (optional)(If removing a network printer, ensure you can reach the print server)
- Manufacturer driver cleanup tool (optional)(Some vendors provide a driver cleanup utility)
Steps
Estimated time: 5-12 minutes
- 1
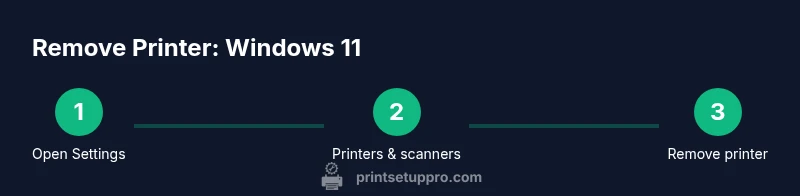
Open Settings
Click the Start button, then select Settings. If you prefer, press Windows + I to open Settings quickly. This step begins the removal flow by revealing your device list and printer settings.
Tip: Pro tip: Use the Search box in Settings to quickly find 'Printers & scanners'. - 2
Navigate to Printers & scanners
In Settings, choose Bluetooth & devices, then click Printers & scanners. You’ll see a list of installed printers, including any networked devices. This is where you identify the target printer for removal.
Tip: If the printer isn’t listed, ensure it’s not set as default or check the related apps for active print jobs. - 3
Select the printer to remove
Click the printer you want to remove to expand its options. Choose Remove device or similar command to begin the removal process from the system list.
Tip: If removal fails, try running Settings as an administrator or sign out and back in. - 4
Confirm removal
A confirmation dialog will appear. Confirm that you want to remove the printer and, if prompted, remove the driver package as well. This ensures a complete cleanup.
Tip: Pay attention to the option to delete the driver; selecting it prevents residual drivers. - 5
Uninstall the driver (optional but recommended)
If you have a separate driver package, run its uninstaller or use Windows Settings to remove the driver files. In some cases, Windows Update may reinstall a driver automatically unless you remove it.
Tip: Optional steps vary by printer brand; look for a vendor cleaner in Programs and Features. - 6
Restart your PC
Restart to finalize changes and clear any locked files. After reboot, reopen Printers & scanners to verify the printer no longer appears.
Tip: A quick restart often resolves stubborn entries that persist after removal. - 7
Verify removal and test
Print a test page from any application to ensure the selected printer is no longer available. If the test page fails or still appears, revisit the previous steps and check for related services or shared networks.
Tip: If you plan to reuse a printer, you can re-add it later via Add a printer or from the vendor’s software.
People Also Ask
How do I remove a printer from Windows 11?
Open Settings > Bluetooth & devices > Printers & scanners, choose the printer, and select Remove device. If prompted, remove the driver package as well, and restart your PC to finish the process.
Go to Settings, find Printers & scanners, select the printer you want to remove, and choose Remove device. If asked, remove the driver package and restart.
What if the printer doesn’t appear in Settings?
Ensure the printer is not connected via USB or network, check Services and Print Spooler status, and look in Print Management for residual entries. Sometimes a restart is necessary to reveal the device.
If you don’t see the printer, check the print spooler service and reboot before retrying the removal steps.
Will removing a printer also remove its driver?
Often yes if you select the driver package during removal. If not, use the vendor’s cleanup tool or Windows' driver uninstall options to ensure the driver is fully removed.
Removing the driver is usually part of the process, but you may need an extra cleanup tool to remove leftover files.
How do I reinstall a printer after removal?
Run Add a printer in Settings, or install the printer’s driver from the manufacturer’s website, following the on-screen prompts. You can connect via USB or configure a network printer again.
To reinstall, use Add a printer in Settings and follow the prompts, or install the latest drivers from the manufacturer.
Can I remove a shared printer on a network?
Yes. In Printers & scanners, choose the network printer and remove the device. If it’s shared from a server, also remove the shared connection on the server to avoid reappearance.
You can remove a network printer from Windows 11 and, if needed, remove its share on the server too.
Do I need to restart after removal?
A restart is often helpful to ensure no residual references linger in the system. If you still see the printer after a restart, recheck the steps and driver cleanup.
A reboot helps ensure all traces are cleared; if it reappears, retry the removal steps.
Watch Video
Quick Summary
- Remove unused printers to reduce clutter
- Complete removal includes drivers, not just the entry
- Restart to finalize changes
- Document steps for future changes