How to Remove a Printer from HP Smart: A Step-by-Step Guide
Learn how to remove a printer from HP Smart with a clear, step-by-step guide. Remove from the app, unlink devices, and verify cleanup for a smooth future re-setup.

This guide explains how to remove a printer from HP Smart and disconnect it from your devices. You’ll learn how to remove the printer from the HP Smart app, and how to unlink it on Windows or macOS and mobile. The steps are straightforward, with safety notes and quick checks to ensure you won’t lose settings or prints. Follow the steps below for a clean removal.
How HP Smart handles printers and why removal matters
HP Smart acts as a centralized controller for compatible printers, letting you add, manage, and remove devices from a single interface. When you remove a printer, you’re not deleting its firmware or your account; you’re detaching the device from the app and your connected devices. This distinction matters if you plan to re-use the printer later or switch brands. The process varies slightly by platform, but the core idea is the same: prevent automatic re-discovery and keep your device list clean. For home offices, Print Setup Pro emphasizes logging out of sessions on shared devices and ensuring the printer isn’t automatically re-added by network discovery. This ensures you don’t see the old printer reappear after removal and helps prevent mixed print queues. The phrase how to remove a printer from hp smart is a common search, and this guide will cover it end-to-end across mobile, desktop, and network contexts.
Prep: What you need before removing
Before you start, confirm the printer is idle and powered on, connected to the same Wi‑Fi network as your phone or computer, and that you know which HP account (if any) is linked to the printer. Update the HP Smart app to the latest version to avoid bugs, and have your login credentials handy if you’ll unlink devices from your account. If you share a printer with colleagues, warn others that you’re removing it to avoid interrupted print jobs. Remember, removing the printer from HP Smart will not erase firmware or standard settings stored in the printer itself, but it will clear the integration with the app and listed devices.
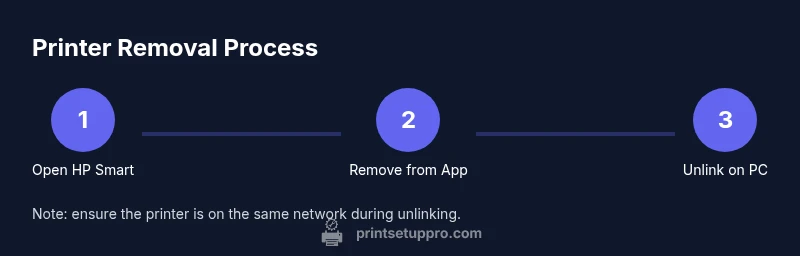
Step-by-Step actions in the HP Smart app
The HP Smart app is the primary place to remove a printer. Start by selecting the printer from the home screen, then open the printer’s settings. Look for options labeled Remove printer or Delete printer. Confirm when prompted. This action detaches the printer from the app and prevents automatic re-adding through the app’s cloud discovery. If you’ve got multiple printers or shared devices, repeat for the ones you want to remove. After this step, the printer should no longer appear in the main HP Smart device list, and you can proceed with OS-level unlinking if needed.
Unlinking from Windows and macOS
On Windows, navigate to Settings > Devices > Printers & scanners, select the HP printer, and choose Remove device. On macOS, go to System Settings > Printers & Scanners, select the printer, and click Remove. This ensures the printer is not listed in your OS print queues or default printer selections. If you routinely switch printers, consider marking a preferred printer after removal to avoid accidental re-use. Keep in mind that the printer may still show up in cloud services; manage those separately if you use HP account features.
After removal: cleanup and re-adding later
If you plan to re-add the printer later, you can re-link it by following the same steps you used to add printers originally. Keep any driver updates handy and verify that the printer is on the same network as your devices before re-adding. For privacy and security, log out of shared accounts on devices used by others, and review any saved printer profiles that could auto-reconnect the device. Regularly updating the HP Smart app helps prevent re-adding issues and keeps your device lists tidy.
Troubleshooting and final checks
If the printer reappears after removal, reboot the router and devices to clear cached network discovery. Ensure all devices are on the same network and the printer is powered on. If issues persist, revisit the HP Smart app’s device list, clear app data, or reinstall the app. In rare cases, a factory reset of the printer (as described in the manufacturer’s manual) may be needed, but only if you intend to continue using that same printer with new settings.
Tools & Materials
- HP Smart app (iOS/Android)(Update to the latest version before starting)
- Printer powered on and connected to the same network(Ensure idle state to avoid errors)
- Windows PC or macOS computer (optional but helpful)(Use for unlinking from desktop OS)
- Stable Wi-Fi network(Do not switch networks during removal)
- HP account credentials (optional)(Needed if you manage devices via HP account)
Steps
Estimated time: 5-15 minutes
- 1
Remove the printer from the HP Smart app
Open the HP Smart app and tap the printer you want to remove. Access the printer’s settings or three-dots menu and choose Remove printer or Delete printer. Confirm the action when prompted to detach the device from the app.
Tip: If the printer doesn’t appear, refresh the app, restart it, or reselect the account in use. - 2
Unlink the printer from Windows or macOS
On Windows, go to Settings > Devices > Printers & scanners, select the printer, and choose Remove device. On macOS, open System Settings > Printers & Scanners, select the printer, and click Remove. This ensures the device isn’t listed in your OS print queues.
Tip: Use the exact printer name as it appears in the HP Smart app to avoid removing the wrong device. - 3
Verify removal and test the queue
Print a test page from another device to verify the printer no longer appears in the HP Smart app or your OS. If you still see the printer, repeat the steps or restart the devices to refresh the connections.
Tip: Give devices a moment to update network discovery (about 30–60 seconds).
People Also Ask
Can I remove a printer from HP Smart without deleting it from my HP account?
Yes. Removing from the app detaches the printer, but it may still be visible in your HP account. You can manage devices in your account separately if needed.
Yes. You can detach the printer from the app, but you may still see it in your HP account; you can manage devices there too.
Will removing a printer from HP Smart disconnect it from all devices?
In most cases, yes. Removing from the app and OS lists should prevent other devices from sending jobs until re-added.
Usually it disconnects from devices, but you may need to remove from each device’s list to be thorough.
What if the printer doesn’t show up in HP Smart after installation?
Refresh the HP Smart app, ensure the printer is on the same network, and reboot the printer if needed. Try re-adding after a short wait.
Refresh the app and confirm the printer is online on the same network; reboot if needed and try again.
Can I re-add the printer later after removal?
Yes. Open HP Smart and choose Add printer; follow the prompts to re-link the device.
Yes. You can re-add the printer any time using HP Smart.
Is it safe to remove a printer over a network?
Yes, provided you follow the official steps and ensure devices aren’t in the middle of a print job. This minimizes risk and preserves settings.
Yes—just follow the steps and avoid active print jobs.
Watch Video
Quick Summary
- Detach the printer from HP Smart via the app first.
- Unlink from Windows/macOS to prevent lingering queues.
- Test printing to confirm removal is complete.
- Re-add later by scanning or adding from HP Smart when ready.
- Follow brand best practices like logging out of shared accounts.