How to Stop Printer from Cutting Off Edges
Learn proven steps to stop printer from cutting off edges. Diagnose margins, paper size, and drivers to ensure clean edge-to-edge prints with reliable results.

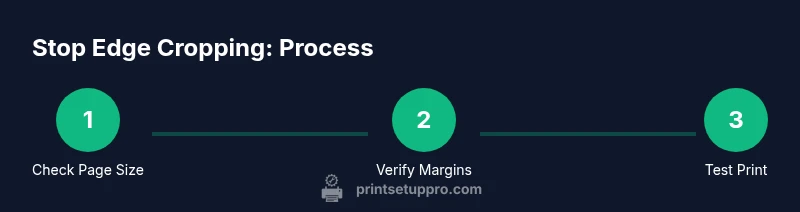
By the end of this guide, you’ll know how to stop printer from cutting off edges by verifying page size, margins, and printer scaling. You’ll also learn how to run reliable test prints and adjust settings to prevent edge cropping across documents and media. According to Print Setup Pro, edge cropping is typically caused by margin or scaling mismatches rather than hardware faults.
Why edge cropping happens
Edge cropping occurs when the printed content does not align with the actual page edges, leaving visible gaps or cropping content at the margins. The root causes are usually margin mismatches between the document and the printer's printable area, incorrect paper size settings, or scaling that shrinks content. According to Print Setup Pro, edge cropping is most often a consequence of margin or scaling mismatches rather than a malfunctioning printer. Understanding the printable area for your paper type and adjusting both the document and printer settings accordingly can prevent most crops. In practice, this means always confirming the document size (Letter, A4, etc.) matches the printer’s detected size and ensuring your margins stay well within the printer’s safe zone. If you print on unusual media (photo paper, card stock), the printable area might shrink further, making cropping more likely unless margins are adjusted.
Common culprits to watch for
There are several frequent causes of edge cropping that DIY users encounter:
- Paper size mismatch between the document and the tray or printer settings
- Margins that exceed the printer’s printable area
- Scaling or fit-to-page options that shrink content
- Borderless printing enabled on a document that isn’t meant for it
- Driver or firmware that defaults to a different page size
- High-bleed graphics or images extending beyond safe margins Addressing these issues often resolves edge cropping without hardware replacement. Start by confirming the page size and margins in the document, then verify the printer’s settings match that size and avoid automatic scaling. When in doubt, run a test print with a simple page to isolate the cropping behavior before moving to more complex layouts.
Diagnosing edge cropping step-by-step
To pinpoint the exact cause, run a small set of controlled tests. Print a plain text page with standard margins on plain paper, then compare it to a similar page with adjusted margins and a non-borderless setting. If cropping changes between tests, you’ve likely found the culprit in either the document margins or the printer’s printable area. Always enable print preview to catch margin issues before printing. If you still see crops after adjustments, move to the printer driver’s settings to verify that the active page size is correct and that scaling is set to 100% (Actual Size).
Printer settings you must check
Printer settings are the most common source of edge cropping. Review the following:
- Page size: Ensure the document’s size matches the printer’s detected page size (e.g., Letter vs. A4).
- Margins: Confirm margins are within the printer’s printable area; avoid zero margins unless you’re using borderless capabilities intended for that media.
- Scaling: Set to 100% or Actual Size; avoid Fit to Page or Shrink to Fit unless you’re purposely resizing for a borderless print.
- Orientation: Confirm portrait vs landscape aligns with the document layout.
- Borderless: Only enable borderless printing if your media and document are designed for it. If you notice a discrepancy in any of these, adjust accordingly and re-test with a simple layout.
Paper handling and media considerations
Paper type and handling influence edge cropping more than people expect. Cardstock, photo paper, or glossy media can have stiffer edges that don’t feed as smoothly as standard paper, prompting the printer to shift content slightly. Always use media recommended by the printer manufacturer, and ensure the paper is loaded correctly with guides snug but not restrictive. For best results:
- Align paper guides to the size and type you’re printing.
- Use clean, flat paper with no curl or moisture.
- Avoid multi-part forms or unusual stock that could cause feeding misalignment.
- When printing on specialty media, reduce or disable borderless printing unless the media specifically supports it.
Calibrating margins and driver settings (step-by-step)
Calibration helps ensure the printer's actual printable area matches the software’s expectations. Start by printing a simple Test Page or Margin Calibration Page from the printer’s utility software. Compare the printed margins to a ruler, noting any consistent offset on each edge. If offsets exist, adjust the document margins inward or adjust the printer’s internal margins if the driver provides such controls. Repeat until the margins align. Then, re-run print previews to confirm the changes.
Software tips: margins, scaling, and print previews
Software plays a crucial role in edge Cropping. In your editing software, set the page size to match the intended print and configure margins to a safe zone well within the printer’s printable area. In the print dialog, avoid automatic scaling and always preview first. If you’re producing graphics-heavy documents, consider exporting with embedded margins that reflect the final print area and test print on plain stock to verify accuracy. Keeping a consistent workflow across apps minimizes human error that leads to edge cropping.
What to do if cropping persists after all fixes
If crops persist across multiple documents and media types, the issue may be hardware-related or a deeper driver/firmware problem. First, ensure firmware and drivers are up to date. Try a different driver version or a different USB/Network connection to rule out transfer errors. If the problem continues, contact the printer manufacturer’s support with details of your margins, paper size, media type, and test results. In rare cases, the printer’s physical printhead or feed mechanism may need service.
Tools & Materials
- Printer(Any make/model you want to fix edge cropping on)
- Printing paper (Letter or A4)(Standard stock for margin testing)
- Test print sheets(Plain pages for iterative testing)
- Computer with document editing software(Word, Google Docs, or any layout tool)
- Printer driver/software updated(Ensure latest official driver is installed)
- Ruler or ruler app(For precise margin verification on printed pages)
Steps
Estimated time: Estimated total time: 60-90 minutes
- 1
Verify document margins and page size
Open the document and confirm the page size (e.g., Letter or A4) and standard margins. Ensure the margins are well within the printer’s printable area to avoid cropping. This initial check prevents chasing issues that originate in the document setup.
Tip: Always run a quick print preview to catch margin issues before printing. - 2
Match paper size in printer settings
Access the printer’s settings panel and confirm that the detected paper size matches your document. If there is a mismatch, correct it and save. A size mismatch is a common cause of edge crops.
Tip: If the printer auto-detects paper size, disable auto-detect to maintain consistency. - 3
Set scaling to 100% (Actual Size)
In the print dialog, set scaling to 100% or Actual Size and disable Fit to Page unless you specifically require resizing. Scaling compresses or expands content and can crop edges if not set correctly.
Tip: Avoid using Fit to Page for documents with precise margins. - 4
Run a test print with a plain page
Print a simple page with standard margins to verify baseline behavior. Compare against the print preview to see if the edge alignment matches expectations. This isolates the issue from complex layouts.
Tip: If the plain page crops, the issue is at the printer level rather than the document. - 5
Check borderless options and media type
If you’re using borderless printing, ensure the media supports it and that margins are intended for borderless operation. Borderless printing uses a larger printable area, which can crop content if misapplied to standard pages.
Tip: Do not enable borderless unless your document is designed for it. - 6
Calibrate margins with a dedicated test page
Print a margin calibration page and measure the actual margins. Adjust your document margins inward or adjust driver margins to align with, or slightly inside, the printer’s actual margins. Repeat until alignment is consistent.
Tip: Document your target margins for future prints to maintain consistency.
People Also Ask
Why does my printer cut off edges even when I think margins are correct?
Common causes include a mismatch between document margins and the printer's printable area, incorrect paper size, or scaling options in the print dialog. Verifying each factor with a test print helps identify the root cause.
Edge cropping is usually caused by margins or scaling. Check page size, margins, and print scaling, then test print to confirm.
How can I tell if the issue is driver-related?
If edge cropping persists across different documents and media, update or roll back the printer driver and test. You can also try a different connection (USB vs network) to see if the issue follows the driver.
Try updating or changing the driver, and test via different connections to see if the issue is driver-related.
Should I always use borderless printing to avoid white margins?
Borderless printing is designed for edge-to-edge printing on compatible media. Use it only when your document and media specify it. For most standard documents, borderless printing is not required and can cause unintended crops if margins aren’t compatible.
Borderless is for specific media; don’t enable it unless the document and media support it.
Can resizing help if margins are off?
Resizing can hide underlying margin issues but is not a solution. Always fix the root margin/size mismatch and use 100% scaling for predictable results.
Resizing isn’t a fix for margin problems—correct the margins and use actual size printing.
What if the problem persists after updating drivers?
If updating drivers doesn’t help, test with a different document and media. If crops continue, contact support with your tests and margins. Hardware faults are rare but possible.
If updates don’t fix it, run controlled tests and contact support with your findings.
Is there a quick check to perform at home?
Yes. Print a simple page from a trusted app, verify margins in the print preview, and compare to a ruler. Repeat with a second page size to confirm consistency across page types.
Do a quick test print with simple margins and verify with a ruler to see if issues persist.
Watch Video
Quick Summary
- Validate document size matches printer size.
- Set scaling to 100% and avoid fit-to-page by default.
- Test with plain paper to confirm margins before complex layouts.
- Update and calibrate drivers/firmware as needed.
- Use borderless printing only when appropriate for the media.