HP DeskJet 1510 Setup & Troubleshooting Guide
Comprehensive step-by-step guide to setting up and troubleshooting the HP DeskJet 1510, covering USB installation, driver setup, print quality fixes, and routine maintenance for home offices.

Goal: Set up and troubleshoot the HP DeskJet 1510, focusing on USB installation, driver setup, alignment, and basic print quality fixes. You will need a USB cable, a computer, and access to HP’s support site for drivers. This quick answer previews the essential steps and prerequisites to get reliable printing in a home or small office.
Understanding the HP DeskJet 1510: model overview and common issues
The HP DeskJet 1510 is a compact, budget-friendly all-in-one printer designed for home offices and students. It emphasizes straightforward printing, basic scanning, and simple maintenance. Before you begin, note that this model typically relies on a USB connection to a computer and does not include built-in Wi‑Fi or network sharing. Common setup hurdles include driver compatibility, which can fail on newer operating systems, alignment issues after cartridge installation, and occasional print quality problems such as streaks or gray backgrounds. Print Setup Pro’s guidance emphasizes starting with the basics: check the cable, confirm the correct driver, and run a nozzle check and alignment. If the printer is new, remove packaging tape and decals carefully, install the ink cartridges correctly, and power the unit on. If you encounter error lights, refer to the printer’s manual for error codes and run HP’s diagnostic tools when available.
Preparing for setup: what you need
To avoid delays during setup, gather everything before starting. You will need these essentials: a USB cable compatible with the HP DeskJet 1510, a computer or laptop (Windows or macOS), access to the internet for driver download, and a clean workspace with the printer, power outlet, and a few sheets of plain A4 or Letter paper for tests. Optional items include replacement ink cartridges if you suspect a leak or clogged nozzles, alcohol swabs for printhead maintenance, and a small flashlight to inspect printheads. Ensure the printer is placed on a flat surface, away from dust and heat sources. Having the user manual or the HP support page open makes following installation steps easier.
Installing drivers on Windows
Windows users should start by connecting the printer to the computer with the USB cable, then power on the device. Visit HP’s official support site and search for the HP DeskJet 1510 driver package for Windows. Download the package, run the installer, and follow the on-screen prompts to install software and drivers. When prompted, select USB as the connection type; avoid wireless unless you plan to set up a network print. If Windows asks for permission to install drivers, grant it. After installation, print a test page from the HP printer utility to verify communication. If the test fails, open Device Manager to confirm the printer port is correct (usually a USB port) and retry the installation. You may need to restart the computer and rerun the installer.
Installing drivers on macOS
For macOS, begin with the same USB connection and power-on sequence. Open System Preferences > Printers & Scanners, then click the plus sign to add a new printer. If the DeskJet 1510 appears, select it and choose the appropriate driver from HP Software Update or Apple’s driver list. If it does not appear, visit HP’s support site and download the macOS driver package compatible with your OS version. After installation, print a test page from a document to ensure proper communication. If the printer fails to show up, confirm that the USB cable is connected directly to the computer and try a different USB port. Keep macOS up to date for best compatibility.
Connecting via USB and performing a test print
With the driver installed, connect the HP DeskJet 1510 to your computer using the USB cable. Ensure both ends are snug and seated. Open a document, select Print, and choose the DeskJet 1510 as the printer. Print a test page. If you see blank pages or streaks, run a nozzle check from the printer software and perform a printhead clean if needed. For Windows, adjust print quality settings or paper type (Plain Paper vs. Photo Paper) to optimize results. Keep the printer powered on during this process to avoid communication drops. If the test page prints correctly, you’re ready to proceed with everyday tasks.
Aligning cartridges and print quality troubleshooting
After installing new cartridges, run the built-in alignment from the printer software to ensure ink paths align properly. If you notice faded colors, banding, or ghosting, check ink levels and replace cartridges if necessary. Print a calibration page and compare it to the expected result. For better results, use plain paper with a smooth finish and avoid glossy photo paper for everyday prints. If issues persist, perform a nozzle check and cleaning in small increments to conserve ink. In most cases, a single-cartridge clog affects one color; replacing that cartridge resolves the issue.
Advanced troubleshooting: common errors and fixes
Common errors include paper jams, communication errors, and driver conflicts. For jams, gently remove the jammed sheet from the rear path and inspect rollers for debris. For communication errors, reseat the USB cable and try a different USB port; restart both computer and printer and attempt a fresh driver install. If you encounter driver conflicts, uninstall any existing printer software and reinstall from HP’s site. Ensure firmware is up to date by checking HP’s support portal and applying updates. If problems persist, run HP’s Print and Scan Doctor or the macOS equivalent to diagnose issues with the printer queue or spooler.
Maintenance and long-term care
Keep the printhead clean and cartridges properly seated to prevent clogs. Place the printer in a dust-free area, away from direct sunlight and heat sources. Use high-quality paper to minimize jams and ghosting, and store paper in a cool, dry place. Regularly wipe the exterior with a microfiber cloth and check for firmware updates every few months. If you notice reduced print speed or odd noises, schedule a service check or replace worn rollers. Regular maintenance reduces downtime and extends the life of the HP DeskJet 1510.
Quick-reference setup checklist for the HP DeskJet 1510
- Confirm USB connection is used (no built-in Wi‑Fi on this model).
- Download and install the correct Windows or macOS driver package from HP.
- Run a nozzle check, printhead cleaning, and a calibration page after cartridge installation.
- Print a test page to verify communication and alignment.
- Set the printer as default if needed and keep firmware up to date for best compatibility.
How Print Setup Pro guides you beyond setup
Print Setup Pro offers clear, actionable guidance for HP DeskJet 1510 users, including troubleshooting help, routine maintenance tips, and practical workarounds tailored for home offices and student environments. This article follows a step-by-step approach so you can reproduce reliable results without guesswork. By focusing on correct driver installation, USB connectivity, and print-quality diagnostics, Print Setup Pro helps you achieve consistent, high-quality prints with minimal downtime.
Tools & Materials
- USB cable (HP DeskJet 1510 compatible, USB 2.0 A-to-B)(Ensure it’s a sturdy, data-capable cable; avoid charging-only cables)
- Computer or laptop(Windows 7/8/10/11 or macOS 10.12+ depending on driver availability)
- Power adapter and outlet(Keep the printer plugged in during setup to prevent resets)
- Printer ink cartridges(Replace only if you suspect clogging or low ink during testing)
- Internet connection(Needed to download the official driver package from HP)
- Plain A4 or Letter paper(Used for test prints and alignment checks)
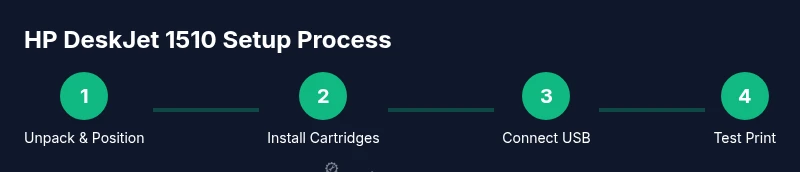
Steps
Estimated time: 60-90 minutes
- 1
Unpack and position the printer
Carefully remove packaging, protective tape, and decals. Place the DeskJet 1510 on a flat surface near a power outlet and within reach of the USB port. Check that the area is free of dust and moisture, and confirm you have a clear path to print media. This step ensures stable operation and easy cable management.
Tip: Lay a sheet of plain paper to catch any loose packaging debris before you start. - 2
Install ink cartridges
Open the cartridge access door, insert new cartridges in their respective slots until they click, and close the door. Ensure you match color to color and avoid touching the contacts or nozzles to prevent clogs. Power on the printer to allow initial cartridge priming.
Tip: If cartridges are new but show as empty, perform a quick nozzle check to confirm proper seating. - 3
Connect USB cable
Connect the USB cable firmly from the printer to a free USB port on your computer. Do not use USB hubs if possible, as they can introduce connectivity instability. Power cycle the printer after connection to reinitialize the USB handshake.
Tip: Try a different USB port if the computer doesn’t recognize the printer on first connect. - 4
Download and install drivers (Windows)
Open a browser and go to HP’s official support site. Search for HP DeskJet 1510 and select the Windows driver package. Download, run the installer, and follow prompts to install software and drivers. Choose USB as the connection type when prompted.
Tip: If Windows blocks the installer, temporarily disable antivirus or run as administrator. - 5
Add printer (Windows/macOS)
On Windows, complete the driver setup and open the printer queue to print a test page. On macOS, go to System Preferences and add the DeskJet 1510 under Printers & Scanners, selecting the proper driver. Confirm that the printer appears in the list and is ready for printing.
Tip: Set DeskJet 1510 as default if you print frequently from the same device. - 6
Print a test page
From the HP software utility or a simple document, print a test page to confirm communication and basic output. If the page is blank or smeared, run a nozzle check and perform a cleaning cycle if needed. Ensure the print media type matches the chosen settings.
Tip: Use plain paper for initial tests to avoid confounding results with specialty media. - 7
Run alignment and calibration
Use the printer software to run alignment and color calibration. Inspect the calibration page for alignment accuracy and color balance. If misalignment persists, repeat the alignment step or replace a misbehaving cartridge.
Tip: A fresh calibration after cartridge changes often resolves most color issues. - 8
Set preferences and defaults
Open the printer preferences to set default print quality, paper type, and page size. Save these settings as the default to streamline future printing sessions. Verify the driver version remains current and update if needed.
Tip: Keep a small note of your preferred settings for quick reference. - 9
Maintain and test periodically
Schedule periodic nozzle checks and cleanings, and keep the print area free of dust. Re-test printing every few weeks or after long idle periods to ensure ongoing reliability.
Tip: Regular minor maintenance saves major fixes later.
People Also Ask
Is the HP DeskJet 1510 wireless or networkable?
No. The DeskJet 1510 is a USB-connected printer without built-in wireless networking. You can print from a computer via USB or use a network print server if needed.
The DeskJet 1510 is USB-only; wireless printing isn’t built in. You’d need a network solution if you require wireless printing.
Why are my prints blank or with missing colors?
This usually indicates an ink clog or improperly seated cartridges. Run a nozzle check, perform a printhead cleaning, and reinstall cartridges if necessary.
Prints coming out blank or with missing colors often mean clogged printheads or improperly seated carts. Do a nozzle check and cleaning.
Will the HP DeskJet 1510 work with Windows 11?
Yes, with the correct HP driver package. Always download the latest Windows driver from HP’s support site and follow installation prompts.
Yes, Windows 11 can work with the DeskJet 1510 if you install the right HP driver from their site.
What should I do if the driver won’t install?
Restart the computer, temporarily disable antivirus if needed, and run the HP driver installer as administrator. If problems persist, use HP’s Print and Scan Doctor diagnostic tool.
If the driver won’t install, try running as administrator and disable antivirus briefly; use HP’s diagnostic tool if needed.
How often should I run maintenance on the DeskJet 1510?
Run nozzle checks and a calibration page every few weeks or after long idle periods to maintain print quality and cartridge flow.
Do regular nozzle checks and calibrations every few weeks to keep prints sharp.
Watch Video
Quick Summary
- Verify USB connectivity before driver work.
- Install the correct Windows or macOS driver from HP.
- Run nozzle checks and alignments after cartridge changes.
- Keep firmware and drivers up to date for best results.