HP LaserJet Pro 400: Setup and Troubleshooting Guide
How to install, connect, and troubleshoot the hp laserjet pro 400. USB/Wi‑Fi setup, driver installation, common fixes, and maintenance tips for reliable home‑office printing.

In this guide, you will learn how to set up and troubleshoot the hp laserjet pro 400 from unboxing to printing. You'll cover connection options (USB and Wi‑Fi), driver installation, firmware checks, and common issues with clear steps. By the end, your printer should print reliably and be ready for everyday use.
hp laserjet pro 400: Why reliability matters for home offices
According to Print Setup Pro, the hp laserjet pro 400 is a workhorse for small teams and students who need dependable, high‑quality text printing with minimal maintenance. In a bustling home office, reliability translates to fewer interruptions, smoother workflows, and predictable costs. The hp laserjet pro 400 can deliver crisp text, clean graphics, and fast output when properly powered, connected, and updated. This guide focuses on setup and troubleshooting practices that minimize downtime and maximize uptime for your daily tasks, whether you’re drafting reports, printing assignments, or preparing documents for clients. Print quality and device longevity hinge on disciplined initial setup, regular firmware checks, and proactive maintenance—habits Print Setup Pro strongly endorses.
Compatibility and prerequisites: what you need before starting
Before you even open the printer box, confirm you have the essential items: the hp laserjet pro 400 printer itself, the power cable, a toner cartridge appropriate for your model, enough plain paper for testing, and a device to install drivers (a PC or Mac with internet access). A stable Wi‑Fi network or wired Ethernet is recommended for smooth wireless or network printing. You’ll also want your network name (SSID) and password if you plan to go wireless. Have your computer’s admin rights ready to install drivers, and keep any existing printer queues clear to avoid conflicts during setup. Print Setup Pro recommends starting with a wired USB connection if you’re unfamiliar with wireless networks, then migrating to Wi‑Fi once drivers are installed.
Unboxing, toner, and paper loading: first physical steps
Start by unboxing the hp laserjet pro 400 and inspecting for any shipping damage. Remove protective tape and accessories, then install the toner cartridge following the labeling inside the drum area. Place the printer on a level surface near a power outlet and a computer. Load standard office paper into the tray and ensure the paper guides are snug to prevent jams. A clean, dry work surface helps reduce dust on the glass and sensors. If you notice toner spillage, wipe it with a dry lint‑free cloth before loading the tray. These initial steps reduce print defects and help you complete the first print quickly.
Connecting methods: USB, Ethernet, and Wi‑Fi configuration
The hp laserjet pro 400 can connect via USB for direct laptop printing, or through Ethernet/Wi‑Fi for shared printing across multiple devices. If you’re new to networking, start with a USB connection to install drivers and verify basic printing, then switch to a wireless or wired network setup. For wireless setup, ensure your router is broadcasting on 2.4 GHz (most printers don’t require 5 GHz) and enter your SSID and password precisely. After connecting, print a network configuration page to confirm the correct IP address and network status. This information helps troubleshoot connectivity issues later. Print Setup Pro emphasizes documenting the printer’s IP address when using a network.
Driver installation, firmware checks, and first print
With the printer connected, download the latest drivers from HP’s official support site or use the installation CD if provided. Run the installer and follow prompts to add the hp laserjet pro 400 to your system. During installation, choose the connection type you’re using (USB or network). After installation, perform a firmware check and update if prompted; firmware updates can improve compatibility and fix known issues. Once drivers are installed, print a test page and verify print quality, alignment, and color accuracy if applicable. Keep the printer paused during any firmware update to prevent interruptions.
Common issues and fast fixes
If the printer fails to print, verify power is on, the printer is selected as the default, and a test page is possible via the printer’s control panel. Paper jams are more common if the tray guides aren’t aligned or if paper is loaded incorrectly; reseat stock and straighten guides. Print quality problems—fading, streaks, or dark blotches—usually stem from toner or drum issues, dirty rollers, or a misadjusted printer setting. Run a cleaning cycle from the printer menu, replace toner if smear persists, and ensure the driver is configured for the correct media type and print quality settings. For network issues, confirm the IP address and re‑verify wireless credentials if necessary.
Maintenance and long‑term care
Schedule regular maintenance to extend the hp laserjet pro 400’s life: keep the exterior clean, wipe the glass scanning/printing area with a microfiber cloth, and replace toner before it runs completely dry to prevent streaks. Periodically check for firmware updates and keep the driver software up to date. Keep spare toner on hand to avoid urgent shopping trips. Consider establishing a simple printer‑care routine—monthly checks of paper path, tray alignment, and network status—to preserve print quality and reduce downtime. Print Setup Pro recommends documenting your setup steps so others can replicate the process quickly in shared workspaces.
Authority sources and further reading
For additional context on printer safety, climate, and maintenance best practices, see government and major publications:
- OSHA printer safety basics: https://www.osha.gov
- Consumer protection and printers: https://www.consumer.ftc.gov
- Trusted tech reviews and setup guides: https://www.pcmag.com
Tools & Materials
- HP LaserJet Pro 400 printer(Unbox and inspect for damage; model should match hp laserjet pro 400)
- Power cable(Use the included power cord; verify outlet is grounded)
- USB cable (type A to B)(Optional if you plan USB direct printing; needed for initial driver install on some systems)
- Ethernet cable(Use for wired network setup if preferred over Wi‑Fi)
- Wi‑Fi network details (SSID and password)(Needed for wireless setup; ensure 2.4 GHz is enabled if router is dual‑band)
- Computer or mobile device with internet access(To download drivers and configure settings)
- Printer toner cartridge for hp laserjet pro 400(Use genuine or compatible toner; ensure correct model)
- Standard office paper(For test page and daily printing; 20 lb or similar)
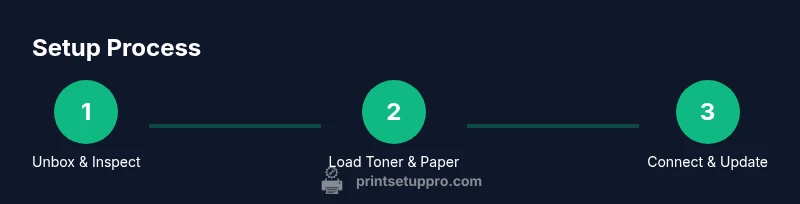
Steps
Estimated time: 45-60 minutes
- 1
Unbox and inspect
Carefully remove the hp laserjet pro 400 from its packaging. Check for damage and confirm that all components are present (printer, power cord, toner, user guide, and cables as applicable). Remove protective tapes and dispose of packaging responsibly.
Tip: Keep a quick checklist nearby to ensure nothing is missing before you proceed. - 2
Load toner and paper
Install the toner cartridge according to the labeling inside the printer. Load plain paper into the tray and align the guides to fit the stack snugly without bending the pages.
Tip: Don’t touch the toner roller; oils from fingers can affect print quality. - 3
Choose your connection method
Decide between USB, Ethernet, or Wi‑Fi. USB is simplest for a single computer; network printing requires IP configuration or a router setup for wireless printing.
Tip: If unsure about Wi‑Fi, start with USB to verify basic printing first. - 4
Install drivers and software
On your computer, download the latest drivers from HP’s support site and run the installer. Follow prompts to add the hp laserjet pro 400 as a printer on your system.
Tip: Select the correct connection type in the installer to avoid driver conflicts. - 5
Connect to the network (if applicable)
If using Wi‑Fi or Ethernet, configure network settings on the printer via its control panel or a connected computer. Confirm network status and obtain the device IP address for later troubleshooting.
Tip: Write down the IP address shown on the printer’s network page. - 6
Print a test page
From the printer control panel or via the driver, print a test page to verify alignment, margins, and toner quality. Adjust print settings if needed.
Tip: Use a standard document with text and simple graphics to check consistency. - 7
Update firmware
Check for any firmware updates and apply them if available. Firmware updates can improve compatibility and fix known issues with the hp laserjet pro 400.
Tip: Ensure the printer remains powered during the update to prevent bricking. - 8
Set preferences and defaults
Configure default paper size, print quality, and tray behavior for typical tasks. Consider creating a quick‑print profile for common documents.
Tip: A consistent profile reduces misprints and media waste. - 9
Create a maintenance routine
Schedule periodic checks for paper jams, tray alignment, and sensor cleanliness. Keep spare toner and paper, and monitor print quality over time.
Tip: A simple calendar reminder helps sustain performance. - 10
Document the process
Save your setup steps so others can replicate the configuration in a shared workspace. Include model specifics, network settings, and any software versions.
Tip: Documentation speeds onboarding for new users and minimizes downtime.
People Also Ask
Can I use the hp laserjet pro 400 wirelessly, and what are the prerequisites?
Yes, the hp laserjet pro 400 can print over Wi‑Fi. You’ll need a compatible wireless network (2.4 GHz commonly) and the printer’s IP address or SSID/password for setup. Install the latest drivers on your computer to complete the wireless configuration.
Yes, you can print over Wi‑Fi. You’ll need your network name and password, then install the latest drivers to finish the setup.
What should I do if the test page looks blurry or faded?
Blurry or faded print usually points to toner or drum wear, toner residue, or driver settings. Replace the toner if needed, reseat it properly, and run a cleaning cycle from the printer menu. Verify print quality after each step.
If the test page is blurry, check the toner and run a cleaning cycle, then retest.
How often should I update the firmware on the hp laserjet pro 400?
Check for firmware updates periodically, especially after major driver updates or new OS versions. Keep a backup of printer settings before updating and ensure the printer remains powered during the update.
Check for updates after driver updates or OS changes, and keep it powered during installation.
Why is there a paper jam and how can I fix it?
Open the jam areas gently, remove any stuck paper, and reload the tray with correctly sized stock. Ensure the guides are snug but not crushing the paper. Clear all sensors and try printing a test page.
Gently remove jammed paper and reload the tray, making sure guides fit snugly.
Can I share the hp laserjet pro 400 across multiple devices?
Yes, sharing is possible via network printing. After connecting to the network, install the printer on each device using the same driver and connect to the network IP. Keep the printer set as a shared resource in your operating system.
Yes—once on the network, install the printer on all devices using the same driver.
What maintenance tasks should I perform regularly?
Regularly check for dust, clean the glass area, inspect trays, and confirm alignment. Maintain fresh toner and paper stock to avoid misfeeds. Establish a monthly checklist to keep the printer in peak condition.
Do a monthly dusting, glass cleaning, and paper/load checks to keep everything running smoothly.
Watch Video
Quick Summary
- Confirm essential hardware before starting
- Choose a reliable connection method and install current drivers
- Test print and firmware updates to ensure reliability
- Maintain simple routine checks to reduce jams and degradation
- Document setup steps for easy replication