HP M402 Setup and Troubleshooting Guide for Home Offices
Step-by-step setup and troubleshooting for the HP M402 printer, covering wiring, drivers, network setup, duplex printing, and maintenance for reliable home-office printing.

Goal: set up and troubleshoot the hp m402 printer with reliable USB or Ethernet connectivity. Learn to install the correct drivers, verify a test print, and configure basic network settings. This quick answer previews the full step-by-step guide designed for home offices and students. By following the steps, you’ll reduce downtime, prevent jams, and ensure secure, compliant printing in shared spaces.
Understanding the HP M402 printer family and prerequisites
The hp m402 line includes monochrome laser printers designed for compact home offices and small workgroups. In this guide, we focus on the typical M402n (network-enabled) and M402d (USB plus Ethernet) variants. Before you begin, verify you have a stable power source, a suitable cable connection (USB or Ethernet), and access to a computer with administrator rights to install drivers. According to Print Setup Pro, hp m402 is valued for its straightforward setup and reliable monochrome output. The hp m402 is especially popular for budget-conscious workflows, where quick setup and predictable toner usage matter. Print Setup Pro Analysis, 2026 suggests that users place a high priority on driver compatibility and reliable network configuration when adopting this model. Expect a compact footprint, a straightforward menu, and a straightforward, dependable printing experience that fits a home-office workflow.
Workspace preparation and connectivity: USB vs Ethernet
For a single PC, USB is the simplest path: connect the cable, install the driver, and print a test page. For multiple devices or shared workspaces, Ethernet provides a stable network connection that lets everyone print without direct USB access. The hp m402 family supports wired networking, with Windows and macOS drivers designed to work across common operating systems. Wireless printing is not typically built into these models, so plan for either USB or Ethernet or use a small wired-to-wireless bridge if wireless is essential. Print Setup Pro recommends mapping the printer on your router’s DHCP table to simplify device discovery and avoid IP conflicts.
Unboxing and initial inspection: parts, power, and post-checks
Start by carefully removing the printer from its packaging and laying it on a clean surface. Check that the power cord, USB or Ethernet cables, toner cartridge, and user manuals are present. Inspect the front panel for any loose parts, and verify the toner cartridge is properly seated. Install the toner if needed, then power on the device and watch the initialization sequence. Taking a few minutes to confirm all cables and accessories are present saves time during final setup and reduces the chance of post-install surprises.
Installing drivers on Windows and macOS
Visit the official HP support site to download the appropriate driver package for your operating system. For Windows, run the installer, accept the license terms, and allow the program to detect or add the printer on the local network or USB connection. On macOS, use the HP driver or the built-in AirPrint option if supported, then add the printer in System Preferences > Printers & Scanners. After installation, print a test page to confirm the driver is communicating correctly. If you encounter permission prompts, run the installer with administrator rights and temporarily disable any firewall that could block the printer driver.
Network setup and printing from multiple devices
If you’re using Ethernet, assign a stable IP address or rely on DHCP with a reserved IP for ease of access. On Windows, add a network printer by browsing to the shared device or entering its IP address; on macOS, go to System Preferences > Printers & Scanners and click Add, choosing the IP tab if needed. Ensure both driver and printer language are consistent (PCL or PS) across devices. To verify, print from at least two different client machines to confirm consistent behavior.
Printer settings for efficiency: duplexing, trays, and defaults
Configure duplex printing (two-sided) to reduce paper usage, set the default media size to Letter or A4 as appropriate, and choose the default printer in each app to avoid sending jobs to the wrong device. Enable toner-saving mode for draft prints when appropriate, and fine-tune the print quality to balance speed and output. If your M402 supports multiple trays, assign the appropriate paper type and size per tray to prevent misfeeds. Regularly review energy-saving or sleep-mode settings to minimize idle power consumption.
Maintenance routines to extend life
Keep the exterior clean with a soft, lint-free cloth and avoid harsh cleaners that can damage plastics. Replace toner cartridges only when clearly low and store spares upright in a cool, dry place. Periodically check for firmware updates from HP and apply them as recommended. Establish a simple cleaning calendar that includes a print test page and quiet-time checks for unexpected noises, jams, or slow prints. These routines help prevent small issues from becoming downtime events.
Troubleshooting common issues and error codes
Start with the basics: verify power, cable connections, and that the printer is online. If the printer is offline, recheck network wiring or switch to USB temporarily to confirm hardware functionality. For frequent paper jams, inspect the paper path for obstructions and ensure the media type and weight are appropriate for the printer. If print quality is poor, replace the toner and run a calibration. Keep a small log of error codes and corresponding fixes to speed future troubleshooting.
Security and privacy considerations for networked printers
Networked printers can be entry points for malware or data leakage if not managed carefully. Keep firmware up to date, disable unused services, and restrict access to the printer’s web interface with a strong admin password. Regularly review who has printing access in shared environments and enable secure print release if your model supports it. These practices help protect sensitive documents and maintain a cleaner, safer office network.
Tools & Materials
- Power cord and outlet(Use a surge-protected outlet if possible)
- USB cable (Type-B to USB-A)(Shielded cable preferred)
- Ethernet cable(For wired network setup)
- Computer or laptop with admin rights(Windows or macOS with internet access)
- HP driver package (HP Universal Print Driver)(Download from HP support site)
- Printer toner cartridge(Ensure compatibility with the M402 family)
- Printing media (paper)(Standard Letter or A4 size)
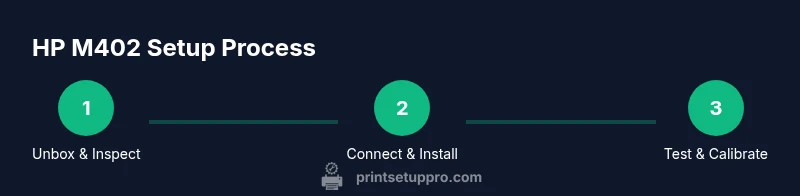
Steps
Estimated time: 60-90 minutes
- 1
Unbox and inspect the printer
Carefully remove the printer from the box and verify all components are present. Check the toner, power cord, cables, and quick start guide. Confirm there are no visible shipping damages, then set the unit on a stable surface near a power outlet and your computer.
Tip: Take photos of the box contents as you unpack to aid warranty and returns if needed. - 2
Position and power on the device
Place the printer in a well-ventilated area with accessible ports. Plug into a surge-protected outlet and press the power button to initialize. Wait for the startup sequence to complete before proceeding.
Tip: Avoid placing the printer in an overly tight space to reduce heat buildup. - 3
Connect via USB or Ethernet
Decide on your connection method. For USB, connect the cable from the printer to your computer and wait for OS detection. For Ethernet, connect to the network switch or router and ensure the printer obtains an IP address either via DHCP or a reserved address.
Tip: If you switch from USB to Ethernet, restart the printer and your computer to ensure proper detection. - 4
Install drivers on Windows
Download the HP Universal Print Driver package and run the installer. Follow prompts to add the new printer, selecting USB or Network when asked. Allow the installer to complete and print a test page.
Tip: Run the installer as administrator to avoid permission issues. - 5
Install drivers on macOS
On macOS, install the HP driver or use AirPrint if supported. Add the printer in System Preferences > Printers & Scanners, choosing the correct connection type. Print a test page to verify operation.
Tip: If necessary, restart the Mac after installation to finalize the driver integration. - 6
Configure network sharing and device discovery
Ensure the printer appears on all intended devices by confirming the shared printer settings or network discovery. Reserve an IP address if using DHCP to keep printing stable across reboots.
Tip: Document the IP address and driver type for future setup changes. - 7
Set defaults and duplex printing
Open printer preferences and enable duplex printing if available. Set the default paper size and type, and choose the most common print quality setting for your typical documents.
Tip: Save these as the default to minimize repeated configuration. - 8
Print a test page and calibration
Print a test page to check alignment, margins, and color consistency (even though this is mono, alignment is still important). Run a calibration if prompted by the printer firmware.
Tip: If the test page looks off, run a basic printer maintenance cycle from the control panel.
People Also Ask
Does the HP M402 support wireless printing?
Most HP M402 variants rely on USB or Ethernet for connectivity; built-in Wi‑Fi is not standard. To print wirelessly, connect the printer via Ethernet and print from devices on the same network, or use a wired-to-wireless bridge if needed.
The HP M402 generally uses USB or Ethernet; there’s no built‑in Wi‑Fi. You can print wirelessly by connecting the printer to your network via Ethernet and printing from other devices on that network.
How do I install drivers on Windows 10/11?
Download the HP Universal Print Driver from HP’s support site, run the installer as administrator, and add the printer when prompted. Choose USB or Network during setup and print a test page to confirm.
Download the HP driver package, run it as administrator, and add the printer as USB or network. Then print a test page to confirm it works.
How do I replace the toner cartridge?
Power off the printer, open the front cover, remove the empty cartridge, and insert a fresh cartridge firmly until it clicks. Close the cover, power on, and run a calibration if prompted.
Power off, swap the cartridge, close the cover, power on, and calibrate if asked.
What should I do if the printer shows Offline status?
Check cables and network connections, ensure the printer is on and not in sleep mode, and verify the IP address. Re-add the printer in your OS if needed or restart the router and printer.
If it’s offline, check power, cables, and IP; re-add the printer or restart devices to restore connection.
Can I duplex print with the HP M402?
Yes. Enable duplex or two-sided printing in the printer preferences and in the application’s print settings to save paper and reduce costs.
Duplex printing is available; turn it on in printer preferences and in your app’s print settings.
Should I firmware-update the HP M402?
Firmware updates improve compatibility and stability. Check HP’s support site periodically and install updates following the provided instructions.
Firmware updates help performance; check HP support and install updates as directed.
Watch Video
Quick Summary
- Connect with the proper interface first.
- Install the correct drivers for your OS.
- Enable duplex printing to save paper.
- Keep firmware up to date for stability.
- Establish a maintenance routine to prevent downtime.