Plastic Card Printer Setup, Use, and Troubleshooting
A comprehensive guide to choosing, setting up, and maintaining a plastic card printer for ID badges, membership cards, and access passes. Learn features, workflows, security considerations, and troubleshooting tips to ensure reliable, high-quality prints.

This guide will show you how to choose, set up, and troubleshoot a plastic card printer for ID badges, membership cards, and access passes. You’ll learn how to assess printer features (print speed, encoding options, card materials), connect to your computer or network, install drivers, load supplies, and perform routine maintenance to prevent jams and faded prints.
What is a plastic card printer and why you might need one
For home offices, schools, and small businesses, a plastic card printer turns digital ID designs into durable PVC cards. These devices yield ID badges, access passes, loyalty cards, and membership cards with options for magnetic stripe encoding, smart chips, and contactless technologies. The choice impacts security, speed, and long-term costs. According to Print Setup Pro, selecting a plastic card printer starts with defining card types, desired throughput, and budget. Planning upfront saves wasted purchases and ensures you can scale as requirements grow.
Key features to evaluate before you buy
When evaluating plastic card printers, consider print technology (thermal transfer vs direct thermal), color vs monochrome capabilities, print resolution (dpi), media handling (card thickness and size), feeding reliability, and encoding options (mag stripe, contactless, smart card). Look at throughput (cards per hour), standby power usage, and noise levels if you have a shared workspace. Compare ribbon types and consumable costs and whether the printer supports lamination or overlam coatings for durability. Security features like password protection and locked supply bays can be important for small businesses handling sensitive cards. Print setups may require additional modules for encoding or high-security features; ensure your chosen model supports future upgrades without major hardware changes.
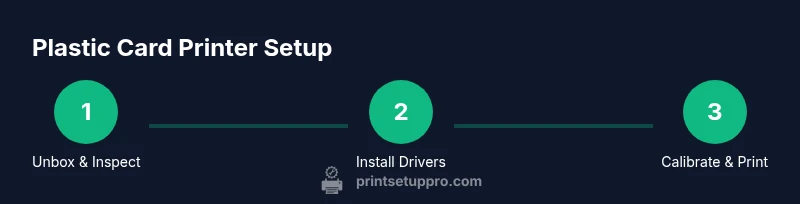
Setup basics: unboxing, drivers, and connection options
Unboxing a plastic card printer should start with a visual inspection for any shipping damage and confirmation that all listed components are present. After you connect to power, install the latest drivers from the vendor’s website and install any companion software for card design and encoding. You can connect via USB for direct printing or via Ethernet/Wi‑Fi for shared access in offices. Print Setup Pro notes that keeping firmware up to date improves reliability and security, so check for updates before first use.
Feeding cards, loading ribbons, and supplies
Load blank PVC cards into the feeder according to the manual, ensuring the card orientation matches the guide in the printer window. Install the correct ribbon or ribbon-cart combo for your print type (YMCKO for full color, monochrome for fast, cost-effective prints). Avoid touching the card surface with bare hands; use lint-free sleeves or wear clean gloves when handling sensitive stock. Keep the cleaning cards handy; routine cleaning of rollers and sensors helps prevent feed jams and color defects.
Printing workflows, color management, and troubleshooting
Develop a print workflow that matches your card design needs: batch jobs, variable data, or secure encoding. Calibrate color profiles using a standard test card and verify that color balance, sharpness, and encoding align with expectations. If you notice misalignment or color shifts, re-run calibration, re-check ribbon alignment, and inspect card stock quality. For encoding issues (mag stripe or smart card), verify that encoding modules are properly installed, the correct encoding standard is selected, and that any required driver settings are enabled.
Routine maintenance and longevity tips
Set a regular cleaning schedule including daily feeder checks and weekly sensor/roller cleaning with manufacturer-approved solutions. Keep firmware and drivers current to reduce compatibility glitches. Store ribbons and cards in a clean, cool environment away from direct sunlight. Use high-quality consumables compatible with your model to minimize waste and improve print consistency over time.
Design considerations and security best practices
When designing cards, keep legibility in mind: high-contrast text, scannable barcodes, and readable fonts. For security, enable password protection on the printer’s software interface and use stock cards with tamper-evident features if possible. Consider an access-control workflow that logs print activity and encodes serialization data in a secure database. Print setups should also include a policy for handling lost or stolen cards to minimize misuse.
Authoritative sources
- National Institute of Standards and Technology (nist.gov) guidance on secure ID card practices
- University IT security pages (edu domain) on secure credential issuance
- Government data privacy resources (gov domain) for handling personal data on ID cards
Troubleshooting quick reference for common issues
- Color banding: verify ribbon installation and color profile; reseat the ribbon cartridge and perform calibration.
- Jams or misfeeds: inspect the feeder for debris, check the card thickness compatibility, and clean rollers.
- Encoding failures: confirm encoding module is enabled in software, test with a sample card, and verify data formatting.
- Faded prints: confirm ribbon quality, check print head life, and ensure correct temperature settings.
- Card curl or curl-induced misfeeds: ensure card stock is stored flat and within recommended humidity range.
- Driver/firmware mismatch: update to the latest driver and firmware from the vendor.
Tools & Materials
- Plastic card printer(Main device; ensure model supports needed encoding options)
- Blank PVC cards (CR‑80, 30 mil)(Standard ID card size; choose thickness compatible with printer)
- Ribbon cartridge appropriate for print type(YMCKO for color; monochrome for faster, cheaper prints)
- Computer or laptop with USB/Ethernet access(For design, print, and encoding workflows)
- Printer drivers and design software(Download latest from vendor; install templates if available)
- Cleaning kit (swabs, cards, and cleaning roller)(Use monthly or as guided by manufacturer)
- Power cable and USB/Ethernet cables(Check length and compatibility with setup area)
- Anti-static wrist strap (optional)(Helpful for handling sensitive stock)
Steps
Estimated time: 30-60 minutes
- 1
Unbox and inspect
Carefully remove the printer from its packaging and verify all components listed in the manual are present. Look for any shipping damage and report it to the vendor immediately. This initial check helps prevent missing parts from delaying your first print.
Tip: Keep the packing materials until you’ve completed the setup in case you need to return components. - 2
Install drivers and software
Download the latest drivers and card-design software from the manufacturer’s site. Follow the on-screen prompts to complete installation and restart if prompted. This ensures compatibility with your operating system and access to the latest features.
Tip: Use a wired connection for initial setup to avoid wireless interference. - 3
Connect power and establish connections
Plug in the printer, turn it on, and connect via USB or network. Confirm the device appears in your OS printer list and run a quick test page to verify basic functionality.
Tip: If using network printing, assign a static IP to avoid address changes during use. - 4
Load cards and ribbon correctly
Insert blank cards into the feeder with the correct orientation indicated by the guides. Install the ribbon cartridge, ensuring smooth alignment and proper tension to prevent skew during printing.
Tip: Do not touch the card surface; oils can affect print quality. - 5
Calibrate color and encoding
Run a color and encoding calibration card to set baseline color output and verify magstripe/smart card encoding works as expected. Adjust settings if colors are off or encoding fails.
Tip: Keep calibration cards on hand for quick retries. - 6
Create a print profile for repeat jobs
In the software, create a profile for each card type or batch, including color settings, encoding, and card size. Save and name profiles clearly for easy recall in future jobs.
Tip: Document your profile names and what they contain for team consistency.
People Also Ask
What is a plastic card printer and what can it do?
A plastic card printer converts digital designs into durable PVC cards used for ID badges, access passes, and loyalty cards. It supports color printing, encoding options, and various card sizes. Maintenance and compatibility with supplies determine long-term performance.
A plastic card printer turns digital designs into durable ID cards and can include encoding options for security.
What types of cards can be used with these printers?
Most printers work with standard CR‑80 PVC cards of 30 mil thickness. Some models support different thicknesses, laminate overlays, and specialty stock for durability and security.
Most printers use standard CR‑80 PVC cards, with some models handling thicker stock for extra durability.
Do I need encoding for mag stripes or smart cards?
Encoding lets you write data to mag stripes or smart cards. If you need access control or personalization, select a printer with the appropriate encoding module and compatible driver settings.
If you need security features, choose encoding modules and ensure driver support.
What maintenance keeps print quality high?
Regular cleaning of rollers and the print head, using the manufacturer’s cleaning cards, reduces misfeeds and color defects. Keep firmware up to date to avoid software glitches.
Clean the printer regularly and keep firmware current to maintain print quality.
Why is color calibration important?
Color calibration ensures consistent output across batches. It helps you achieve predictable results, critical for branding and professional appearance.
Calibration makes colors consistent across prints, which is important for branding.
How often should I replace ribbons and cleaning cards?
Ribbons should be replaced when colors appear dull or when the print length reaches the cartridge’s rated capacity. Use cleaning cards regularly to prevent buildup and jams.
Replace ribbons as colors fade and use cleaning cards often to prevent jams.
Watch Video
Quick Summary
- Define card needs and throughput before buying
- Choose compatible ribbons and encoding options
- Keep printer firmware and drivers up to date
- Calibrate color and encoding for reliable output
- Maintain a regular cleaning schedule to prevent jams
- Create reusable print profiles for repeat jobs