Set up HP Printer Wireless: A Step-by-Step Guide
Learn how to set up HP printer wireless across Windows, macOS, and mobile devices with a practical, step-by-step guide covering Wi‑Fi setup, driver installation, and troubleshooting.

By the end of this guide you will set up HP printer wireless across your Windows, macOS, and mobile devices. You will connect the printer to your Wi‑Fi, install the correct drivers, and add it to all your recurring machines for smooth, secure wireless printing. This article uses clear, step-by-step instructions and includes troubleshooting tips, driver considerations, and cross-platform guidance to help you avoid common pitfalls.
Why wireless setup matters
In modern home offices and small workspaces, a reliable wireless connection to your HP printer is a game changer. A well-executed set up hp printer wireless reduces desk clutter, eliminates the need for USB cables, and enables printing from multiple devices at the same time. Whether you are drafting a report, submitting assignments, or delivering invoices for a small business, wireless printing makes collaboration smoother and speeds up daily tasks. A robust wireless setup also simplifies updates and maintenance because the printer can receive firmware and driver updates automatically when connected to the network. In short, wireless printing increases flexibility, saves time, and enhances security when configured with sane defaults and proper authentication. This section highlights why wireless connectivity matters and how it complements a productive, modern workspace.
If your HP printer supports 2.4 GHz Wi‑Fi, you’ll often see better range and compatibility than on the 5 GHz band. Keep your firmware current to address known issues and strengthen security. As you read on, you’ll learn the exact steps to connect to your home or small business network, add the printer to Windows, macOS, and mobile devices, and verify connectivity with a test print. The goal is simple: set up hp printer wireless so every device can print quickly and securely, without complex workarounds.
Before you start: compatibility and prerequisites
Before you begin the wireless setup, confirm that your HP printer model supports Wi‑Fi and that your network is suitable for printing. Most HP printers require a 2.4 GHz network for initial setup and stable operation; some newer models can use both 2.4 GHz and 5 GHz bands, but the initial connection often performs best on 2.4 GHz. Make sure you know your Wi‑Fi network name (SSID) and password, and that the router is broadcasting on a compatible channel. A quick firmware check on the printer (via its display or the HP app) ensures you’re not chasing known issues that have already been addressed in newer firmware. Finally, decide which setup method you’ll use (Wi‑Fi, WPS, or USB temporary connection) and whether you’ll install drivers on a single computer or on multiple devices. This foundation prevents common pitfalls and makes the rest of the steps smoother.
Note: If you’re setting up in a small business, consider creating a dedicated printer network with a simple password policy to improve security and make management easier. Print jobs can accumulate, so plan for a stable power source and a quiet setup area where you can access the printer’s control panel.
Find your HP printer on your network
The first practical step is locating the printer on the network so you can connect to it from your devices. Start with the printer’s control panel: navigate to the Wireless or Network settings, then choose Wireless Setup Wizard or the equivalent option. The printer will search for available networks; select your SSID from the list and enter the network password. If your printer supports WPS (Wi‑Fi Protected Setup), you can press the WPS button on your router and then on the printer for a streamlined connection—this bypasses typing a password but requires a WPS-compatible router.
On many models, you can also connect initially via USB to bring the printer online and configure its wireless settings through the HP desktop software or the built‑in web interface. If you are using a laptop, ensure the device is connected to the same Wi‑Fi network that you plan to connect the printer to. Once the printer is connected, print a network configuration page from the printer’s menu to confirm the correct IP address and connection status. A correctly linked printer will appear in your device’s printer list and be ready for driver installation and addition to devices.
Install or update HP printer drivers
Driver installation is essential for access to all features like double-sided printing, scan-to-email, and mobile printing. On Windows, run the HP software installer (HP Smart or HP DeskJet/Envy/Aero options depending on your model) and follow the prompts to select your printer. On macOS, you can add the printer in System Preferences > Printers & Scanners; macOS often provides a built-in driver, but you may still benefit from installing HP’s optional software for full functionality. For mobile devices, download the HP Smart app from the App Store or Google Play; the app often handles discovery and setup without manual driver selection.
If you prefer not to install separate drivers, many HP printers support universal or built‑in printing capabilities (like AirPrint for iOS or Google Cloud Print in older setups). After installing the drivers, print a test page from each device to verify you can reach the printer through the proper channel. Keeping drivers up to date minimizes compatibility issues and security risks.
Connect the printer to the Wi-Fi network
With the printer discovered and drivers installed, the next step is linking the printer to your wireless network. From the printer’s control panel, select the network or Wi‑Fi settings and choose your home or office network. Enter the network password carefully—case‑sensitive and if possible, copy/paste from a password manager to avoid typos. If your printer supports a direct WPS setup, you can press the WPS button on the router and on the printer to create a quick connection. After connecting, print a network configuration page or check the display for status to confirm success. If your network uses a captive portal (common in guest networks), you may need to temporarily connect a computer to the same network to complete the portal authentication.
For best results, place the printer within line of sight of the router and avoid physical barriers that block signals, such as thick walls or metal furniture. Once connected, you can proceed to add the printer to your other devices. Many models provide a cloud or remote printing option that you can enable if you regularly print from outside your local network, but this is optional for basic setups.
Tip: If you’re transferring settings from an old printer, note the new printer’s IP address after setup; you may need it for manual configuration on some devices.
Add the printer to your devices (Windows, macOS, mobile)
Adding the printer to Windows and macOS enables you to print from applications without selecting the printer each time. On Windows, go to Settings > Devices > Printers & scanners, click Add a printer or scanner, and choose the HP printer from the list. If prompted, select
or
and allow Windows to download the latest driver from Windows Update or HP’s site. On macOS, open System Preferences > Printers & Scanners, click the plus (+) button, and select the HP printer. macOS may automatically configure AirPrint or HP’s driver; choose the recommended option.
For mobile devices, you can print using the HP Smart app or the built‑in print service on iOS and Android. Open a document or photo, tap Share or Print, and select the HP printer. Ensure your mobile device’s Wi‑Fi is connected to the same network as the printer. This step makes daily printing effortless across all your devices.
Test print and troubleshoot common issues
Perform a test print from each device to confirm that the printer is functioning across platforms. If the test page fails, check the printer’s display for error indicators such as “Paper out,” “Low ink,” or “Offline.” Common issues include incorrect IP addresses, misconfigured firewall rules, or a misselected default printer. Restarting the printer and router can resolve most transient connectivity problems. Reconnecting the printer to Wi‑Fi and re-adding it to each device often fixes stubborn issues.
If the printer shows as offline on Windows, verify that the printer is set as the default and that the service is online. On macOS, remove and re‑add the printer if it shows a warning icon. On mobile, ensure the HP Smart app is updated to the latest version. When troubleshooting, keep a small checklist handy: confirm network name and password, confirm the IP address, update firmware, and verify both the printer and the router are on stable power and network conditions.
Secure your wireless printer: privacy and access control
Security should be part of the setup from the start. Use a strong password for your Wi‑Fi network and enable printer access controls when available. Disable unnecessary features like universal print sharing from public networks if your printer supports it, and consider enabling a user authentication method for sensitive print jobs. Regularly check for firmware updates, as HP releases patches that improve security and fix vulnerabilities.
If you share the printer in a small office, create separate user profiles or use host-based authentication to limit who can print. Finally, keep the printer firmware up to date and review the network’s security settings periodically. A well‑secured wireless printer reduces the risk of data leakage and unauthorized print jobs.
Best practices for long-term reliability
To keep the HP printer wireless setup reliable over time, keep firmware up to date, use a stable power source, and maintain the network’s health. Schedule periodic checks: verify the printer appears online on all devices, reprint a test page monthly, and monitor ink/tone levels to prevent interruptions during important tasks. Consider setting a fixed IP address for the printer to avoid IP changes that disrupt device discovery, and reserve the printer’s MAC address in your router for easier management. Finally, document your setup steps so future users or new devices can be added quickly without starting from scratch.
Tools & Materials
- HP wireless-capable printer(Confirm model supports 802.11n/b/g and wireless setup via control panel)
- Stable Wi-Fi network (2.4 GHz preferred)(Ensure network has adequate signal strength in printer’s location)
- Network name (SSID) and password(Have the exact credentials handy to copy/paste)
- PC, Mac, or mobile device for setup(Use the HP Smart app on mobile if you prefer)
- USB cable (optional, for initial configuration)(Useful if you want to enable setup via USB first)
- Printer user manual or quick‑start guide(Helpful for model-specific steps)
Steps
Estimated time: 25-45 minutes
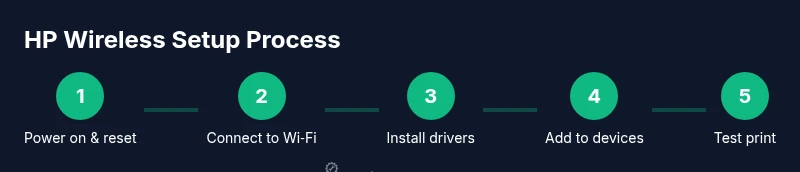
- 1
Power on and reset network settings
Turn on the printer and navigate to the Network or Wireless settings. If the printer has previously connected to a different network, reset the wireless settings to default to avoid conflicts. This clears stale credentials and gives you a clean slate for the new setup.
Tip: If you see a connection error, temporarily disable VPNs on your computer to avoid routing issues. - 2
Choose a setup method
Decide between Wireless Setup Wizard, WPS, or USB-based configuration. The Wireless Setup Wizard is universally compatible; WPS is faster but depends on router support. USB setup is useful if the printer cannot reach the network initially.
Tip: WPS is convenient, but may be less secure on some routers—use it only if you trust the network. - 3
Connect to your Wi‑Fi network
Select your network name from the printer’s list and enter the password exactly as shown. If prompted, choose 2.4 GHz over 5 GHz for the best compatibility with older printers. Confirm the connection and print a network test page to verify.
Tip: Copy/paste the password from a trusted source to avoid typos; capitalize letters correctly. - 4
Install printer drivers or apps
Run the HP Smart app or the appropriate driver installer for Windows or macOS. Follow on-screen prompts to complete installation and select your printer when prompted. If you don’t install drivers, OS printing may still work via AirPrint or similar built-in services.
Tip: Use the latest driver version from HP’s official site or the app store for best compatibility. - 5
Add the printer to Windows
Open Settings > Devices > Printers & scanners and click Add a printer. Choose your HP printer from the list and finish the setup. If the printer doesn’t appear, restart the computer and run the Add a printer wizard again.
Tip: Set your HP printer as the default printer to streamline daily printing tasks. - 6
Add the printer to macOS
Go to System Preferences > Printers & Scanners, click the + button, and select the HP printer. macOS will often install the correct driver automatically; you can also choose HP from the list if you want advanced features.
Tip: Verify AirPrint is enabled if you plan to print from iOS devices without extra software. - 7
Add the printer to mobile devices
Install the HP Smart app on iOS or Android and follow the setup prompts to add the printer. The app makes discovering and printing to the printer quick and straightforward from mobile. You can also print directly from many apps via the share/print option.
Tip: Keep the app updated to access new features and fixes. - 8
Test a print and adjust settings
Print a test page from at least two devices to confirm correct wiring and driver behavior. If the output looks off, adjust margins, scaling, or color settings in the print dialog. If issues persist, check for firmware updates and verify a stable network connection.
Tip: Document any unique steps you used for future reference. - 9
Document and safeguard the setup
Record the printer’s IP address, default queue, and any special settings in a short setup note. Review security settings on the printer and your router to prevent unauthorized access. Regularly check for firmware updates to keep the system secure.
Tip: Store the note in a known location so new users can reproduce the setup later.
People Also Ask
What is the first step to set up HP printer wireless?
Power on the printer and access the wireless setup menu to choose your network. If needed, reset the printer’s network settings to ensure a clean start.
Power on the printer and open the wireless setup menu to connect to your network. If needed, reset the printer’s network settings first.
Can I set up HP wireless printing without an internet connection?
Yes, you can print over your local network even without internet access. Some features, like cloud printing or remote printing, require internet access.
Yes. You can print over your local network without internet, though features like cloud printing require connectivity.
Why can't the printer be discovered by my computer?
Ensure all devices are on the same network and the printer is online. Check firewall settings and re-add the printer if it’s hiding.
Make sure everything’s on the same network and the printer is online. Check firewalls and try re-adding the printer.
Is wireless printing secure on HP printers?
Yes, enable strong Wi‑Fi security, use network authentication if available, and keep firmware updated. Limit access for sensitive documents when possible.
Yes. Use strong Wi‑Fi security, enable authentication if available, and keep firmware current.
Which devices can print wirelessly from an HP printer?
Windows, macOS, iOS, and Android devices can print wirelessly. Use the HP Smart app or native OS print functionality depending on the device.
Windows, macOS, iOS, and Android can print wirelessly using the HP app or built‑in print features.
Do I need to install HP software on every device?
Installing the driver on each device ensures full features. You can also rely on built-in print services like AirPrint or HP’s universal driver where supported.
Yes, install the driver on each device for full features, or use built‑in print services when available.
Watch Video
Quick Summary
- Connect to a stable 2.4 GHz network for initial setup
- Install appropriate drivers on every device
- Add the printer to Windows, macOS, and mobile
- Run a test print from each device to confirm success
- Secure the printer and network to protect data